
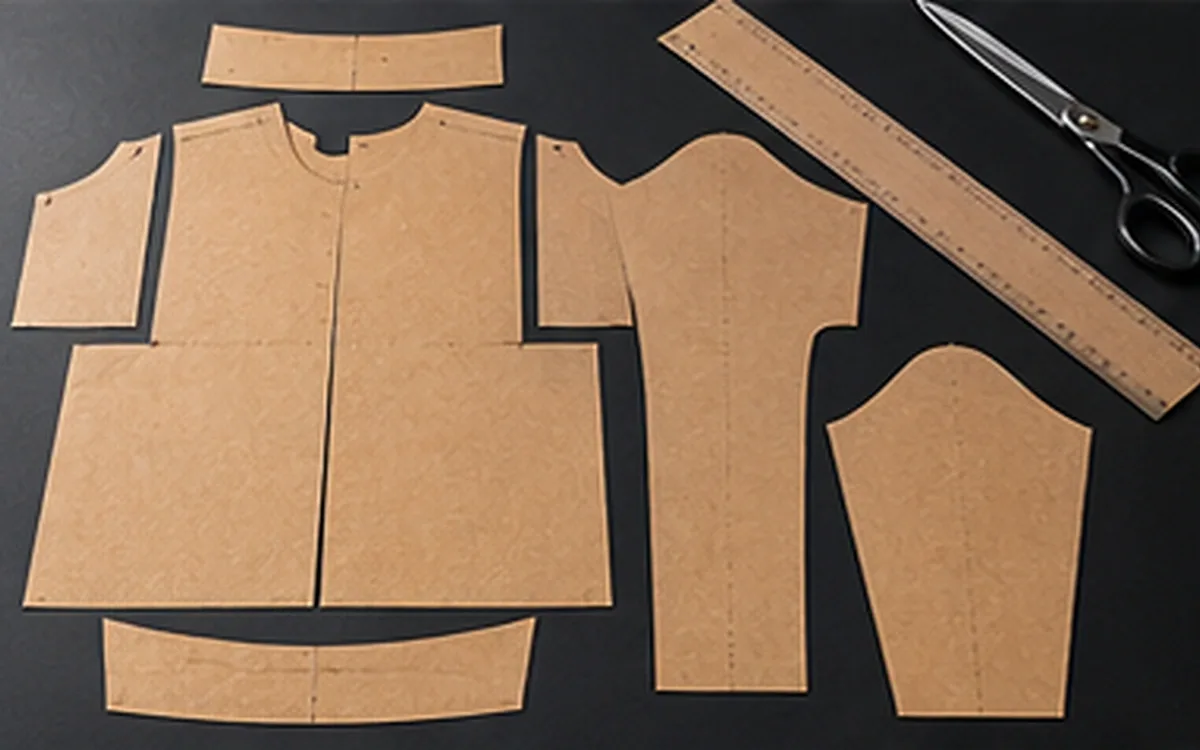
Two pattern pieces can have the same outline but serve different purposes. One may be a trusted starting shape for development. The other may be a cutting piece with seam allowances, material details and an approved size. Looking at the outline alone will not tell the maker which one is ready to use.
Blocks, working patterns and production patterns are three common types of garment patterns. Their names help describe stages of development. Yet factories and training systems do not always use them in the same way. Ask what a pattern contains and what it has been checked for before relying on its label.
This guide follows a simple top from its base shape to a production set. A worked chest example separates ease from seam allowance. It shows why mixing the two changes the finished garment.
Classify the pattern by the job it does
A garment pattern describes the flat pieces used to form a garment. It includes shape and the information needed to use that shape. The pattern may exist on paper or as digital data. Both forms still need fit and construction checks.
Three functional stages help explain the work:
Pattern stage | Main purpose | Question to answer before use |
|---|---|---|
Block or sloper | Provide a known base for a body shape, size and product context | What fit, ease and allowance conventions does this base contain? |
Working or development pattern | Turn that base or another starting shape into the proposed style | Which design and fit decisions are still being tested? |
Production pattern | Supply the checked pieces needed for a defined production use | Does the complete set match the approved garment, materials and sizes? |
The table gives a practical way to group patterns. Companies may use other names. Some teams call a nearly complete style pattern a working pattern. Others use “master pattern” for a controlled original or for a base. The contents and permitted use must settle the meaning.
Keep two other questions separate. How was the pattern made: by drafting, draping or changing an existing pattern? In what form is it held: paper or digital? A draped shape can become a digital production pattern. A paper pattern can be fully ready for production. Stage, method and medium describe different aspects of the same item.
A block holds a useful starting shape
A block provides a base that the pattern maker can return to when developing related styles. Its value lies in what is known about it: the intended body measurements, balance, shaping and fit. A clean outline with no record of those assumptions is a weak starting point.
“Basic” does not mean that the block has no shape. A bodice block may contain darts or other shaping needed to relate flat material to the body. It usually has fewer style features than the final garment. Simply removing a pocket or collar, though, does not make a pattern a suitable block.
Do not assume that every block has zero ease. Some are close-fitting bases; others reflect a particular product and fit approach. Seam-allowance conventions also vary. Check the record or measure the defined lines before adding allowances to an unfamiliar block.
A useful block record identifies the body or size it represents. It gives the measurement points and intended material group. It should explain whether the edges are seam lines or cutting lines. Link the record to the fitting evidence that supports its use. Another pattern maker can then assess its limits without guessing how it was created.
The Fashion Institute of Technology's course catalog describes patternmaking skills. Basic slopers relate to measurements, fit and balance. Later work covers style patterns, samples, grading and production. That sequence explains why a base is a technical resource, not simply an outline to copy.
A block proven for one material does not automatically suit every other fabric. A firm woven and a soft stretch fabric can require different fit decisions. The old block can still inform development, but its previous success is evidence for its original context.
The working pattern explores the style
The working pattern brings the design into a form that can be made and tested. The maker may change length, move shaping, add fullness, develop an opening or create a collar. These choices need to work together, since a garment is an assembly of related pieces.
For a sleeveless top, a style change might lower the neckline and change the shoulder width. The front and back are not the only pieces affected. A neckline facing must follow the revised edge, and the armhole finish must suit the new shape. A correct front piece paired with an old facing still produces a faulty set.
New Mexico State University's pattern-alteration guide describes changes to shape. It also stresses checking related pieces. Its examples concern women's clothing. The broader lesson is useful: a change in one place can create work elsewhere in the set. The guide's specific fit values are not universal factory rules.
At this stage, several versions may be useful. One neckline may be tested for appearance while another is kept as a comparison. Mark their purpose so a trial option does not enter the next sample by accident. Keep the reusable block separate from these style experiments.
The working pattern also makes questions visible. Does the opening allow the garment to be put on? Does the hem turn cleanly? Can the pocket be attached in the intended sequence? The maker should resolve these questions through technical checks and samples, not hide them under a “final” filename.
An Australian training unit covers developing patterns using basic principles. It connects the design and fabric with the pattern's shape and prototype review. This is a training framework, not a global production law. Its sequence supports a practical point. The team must compare the garment with the intended design, then use the findings to improve the pattern.
Work from the finished dimension to the cutting line
Consider a fictional sleeveless woven top. At one defined chest line, the body circumference is 96 cm. The design team chooses 8 cm of total positive ease for this example. The desired finished circumference is therefore:
Finished chest = body chest + total ease.
Finished chest = 96 cm + 8 cm = 104 cm.
The 8 cm is an assumed design choice, not a recommended allowance for every top. Fit also depends on shape, movement, material and the other parts of the garment. Passing this one calculation cannot prove that the top fits.
To make the geometry easy to follow, assume equal front and back widths at the chest line. Each full panel must measure 52 cm between its side seam lines. Each half pattern, placed on a centre fold, therefore measures 26 cm from that fold to the side seam line.
At this measurement line, the example has no front opening or chest dart. No other shaping changes the calculation there. The actual neck opening and its finish would still need a separate design and fit check. Real garments do not always divide their front and back widths equally.
Now choose a 1 cm seam allowance at each side edge. Each half pattern needs that allowance on its side edge only:
Half-pattern cutting width = 26 cm + 1 cm = 27 cm.
There is no seam allowance at the centre fold because that edge is not being cut and joined as a seam. Adding another centimetre there would change the geometry and the finished width.
Unfolding each cut panel gives a width of 54 cm. The two cut panels together contain 108 cm of width at this line. Sewing the two side seams takes up four edge allowances of 1 cm:
Finished circumference = 54 cm + 54 cm − 4 × 1 cm = 104 cm.
There are two side seams, but each joins two cut edges. This is why the total deduction is 4 cm, not 2 cm. The calculation uses the stated seam-line geometry. It does not predict every small change that handling, sewing or finishing may cause.
Dimension in the example | Value | What it describes |
|---|---|---|
Body chest circumference | 96 cm | The chosen body basis |
Finished garment circumference | 104 cm | Body plus the chosen total ease |
Half-pattern width to side seam line | 26 cm | One quarter of the finished circumference |
Half-pattern width to side cutting edge | 27 cm | Seam-line width plus one side allowance |
Sum of the two full cut-panel widths | 108 cm | Material width before the side seams are formed |
Suppose someone treats 27 cm as the seam-line width, then adds another allowance. The pattern becomes too wide. Cutting at 26 cm causes the opposite error if the maker assumes an allowance is already present. The sewn result becomes too small. Both errors can occur even when every person uses the same size label.
The check must name the line being measured. “Chest width 27 cm” is incomplete on its own. State which piece and line the value describes. Say whether it includes an allowance.
Keep ease, allowances and process changes distinct
Ease describes the relationship between the body and the garment's intended fit. Utah State University's sewing guidance describes two purposes. Wearing ease provides room for wear and movement. Design ease adds fullness for the chosen style. The source's skirt example does not establish the 8 cm used in this top.
Seam allowance serves another purpose. It provides material beyond the seam line so the pieces can be joined in the chosen way. Adding a seam allowance should not silently add to the intended finished chest. The example above keeps that difference visible.
A hem allowance also belongs to construction. Its width must suit the planned folds and finish. It is not extra garment length unless the pattern's length definition says so. Check the finished hem line separately from the raw cutting edge.
Process compensation addresses changes expected during making or finishing. It may be needed after trials show how the material behaves. Record it clearly instead of hiding it inside a general ease value. Otherwise, another department may add it again because the first allowance is hard to find.
ApparelDiary's fabric shrinkage testing and pattern allowance guide explains that separate problem. Use the relevant tested material and process when making the decision. An allowance copied from a different fabric does not establish the final size of the current garment.
For an unfamiliar pattern, first ask what size is intended after making. Locate the seam lines. Then check which changes the maker has already allowed for. Clear answers prevent one correction from being applied twice.
A production pattern must describe the complete garment
A working pattern does not become a production pattern merely by gaining seam allowances. The set must contain the pieces needed for the agreed garment and explain their use. If the garment needs facings or linings, include the correct pieces. The fitted shell alone is incomplete.
Check the piece list against the construction. For each piece, identify its material, size, quantity per garment and any need for left and right versions. A pair of sleeves is not two identical sleeves if the design requires opposite hands. A one-way print or surface can make the permitted orientation more restrictive.
The pattern also needs usable grain directions, joining references and placement details. These marks should match the agreed construction. An old notch can mislead the operator even when the new outline is correct. Check the marks as carefully as the shape they help to assemble.
Review seam allowances where pieces meet. Some seams have an intentional ease difference. For those seams, making both edge lengths equal can remove a needed feature. Compare the defined seam lines, joining points and intended ease. Account for hems, folds and shaping in the way the pieces will actually be assembled.
Check corners in their folded or sewn state. A cutting outline that looks smooth when flat can leave a shortage after a hem turns. The needed shape depends on the construction, so a generic allowance offset does not settle every corner.
The approved sample helps confirm the pattern, but the link must be real. If the sample was altered during fitting, record which changes reached the pattern. Otherwise, the sample and the production data can describe two different garments.
Keep the approval scope precise. A check of one base size in one fabric covers a limited case. It does not prove that every graded size and material option has passed. State which version, size range, material and process the evidence covers. Outstanding checks should remain visible to the person preparing the next use.
Drafting, flat development and draping are methods
Drafting creates a pattern through measured construction and a chosen drafting system. It turns body or garment requirements into lines and shapes. The drawing still needs fit and construction checks. Accurate work with a ruler does not guarantee a good garment.
Flat development changes an existing pattern to produce another shape or style. The starting pattern may be a block, a proven style or another suitable base. Its value depends on whether the maker understands what is already included and what the new design changes.
Draping develops shape with fabric on a form or body. The fabric is positioned and adjusted to explore volume, balance and design. The useful lines then have to be translated into flat pattern pieces that can be checked and reproduced.
The Australian unit Drape fabrics to make patterns starts with form and fabric preparation. It then covers shape development, pattern checks and marks. A promising shape on the form still needs this work before its flat pattern is usable. The unit's own assessment scope is narrower than all possible draping work.
A toile is a trial garment or fabric model used to examine the design and fit. It is not the name of the dress form itself. Choose trial material with care. A stiff substitute may help reveal shape, but the intended soft fabric may fall quite differently.
These methods can be combined. A maker may draft a base, drape a feature and refine the result through flat pattern work. There is no need to declare one method universally fastest or most accurate. The design, material, available base and skills determine which approach is useful.
Grading creates a size range, not a bigger photocopy
Once a base size is settled, grading develops the required sizes according to the agreed size system. It changes selected dimensions and relationships. It should not be confused with adding seam allowance or increasing every dimension by one percentage.
Return to the fictional chest example. Suppose the next body size is 100 cm, and the design retains 8 cm of total ease. The next finished chest is 108 cm. That is an increase of 4 cm around the garment, not 4 cm on each half pattern.
Under the same equal-quarter assumption, the seam-line width changes from 26 cm to 27 cm. The cutting width with the same 1 cm side allowance changes from 27 cm to 28 cm. Those changes apply only to the defined chest line in this simplified example.
They do not tell the maker how much to change the neckline, shoulder length or armhole depth. Those points need the relevant size rules and fit decisions. A whole-pattern scale increase would also enlarge features that may need a different change or no change.
Lectra's Gerber AccuMark documentation describes grade rules. Each can contain X and Y movements for pattern points. This gives a digital example of grading through defined movements. The software can apply the recorded rule; it cannot make an unsuitable rule correct.
Review the graded pieces as sets. A change to an armhole must be assessed with the sleeve intended for that size. Check the selected size samples and the other evidence required for the range. Use those findings to decide whether approval can extend beyond the base size.
Use material behaviour when judging readiness
The pattern carries decisions about shape. The material determines how that shape behaves in use. Fabric may stretch during sewing, respond to pressing or fall differently on the body. A pattern that looks correct on a screen can therefore give a poor result.
This is why the intended material should enter development before the team declares the pattern ready. The sample should answer the relevant questions about fit and assembly. A trial in a substitute fabric can still be useful, but its evidence must be limited to the features it can represent.
New Mexico State University's fit-checking guide compares body measurements plus ease with the pattern. It notes that ease varies with the design. Use that comparison as one check. Also examine balance, movement and where the room sits. Equal chest totals can conceal very different front and back shapes.
For example, two tops may both measure 104 cm around the chest. One can still pull across the upper back if the room is placed where the wearer does not need it. The total tells the team that the arithmetic agrees, not that the whole fit problem has been solved.
If the fabric changes after approval, assess the effect before reusing the pattern unchanged. The question is not whether the material has the same commercial name. It is whether the new material preserves the behaviour on which the pattern decision depended.
Count templates and cut pieces separately
A pattern set can contain fewer distinct shapes than the number of pieces needed for one garment. The quantity written against each shape matters as much as the outline.
Take a fictional waist apron with one body, two identical patch pockets and two identical waist ties. Assume that its approved construction uses these three full-size templates:
Template | Cut quantity per apron | Use |
|---|---|---|
Apron body | 1 | Main garment shape |
Patch pocket | 2 | Two matching pockets |
Waist tie | 2 | One tie at each side |
Three templates produce five cut pieces for one apron. For 100 aprons, the piece list calls for 100 bodies, 200 pockets and 200 ties, or 500 pieces in total. This is a component-count check, not a fabric-consumption estimate. The layout, material width and other factors still determine the fabric needed.
Now suppose the design needs two different pocket shapes. One pocket template marked “cut two” no longer describes the garment. The set needs separate identities and quantities for the new shapes. Keeping the old total of five cut pieces would not reveal that error.
The example also assumes identical ties. Where parts need opposite hands, the cutting instruction must preserve that relationship. Do not rely on the operator to infer it from a small sketch. Before assembly, the team should be able to check the cut-piece set against the intended garment. The production pattern must provide enough detail for that check.
Choose the right pattern for the next task
For a new style, select a base with a known and relevant fit history. Copy it for development and retain the original. Document why it suits the intended garment, including any limits that the first sample must test.
For a fit trial, use the working set that answers the current design question. A trial can be deliberately incomplete in some areas, but the sample request should state those limits. Otherwise, a reviewer may judge an unfinished detail as though it were the proposed final construction.
For production preparation, use the complete approved set and its supporting records. Check that the pattern, measurement sheet and construction details describe the same result. ApparelDiary's PLM guide explains how to connect those product records.
A block, a working pattern and a production pattern are useful because they support different decisions. The safest choice comes from understanding the pattern's measurements, assumptions and evidence. Once those are clear, the name on the folder becomes a helpful label rather than a substitute for a technical check.
References
Fashion Institute of Technology: Patternmaking course descriptions.
Australian training unit MSTAT3002: Develop patterns using basic patternmaking principles.
Utah State University Extension: Wearing ease and design ease in a skirt project.
Australian training unit MSTAT4011: Drape fabrics to make patterns.
New Mexico State University: Check your pattern for proper fit.



Discussion0
Loading the discussion…