
Choose how the design will be built
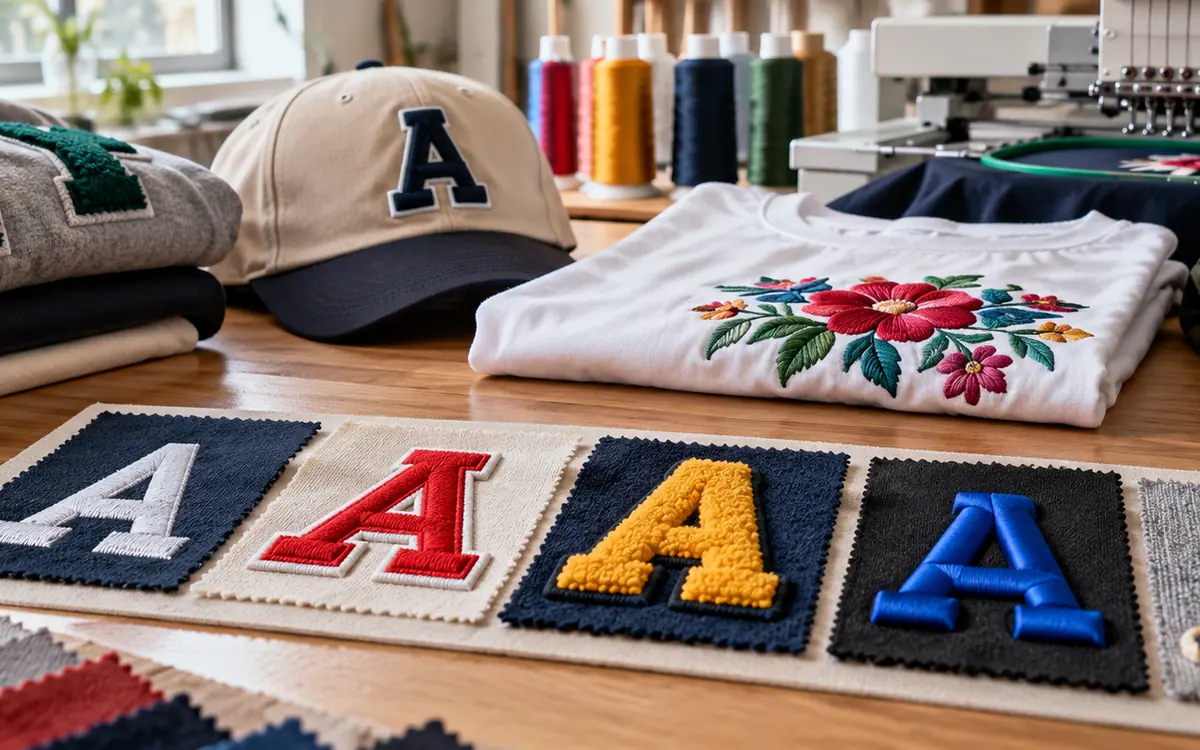
Embroidery methods build the design on the garment in different ways. Some use stitched lines and filled areas. Others attach fabric pieces, form loops or cover a raised insert.
The choice affects texture, detail and flexibility. It also changes garment access and care needs. A method may look right on a stable jacket panel. It may not suit a light stretch top.
Start with the design’s most important features. Find the smallest lettering and broadest filled area. Note any required height or texture. Then relate those features to the garment.
Label the reference image with the intended method, if known. “Raised logo” might mean foam embroidery or layered stitching. It could also mean chenille or an attached badge. Those options need different materials and production steps.
Use a physical sample to settle the construction. A screen image cannot show the back or stiffness. It cannot show how the decorated area moves when worn.
Choose a method that keeps the key design features and suits the product’s use.
Separate stitch type, effect and attachment route
Three decisions are often mixed together.
A stitch type describes how thread forms the design. An effect describes the final look or texture. The attachment route states where the decoration is made. It may be worked on the garment or made separately and attached.
Decision | Examples | What it controls |
|---|---|---|
Stitch construction | Running, satin, fill, loop or chain | How thread forms lines and areas |
Added material or effect | Appliqué fabric, foam, cord or sequins | Surface character and added structure |
Production route | Direct embroidery or attached decoration | Access, sequencing and attachment needs |
A chenille letter can be made on a separate base and then attached. An appliqué can combine fabric with flat embroidered outlines. A single design can use more than one method.
A specification that says only “embroidery” is not enough. Name the required structures. Show where each one begins and ends on the artwork.
This also helps suppliers quote for the same construction.
Use flat embroidery for lines and filled shapes
Flat machine embroidery commonly combines running stitches, satin columns and filled areas. Each serves a different role.
Wilcom’s documentation sets out the uses of running lines, satin and tatami-style fills. Satin suits narrow columns; tatami-style fills suit larger shapes. These are useful choices. A successful design still needs trials.
A fine outline may need a line treatment. A broad letter stroke may suit satin. A large irregular shape may need a fill with controlled stitch direction.
The digitiser should adapt the artwork to the actual size and material. Turning every dark pixel into stitches can make the result heavy or unclear.
Choose flat embroidery if its stitches provide enough depth. It then avoids added inserts or surface materials. Inspect the stitch texture under the intended lighting. Thread direction can make areas next to each other appear to have different shine.
For a large chest design, also assess the decorated panel’s flexibility. A design can look clear and still feel too stiff on the body.
Choose appliqué when the fabric should form the area
Appliqué uses an added fabric shape to build part of the design. Stitches secure and often finish its edge.
Wilcom describes tack stitching as a way to hold the appliqué shape before cover stitching. Its guidance also covers machine stops for trimming. Appliqué therefore needs a planned sequence as well as an outline file.
Specify the appliqué fabric and which way its face should point. State how to finish its edge. A raw edge, a covered edge and a folded edge are different products.
Decide how the pieces will be cut and placed. Pre-cut shapes need the right size and shape, with clear labels. Pieces trimmed during production need access and a defined trim line.
Appliqué can avoid filling a broad area with thread. It adds cutting, placement and material-control tasks. It is not always the fastest or cheapest route.
Assess the fabric after the garment’s intended care. The applied piece and base may shrink or change in different ways. This can alter the finished shape.
Distinguish chenille from a thick flat fill
Chenille embroidery uses its stitch structure to make a raised, textured surface. Do not specify it as flat embroidery with heavier thread.
Tajima’s TCMX description describes loop and chain stitches. It shows specialist machines and machines that combine methods. Check these details when asking what a supplier can produce.
Ask which structure forms the main area and which secures edges or details. Inspect loop height, coverage, texture and the reverse side.
Chenille can suit bold shapes where a soft surface is part of the design. Very small lettering or tight gaps may need another structure alongside it.
State whether to make the decoration on the garment or on a separate base. The choice affects handling, edge appearance and the final attachment.
A photograph of a plush letter cannot specify all the details. Name the yarn, loop structure and attachment method. Keep an approved physical sample and material identity.
Also assess how the raised surface behaves under wear and care. A soft feel at the start does not prove how the surface will look after use.
Use foam relief only where the design supports it
Foam embroidery places a suitable foam beneath stitches to create height. Design the artwork and stitch plan for that construction.
Madeira’s 3D foam guidance favours designs built mainly from satin columns. It explains that broad fill areas do not produce the same result. Its settings are examples for specific products. They do not apply to every foam and garment.
Choose the foam type, thickness and colour to suit the thread and base material. Inspect edges and ends for exposed foam.
Do not assume a standard flat file can be used without changes. The digitiser must plan coverage and the ends of shapes. Transitions between flat and raised areas need care too.
Check the raised design after folding, packing and care. A cap front and a soft jersey chest place different demands on the design.
Use foam relief when height matters and the shape allows clean coverage. The artwork may depend on tiny gaps or thin curves. Another method may keep these details clearer.
Consider couching when the surface material carries the line
Couching holds a surface thread or cord in place with another thread. The Royal School of Needlework’s Stitch Bank explains this construction for materials that are thick, textured or fragile.
In this method, the decorative material stays mostly on the surface. The securing stitches do a separate job.
Specify both materials. Record the cord or decorative yarn and the securing thread. State how visible the securing stitches should be.
Ask the supplier how it will form curves, corners and ends. A cord that works in a broad curve may not form a small sharp letter neatly.
Check attachment and snagging at the intended location. A raised line near a bag strap or cuff can face extra wear. One on a protected panel may face less.
Machine and hand couching can share the same visual idea. Their structure and production can still differ. Approve the actual route. Call an effect hand embroidery only if it is made by hand.
Treat sequins and mixed materials as component choices
Sequins, beads and similar additions extend the design beyond thread. Each has its own material and attachment needs.
Tajima lists sequin and cording options within its specialist embroidery range. Check that the equipment can handle the exact component. Size, shape and attachment route all matter. See the manufacturer’s configuration guidance.
Specify component identity and colour. A reflective surface can look different when its finish changes or it faces another way.
Assess edges, attachment, wearer contact and care. Children’s products and other regulated uses need a review of the rules for that product. An adult fashion approval does not cover them.
Include the garment’s final press and finishing stages in the trial. A component that survives stitching may be affected later.
Set a clear layer order for mixed-media designs. Show which stitches sit below or above the added material and where the construction changes.
A sample should use the specified component. Use a substitute only when that substitution is what the trial is testing.
Match the method to the garment’s movement
A garment panel may stretch, bend or drape during wear. The decoration should fit that movement.
Identify the direction and location of movement. A large motif across a fitted chest has a different role from a small motif on a loose sleeve.
Use a garment or panel that represents production to assess the decorated zone. The fabric’s stretch and thread properties alone cannot show how the assembled decoration will behave.
Take a hypothetical panel segment. It must extend from 100 mm to 125 mm during the intended fit movement. Its required extension is:
(125 − 100) ÷ 100 × 100 = 25%
Suppose the decorated segment reaches only 112 mm in the same defined assessment. It falls 13 mm short of that movement. This is a design warning, not a universal test method or limit.
The team could reduce the decorated area or change its position. It could open the design or choose another method. Test the chosen response on the garment.
Do not solve every movement problem by adding more backing. That may increase local stiffness.
Review detail at the smallest intended size
Embroidery uses real thread, needle holes and material edges. Those features do not shrink perfectly with a digital image.
Take a hypothetical logo that is 90 mm wide. A second size is 60 mm wide, giving a scale factor of:
60 ÷ 90 = 0.667
A 3 mm feature in the large artwork becomes 2 mm if scaled directly. A 1.5 mm internal gap becomes 1 mm.
Those calculations describe artwork geometry. They do not prove the smaller features can be stitched cleanly.
Ask the digitiser to review the small version separately. Some details may need wider gaps, simpler shapes or a different stitch structure.
Madeira’s polyester thread range includes finer threads intended for small details. A finer thread may help. It still needs a needle and file that suit it. Run a trial on the intended material.
Approve the smallest size first if its details pose the greatest risk. Do not rely on a large sample to prove that all sizes will work.
Decide between direct work and an attached decoration
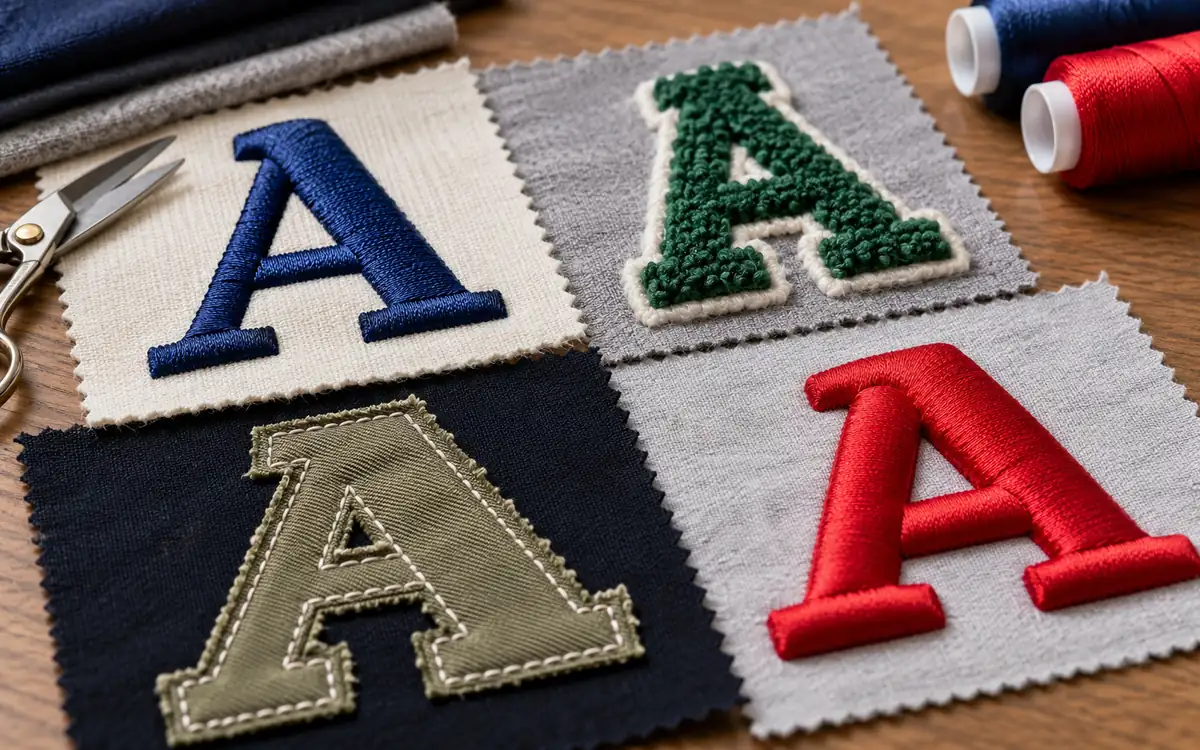
Direct embroidery places the construction on the garment panel itself. Making the decoration separately adds a base and an attachment step.
Direct work can avoid a visible badge edge. Limited access to the garment may restrict placement. A closed sleeve, pocket or lined area may need a different production sequence.
A separate decoration lets the supplier work on a suitable base under controlled conditions. It also adds edge, bulk and attachment questions.
Compare the reverse side. Direct embroidery may place thread and backing against the wearer. A separate piece may create a thicker edge or another layer.
Decide when the decoration enters garment assembly. Sewing through a lining by mistake can change comfort and appearance. A poorly planned route may add embroidery after pocket assembly. The stitches could then close the pocket.
Use ApparelDiary’s garment construction and seam selection guide when coordinating the decoration with assembly. The embroidery method should fit the construction sequence.
Check care at the assembled decoration level
Thread performance is one part of choosing suitable care. The complete decoration may also contain foam, appliqué fabric and cord. Backing and an attachment adhesive may add further care needs.
Madeira lists polyester embroidery threads for demanding care, including some chlorine exposure. Check the specified thread’s guidance. This does not mean every decorated garment can be bleached. See its product guidance.
Test the complete assembly through the proposed care route. Check for colour transfer, surface change and lifted edges. Review shrinkage, exposed inserts and attachment condition too.
A shell fabric and thread can both pass while an appliqué piece shrinks differently. A decoration may stay attached but become stiff or lose its shape.
Keep the assessment tied to the actual care claim. Do not use a mild development wash to support a harsher final instruction.
Record the material identities used in the accepted sample. Changing the foam, yarn or backing later can make the earlier comparison invalid.
Compare the complete production sequence
Different methods place work in different stages. A low stitch count may still require cutting, placement, trimming or attachment.
List the sequence for each candidate. List which tasks take place on the embroidery machine. List those done elsewhere too.
Method | Work that may sit outside stitching |
|---|---|
Flat embroidery | Hooping, backing removal and thread finishing |
Appliqué | Cutting, piece identification, placement and edge trimming |
Chenille | Base preparation, surface finishing and possible attachment |
Foam relief | Foam placement, removal and edge inspection |
Couching | Cord preparation, end treatment and material feeding |
Separate decoration | Base cutting, edge finishing and garment attachment |
Use a trial to identify the actual tasks. Do not assume that every supplier follows the same route.
For a combined design, check if all work occurs on one machine. Record any transfers needed. Each transfer can affect identity and alignment.
Keep this review focused on method selection. Base a detailed quote on the approved sequence and observed production data. Artwork size alone is not enough.
Compare edge complexity as well as design area
Two appliqué shapes can have the same area but need very different edge control. Area alone does not describe the construction.
Consider two hypothetical rectangular shapes. The first is 200 mm by 20 mm; the second is 80 mm by 50 mm.
Both have an area of 4,000 mm². Their perimeters differ:
First shape: 2 × (200 + 20) = 440 mm
Second shape: 2 × (80 + 50) = 260 mm
The long, narrow shape has about 69.2% more perimeter. Its nominal face area is the same. It also needs different care in placement and movement.
This does not directly predict stitching time. Corners, cover-stitch construction, stops and handling still matter. The supplier therefore needs the actual shape. A single area figure cannot describe the work.
Internal holes add more edges. A letter may have several small openings. It can then be harder to place and finish than a solid shape of similar size.
Use this review when choosing between appliqué and a stitched fill. A broad simple area may suit an applied fabric piece. A design with many separate, narrow sections may lose that advantage.
Ask the sample maker for a clear view of the hardest corner and smallest opening. If these features need redesign, fix them first. Then approve the main colour and texture. An attractive centre does not make up for edges that cannot be repeated in production.
Use a sample board that answers the choice
Where possible, use the same base fabric, motif size and colours for the comparison. Label each construction clearly.
Include the front and the back. Add a sample after care. Where useful, include one after a defined wear assessment.
The product team needs to compare texture, detail, flexibility and attachment. Label materials so the team does not have to guess what was used.
Review question | Evidence on the sample board |
|---|---|
Is the design clear? | Actual-size sample and defined viewing condition |
Does the surface feel right? | Accessible physical sample |
Is the reverse acceptable? | Backing and finishing shown |
Does it suit movement? | Decorated panel or garment assessment |
Does care change the effect? | Matched before-and-after samples |
Can it be reproduced? | Repeat samples from the proposed route |
Keep the artwork version beside the sample identity. An excellent sample still needs a link to its file and materials. Without that link, it is hard to repeat.
Work through a method choice for one logo
Assume a hypothetical sweatshirt needs a bold 100 mm letter. The design brief asks for a soft raised surface, regular home care and no hard insert feel.
The team compares flat fill, foam relief and chenille on the same sweatshirt fabric.
Flat fill gives the clearest edges but does not meet the required surface texture. Foam produces height, but the team rejects its feel after a garment trial. Chenille meets the texture brief. It also passes the defined care assessment.
This decision does not prove that chenille is best for all sweatshirts. It follows from this brief and these samples.
Now change the brief to a 20 mm identifier on a light performance top. Detail, low bulk and movement become more important. The same chenille construction may no longer be a useful candidate.
The method should follow the requirements. Do not keep a construction simply because it worked on a previous collection.
Define combined designs at their boundaries
A design may use chenille for the main shape and flat embroidery for small text. It may add appliqué for a broad coloured area. The transitions need their own review.
Show where each method stops. State whether one layer overlaps another. Say whether the join should be visible.
Check thickness at intersections. One corner may combine base fabric, appliqué, foam and dense stitching. It may behave differently from the rest of the design.
Review the sequence with the supplier. A later step may block access needed by an earlier one. It may cover a feature the buyer expects to see.
Use a close view of the boundaries during approval. Check more than the overall motif. Look for exposed edges, trapped material and awkward changes in height.
Keep material and file versions aligned. A revised appliqué outline should not be used with an older cover-stitch path.
Write a method specification that can be reproduced
A useful specification names the construction and the evidence supporting it. Include the actual size and position reference. Show where each method is used. Name the thread, added materials and production route. Link the approved sample.
Define the reverse-side requirement. State whether backing may remain visible or needs a cover. Explain how to assess contact with the wearer.
Record the care route and acceptance criteria. State which material changes need approval.
For placement, use garment landmarks and a stated measurement method. A distance on a flat panel may differ from one on a curved, assembled garment.
Separate permitted visual variation from defects. A textured method may allow some surface variation. It still needs a controlled shape and secure ends.
ApparelDiary’s testable collection brief guide helps define the wider product requirements. The embroidery specification uses those requirements to define how to build the decoration.
Frequently asked questions
Is appliqué always better for large designs?
It can be useful when fabric should form a broad area. Review cutting, placement and edge treatment. Check that the materials suit the required care. A large design may also suit a controlled flat fill or a combination.
Is every raised embroidery made with foam?
No. Chenille, layered stitches, couching and attached constructions can also create height. Specify the structure instead of using “3D” as the only instruction.
Can one file serve every garment size?
Not automatically. Scaling can close gaps and change details. It can also move the design in relation to garment features. Approve each required size or a justified size range.
Does a named traditional style define the production method?
Not fully. A visual reference may inspire machine or hand work with different structures. Find out how the supplied decoration is made. Describe that method accurately.
Approve the method on the garment
The best embroidery choice connects design, material, use and production. It keeps the key features. It must avoid excess stiffness, care failure and attachment problems.
Compare physical samples and assess the complete decoration. Keep the approved file and materials traceable. The supplier then has a clear target. The product team has a result it can repeat.
References
Wilcom: Running, satin and tatami fill choices.
Wilcom: Appliqué tack stitching.
Tajima: TCMX chenille embroidery machines and options.
Madeira USA: Creating embroidery with 3D foam.


Discussion0
Loading the discussion…