

Use the rubbing cloth as evidence of a defined contact
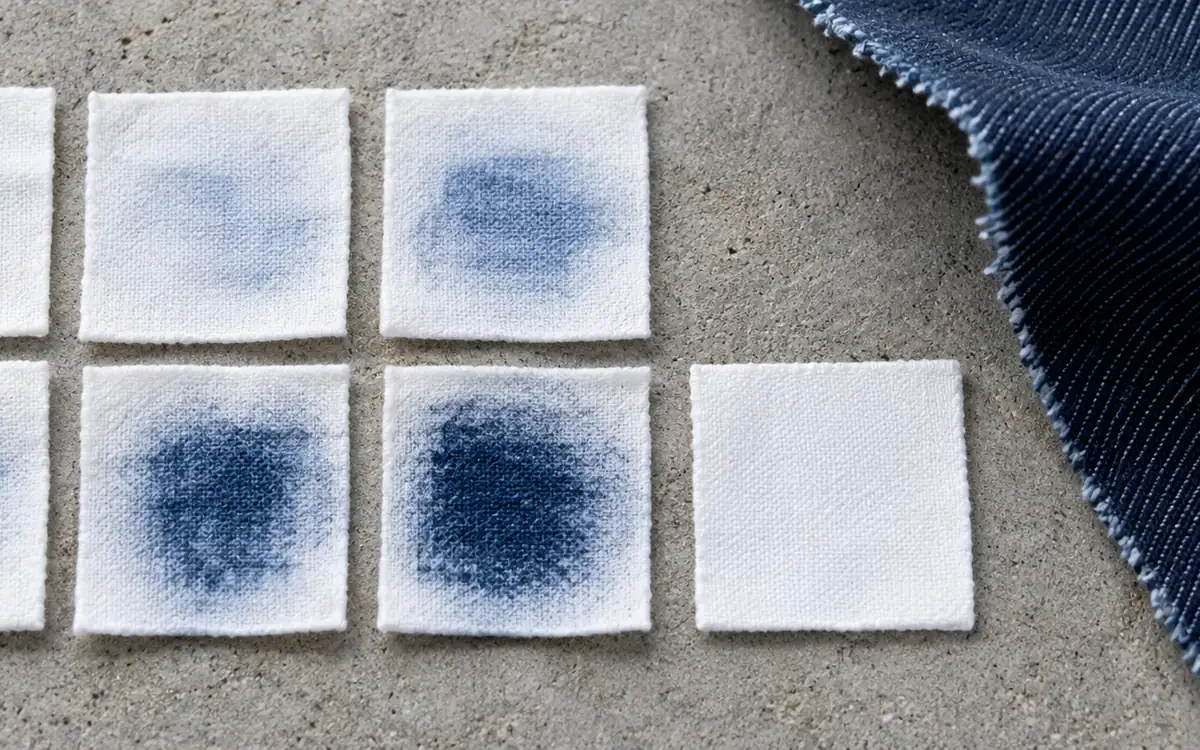
A rubbing fastness test measures colour transfer during controlled rubbing. The coloured textile is one surface. A specified white cloth is the receiving surface. After the exposure, the laboratory assesses the stain on that cloth.
How readily does the textile transfer colour in this dry or wet contact? That is the practical question the result helps answer. It does not measure all dye fixed to the fibre. Nor does it test every kind of durability.
This matters at cuffs, collars, seats, and bags. It also matters where dark and pale materials meet. A standard test is still a defined lab exposure. A useful report names the method, surface tested, condition, and grade.
This guide focuses on valid testing and diagnosis. All number examples are made up unless a source is named.
Select the rubbing method that fits the area
ISO 105-X12 covers colour transfer by rubbing and provides dry and wet tests. Its scope includes yarns, fabrics, and pile materials.
AATCC TM8 also assesses colour transferred to white test cloth through rubbing. Its public scope identifies limits for carpets and printed areas too small for the conventional test arrangement.
Record the exact method and edition required by the buyer. One machine may run several methods. Each can have its own rules for samples, test cloth, wetting, and reports. Do not mix those rules.
For a small printed motif, the ordinary rubbing path may cross several colours and the unprinted background. The stain may then hide which motif caused concern.
ISO 105-X16 addresses smaller areas. AATCC TM116 describes the rotary vertical crockmeter method. It includes cases where small print areas need separate tests. Use the method that fits the required decision. Do not just shorten an ordinary rubbing stroke.
Product feature | Question to settle before testing |
|---|---|
Solid dyed face | Which side and direction represent the required contact? |
Small contrasting motif | Can the selected apparatus isolate the printed area? |
Pile or raised surface | Which finger and preparation rules apply? |
Different face and back | Does the specification require both surfaces? |
Prewashed product | Is the required state before or after that treatment? |
Put these choices in the test request. Do not choose them later to get a better grade.
Understand what can influence the transfer
Rubbing brings surfaces into moving contact. The stain may come from colourant transfer or matter shed by the cloth surface. The colour name alone does not reveal the cause.
A black fabric is not necessarily coloured with carbon black pigment. A pigment print, reactive dyeing, and sulfur dyeing need different process checks. Find out which colourant and route were used before proposing a chemical fix.
Research by Suganuma on wet rubbing found that friction was not the only factor. Dye affinity for the source and receiving fibres also mattered. The receiving materials gave different results. The receiving cloth is thus part of the test system.
Do more than ask whether to add a fixative. Study the surface, dye system, receiving cloth, and test conditions together.
Keep colour transfer separate from a change in the source cloth's look. Two fabrics may both show wear yet leave different stains. A standard crocking grade describes the specified receiving cloth under the chosen grading method.
Preserve the tested face, direction, and location
Mark the fabric face and the direction before cutting specimens. For a reversible product, identify both surfaces in the plan. For a raised surface or one with a clear direction, record which way it faced. Keep that clear in the report too.
Follow the method's specimen-direction rules. Do not let an easy cutting layout set the direction. Rubbing across a surface may give a different result from rubbing along it.
Record roll position when studying differences within a roll. The edge, centre, start, and end may have different histories. Label each sample so its result links back to its position.
ApparelDiary's fabric shade segregation guide explains how roll identity supports shade control. Rubbing adds a separate need. A close shade match does not prove low colour transfer.
Photograph the proposed rubbing area when print placement or a local surface feature matters. The image records location. The physical sample and its controlled test remain the basis for the grade.
Use fresh test areas for the required exposures. Rubbing one track again changes its surface. The first run may strip off material before the next run. A later result is not a fresh test of the original surface.
Control the receiving cloth
Use the cloth required by the method. ISO 105-F09 specifies cotton rubbing cloth and the assessment of its staining properties against reference materials.
James Heal's Crockmaster documentation lists different ISO and AATCC cloth rules. It calls for fresh cloth for each test. A white scrap from the factory may look similar. That alone does not make it a suitable test cloth.
Retain the supplier, type, and batch identity. Protect unused cloth from dirt, oil, stray colour, and moisture changes. Keep fingers and bench dirt away from the test area. They could add to the stain.
Keep unused comparison cloth available from the appropriate material. A different white shade or finish on the reference can affect the comparison.
For a wet test, follow the stated wetting steps. Check the required water pickup. “Wet enough” is not a measured condition. Record enough detail to show how the cloth was prepared.
Calculate wet pickup on the correct mass basis
Wet pickup compares added water with the conditioned dry mass of the rubbing cloth. Under that stated basis:
Wet pickup (%) = (wet mass − conditioned dry mass) ÷ conditioned dry mass × 100
Suppose a hypothetical cloth weighs 0.250 g before wetting and 0.415 g after wetting.
Water retained = 0.415 − 0.250 = 0.165 g
Pickup = 0.165 ÷ 0.250 × 100 = 66%
The calculation reports the measured pickup. The chosen method sets the allowed value. This example does not set a target for all ISO or AATCC tests.
Dividing the water mass by the wet mass gives a different quantity:
0.165 ÷ 0.415 × 100 = 39.8%
That is the water fraction of the total wet mass. Do not enter it as pickup. That would describe the wrong quantity, even though both sums use the same two masses.
Account for evaporation between preparation and rubbing
Assume the same cloth loses 0.025 g before it is used. Its mass becomes 0.390 g, and its pickup becomes:
(0.390 − 0.250) ÷ 0.250 × 100 = 56%
A small water loss changed pickup by ten percentage points. This shows why timing and handling matter with such a light cloth.
Follow the method's timing and verification requirements. A stack of cloths wetted long before use may dry out as testing proceeds.
Use a suitable balance and retain the raw masses. In this example, a 0.005 g change in wet mass changes pickup by two percentage points. This is a sensitivity check. It does not measure the balance's actual uncertainty. It shows why you must check that the balance suits the task.
A fixed water dose may not give a fixed pickup
Consider three hypothetical cloths with conditioned dry masses of 0.240, 0.260, and 0.280 g. Assume each retains exactly 0.160 g of added water at the relevant weighing.
The pickups are 66.7%, 61.5%, and 57.1%, in that order. The same water mass gives different ratios because the cloth masses differ.
This does not show whether any cloth meets a given method. A dispenser setting is one piece of evidence. Measured pickup is another. Use the preparation and checking steps that the method requires.
Record the actual cloth masses when they form part of that procedure. Results may get worse through a series because the materials differ. Or the wetting steps may have changed by mistake. Raw records let you check both possibilities.
Also distinguish water delivered from water retained. Drops left in the device or on the bench are not held by the cloth. Water lost to the air is not held either. A correct nominal dose alone does not prove the desired wet state.
Separate normal load from friction force
One load presses the head against the cloth. A different force resists movement along the surface. Calling both “rubbing pressure” is confusing.
James Heal describes a removable weight that provides a 9 N loading on its Crockmaster. The selected method and configuration determine the required loading. Wet testing is not permission to double that load.
A simple friction model writes the tangential force as:
Friction force = friction coefficient × normal force
For a hypothetical normal force of 9 N, a coefficient of 0.30 gives 2.7 N. If the coefficient becomes 0.45, the calculated friction force becomes 4.05 N. The applied normal force has stayed at 9 N.
This simple model explains the difference. It cannot predict changing friction in every textile contact. Wetting may change the surface response even when the normal load stays the same.
Do not convert that force ratio into a predicted staining grade. Colour transfer also depends on the materials, contact shape, and grading method. Check the required machine conditions directly.
Head size affects nominal contact pressure
For a simplified circular contact, nominal area is π × diameter² ÷ 4. Nominal pressure is normal force divided by that area.
Take an invented comparison using the same 9 N force. A 16 mm circle has an area of about 201 mm². This gives about 44.8 kPa nominal pressure. A 20 mm circle has about 314 mm² of area. Its nominal pressure is about 28.6 kPa.
The second nominal pressure is 36% lower, despite the identical force. These sizes are inputs for the example. They are not instructions for choosing or replacing a rubbing head.
Real cloth contact is not a uniform load over a perfect circle. Fibres, raised areas, mounting, and changes in shape affect local contact. The sums show why head shape matters as well as load when checking the machine.
Use the specified head and inspect its working surface through the approved procedure. Matching only the displayed force leaves an important part of the contact undefined.
Keep apparatus verification separate from a product pass
Check the head, load, travel, motion count, and sample support. Follow both machine and method instructions. A digital display may repeat a setting. It does not prove that the actual contact is correct.
Inspect wear, looseness, or contamination through the approved maintenance procedure. A damaged surface or poorly mounted cloth can have a large effect on a small test area.
External comparisons can help monitor laboratory performance. AATCC's colourfastness proficiency programme includes TM8. Use such evidence alongside the laboratory's apparatus and material controls. Taking part does not calibrate the head. Nor does it prove every bulk result is valid.
Mount the sample so the test follows the intended path
The specimen should stay secure through the prescribed motion. Sliding, wrinkling, or folding changes the contact. Record visible movement during a test. Check whether it makes the result invalid.
Fasten the rubbing cloth with no fold over the contact face. Keep each fastener in its proper place. Cloth may look neat on top of the head yet have a crease on the working surface.
Confirm the path before the exposure. Keep it in the intended area. Avoid unplanned seams, raised trims, and fabric edges. If one of those features is the subject of the trial, define that trial separately.
Check the meaning of the machine counter against its instructions. One forward stroke, a return stroke, and a full cycle may use different labels. Check what the count means before copying a number. Otherwise you may change the exposure.
Use the specified speed and count. A quick hand rub may flag a problem. It is not a standard crockmeter result.
Evaluate the stain under the required conditions
Prepare and dry the rubbed cloth as required before grading. Keep its wet-test label after drying. This prevents a mix-up with the dry test.
Use the stated evaluation route. ISO 105-A03 concerns staining assessment; AATCC methods identify their applicable evaluation procedures. The report should name the route used.
Inspect unusual deposits or loose fibre carefully. Follow the method's handling rules. Do not brush, wash, or clean the stain on a whim. This can remove evidence and change the grade.
Record clues such as an uneven stain or a possible mounting mark. Keep these notes separate from the formal grade. Do not adjust the grade to fit a suspected cause.
For instance, a narrow dark line near one edge may call for a mounting check. A broad, even stain is a different pattern. Neither proves the cause. Keep the rubbed cloth and inspect the setup. Use a fresh test piece for an approved repeat. Do not remove a mark before review. It may hold the evidence that explains the dispute.
Grade 5 represents the least staining in the conventional grey-scale sequence. Intermediate grades are part of the reporting scale. The grades are not percentages of colour kept. Their steps do not represent equal amounts of transferred dye.
Keep dry and wet requirements separate
Suppose a made-up buyer requires at least grade 4 for dry rubbing. The wet limit is at least grade 3–4. Three correctly prepared samples give these results.
Sample | Dry result | Wet result | Decision against these assumed limits |
|---|---|---|---|
A | 4–5 | 3–4 | Meets both numerical requirements |
B | 4–5 | 3 | Fails the wet requirement |
C | 3–4 | 4 | Fails the dry requirement |
A strong result in one condition cannot cancel failure in the other. Show both decisions.
Sample C shows an unusual wet–dry pattern. Review it before declaring it impossible. Check preparation, sample location, grading, and whether the result repeats. Let the test give the result. Do not assume wet rubbing must be exactly one or two grades worse.
The limits above are teaching assumptions. A dark shade, denim effect, or familiar colour name does not waive the buyer's real limits.
Investigate a wet failure in a disciplined sequence
First establish that the wet-cloth preparation and rubbing conditions were valid. Then examine the tested material and its production history.
Compare an affected specimen with a suitable acceptable control tested under the same conditions. Record differences in fibre blend, dye system, finish route, shade depth, and surface treatment. Any may help explain the result. None alone proves a cause.
For a printed material, examine whether the issue is confined to one print colour or region. For dyed fabric, check whether it follows a lot, a finishing change, or a location across the width.
Observation | Useful next evidence |
|---|---|
Several unrelated samples suddenly worsen | Cloth batch, wetting, apparatus, and grading checks |
One face transfers more colour | Surface identity, finish distribution, and face-specific results |
One printed area fails | Colour-area isolation and relevant application records |
Result changes after a defined treatment | Matched before-and-after samples and full process history |
One roll region is affected | Position-labelled sampling and production events |
The table guides the next comparison. It does not assign a cause from appearance alone.
Avoid treating washing and rubbing as the same property
Laundering and rubbing expose the material in different ways. Passing one does not remove the need for the other when both are specified.
AATCC TM8 allows tests before or after treatments that may affect transfer. State the process and care history of the tested cloth. “Rubbing pass” is incomplete if the buyer asked for testing after a named wash sequence.
For a reactive cotton investigation, use the relevant production evidence in ApparelDiary's right-first-time dyeing guide. Do not assume that a low rubbing grade proves that the entire batch had poor fixation.
Likewise, a wet rubbing test using water does not establish colourfastness to perspiration. Another liquid creates another exposure unless the method and request require it.
Connect standard results with actual contact concerns
The standard cotton receiving cloth provides a controlled reference. A consumer may put the fabric against leather, a synthetic lining, pale upholstery, or another textile. Those contacts need their own defined questions.
Suganuma's research shows why one receiving cloth cannot represent every material. It does not permit a change to the specified cotton cloth while keeping the standard test name.
If a dark shoulder panel marks a pale bag strap in use, record both materials, their state, contact location, and moisture conditions. Use an agreed trial to study that pair. Keep the required standard test result too.
Make special trials clear enough to repeat. Record the receiving material, load, motion, time, liquid, and grading basis. A vague demonstration may show transfer. It offers little basis for comparing possible fixes.
Validate a correction on the final product state
Test a proposed chemical treatment, wash, or finish change on matched affected cloth. Use a suitable control. Choose the route with the supplier and the mill's technical team.
Assess both dry and wet rubbing where required. Also check shade, feel, strength, size, and later process needs. A treatment may raise one grade while spoiling another property. That is not a complete correction.
If durability after care is required, assess the corrected material after the specified care route. An early gain can help development. It does not prove that the effect will survive use.
Record the exact material, treatment, and final state covered by the successful trial. Test bulk output under the agreed plan too. Do this before applying a small trial result to the whole delivery.
Build a report that can be compared later
Retain the method and edition, sample identity, face, direction, location, and pretreatment. Record the receiving cloth and wetting basis. Add machine setup, checks, and grading method.
Show dry and wet results separately, with the applicable requirement beside each. Add deviations and observations that affect interpretation.
Keep the exposed cloths and unused references under the laboratory's retention procedure. They help show whether a later dispute concerns exposure, grading, or a different sample.
Use the same fields in later trials. A new grade is more useful when the team can see what changed between tests.
Frequently asked questions
Does a good rubbing grade prove good washing fastness?
No. The exposures differ. Use the required test for each property and retain both decisions.
Can extra water make a wet test more conservative?
It changes the exposure. Follow the specified wetting procedure and target instead of changing the test to create an assumed worst case.
Can I test a small motif with the normal long rubbing path?
Check whether that path isolates the area. A small-area method may be required by the buyer and product question.
Should I increase the load for wet rubbing?
Use the loading required by the chosen method. Wetting and normal load are separate test variables.
Control the contact before judging the cloth
A reliable rubbing-fastness decision starts with a defined surface, receiving cloth, and contact. Accurate wet pickup and apparatus control make the dry and wet grades meaningful.
Once those conditions are sound, use the result pattern to focus the next checks. The final decision should name the product state and the limits it met.
References
ISO 105-X12: Colour fastness to rubbing.
AATCC TM8: Colorfastness to Crocking, Crockmeter.
ISO 105-X16: Colour fastness to rubbing, small areas.
AATCC TM116: Rotary vertical crockmeter method.
Suganuma, 2015: Improvement of the standard method for assessing colour fastness to wet rubbing.
ISO 105-F09: Specification for cotton rubbing cloth.
James Heal: Crockmaster and rubbing cloth documentation.


Discussion0
Loading the discussion…