
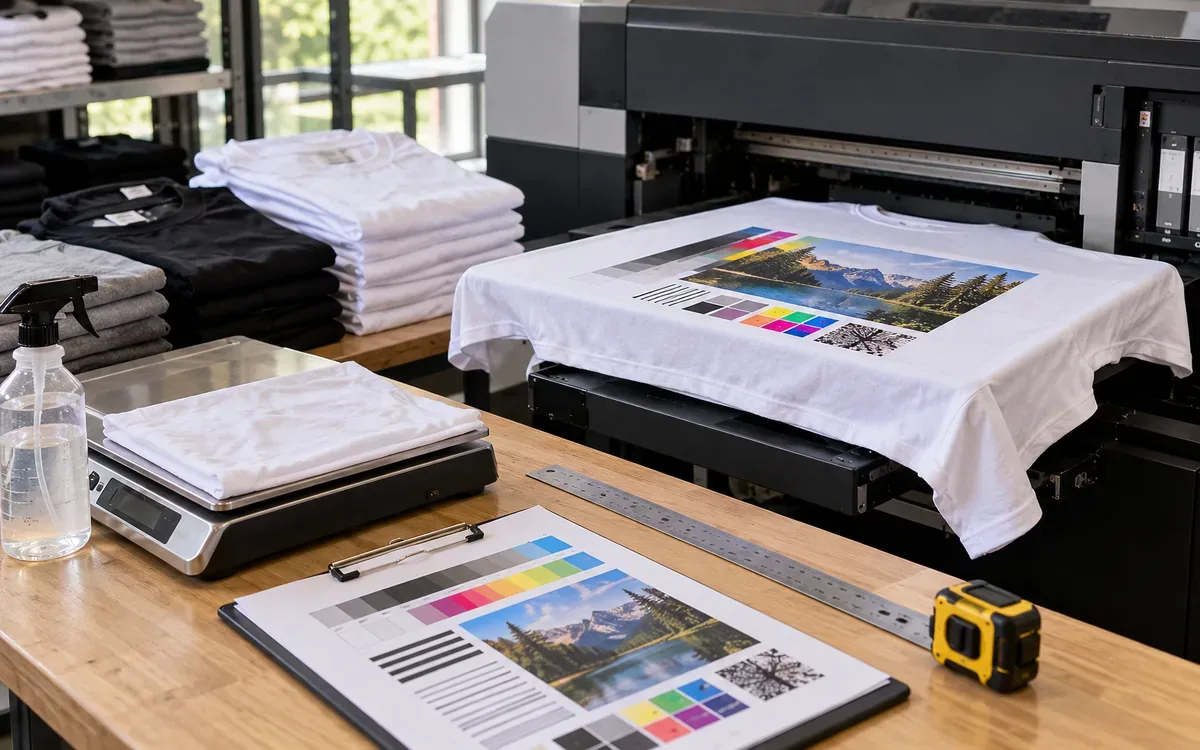
A blank garment is ready for DTG printing when it works with the chosen print system. Together, they must produce the required result. A fibre label, soft handle or smooth photograph cannot establish that result.
Approval should answer a practical question. Can this style, colour and supply lot carry the artwork through printing and curing? Will it still meet the brief after care? The answer needs repeatable samples and a defined process. It should also show which garment features make loading or printing difficult.
The approach below is for product teams, decorators and garment suppliers. Its trial figures are made up for teaching. Use the instructions for the actual printer, ink and pretreatment. They depend on the equipment and materials in use.
Write a print brief before comparing blanks
Start with the finished image and its use. Record its size, position, colours and detail level. A small dark logo may sit on a pale shirt. A large white underbase may cover black fleece. These jobs make different demands.
Define the appearance features that matter. These might include white coverage, fine lettering and clear edges. Check colour match and surface feel. Note whether the pretreatment boundary can be seen. Use an approved physical reference where possible.
Describe how the garment will be worn and cared for. A promotional shirt and a frequently washed work garment may need different evidence. Set the care route and appearance limits before the trial. The team should not choose a convenient rule after seeing the samples.
Include the garment’s fit and construction. The artwork must work on the smallest and largest relevant sizes. A print may fit a medium sample. On another size, it may run into a pocket, armhole or seam.
The brief should lead to a short decision table. Each feature needs an assessment method, a target or reference and an owner. “Good quality print” leaves too much room for different interpretations across teams.
Qualify a defined garment and print system
Record the garment supplier, style code, colour, size and lot. Add the stated fibre content, fabric structure and finish. Include relevant process history. Ask the supplier to identify changes that could affect decoration.
Then record the printer, ink family, pretreatment product, software settings and curing route. Approval belongs to that combination. Changing the blank while holding the artwork constant still changes the system.
Manufacturer guidance shows why the boundary matters. The Epson SC-F2270 equipment guide gives different pretreatments for cotton and polyester. It also calls for trials on blends. Its recommendations apply to that printer’s materials and process.
The DuPont Artistri DTG process guide likewise defines particular ink and pretreatment families. It identifies garment quality and surface treatments as factors that affect results. Treat such guidance as a starting point for the named system.
A supplier’s “DTG suitable” description can narrow the search. Ask what equipment, inks, colours and care conditions support that claim. Test a sample from the proposed supply. It gives more useful evidence than a broad claim of compatibility.
Inspect the surface that will receive the artwork
Examine the intended print face under consistent lighting. Look for raised fibres, lint, local texture, crease marks and changes in the knit. Check the area that the artwork will occupy, not only an easy patch near the hem.
Compare several garments. A smooth sample picked by the supplier may not represent the lot. Follow the agreed sampling plan. Include different packages and positions within the delivery.
Use what you see to guide tests. Do not turn it into a ranking for every fabric. A heavier shirt is not automatically a better print surface. Nor does a high cotton percentage alone prove a stable result. The final interaction includes the surface finish, pretreatment, ink and cure.
A simple wetting screen may help. If used, keep the method the same and label it as a screen. Drop size, location, fabric state and observation time can affect what is seen. A water drop cannot replace the actual ink-system trial.
Keep the original garment intact where possible. A cut swatch leaves out the seams. It also misses loading stretch and other effects of garment construction. Swatches help compare surfaces. Test the complete blank to check whether the intended production route works.
For broader receiving controls, use ApparelDiary’s fabric roll acceptance guide. DTG qualification adds evidence about the decorated, assembled garment.
Map the usable print area on every relevant size
Measure the flat area available in the actual loading position. Identify seams, pockets, zippers, rib trims and raised intersections. The largest panel dimension is not necessarily the largest usable print field.
Consider a made-up trial with a small shirt. It has a 280 mm clear zone between raised features. The artwork is 250 mm wide. If centred perfectly, it leaves 15 mm on each side. Placement may vary by ±6 mm. This reduces the smallest possible side margin to 9 mm.
Usable minimum margin = (280 − 250) ÷ 2 − 6 = 9 mm.
Suppose the loading trial sets a 12 mm clearance limit. This is the least space allowed beside those features. The layout then fails that project rule. The team could reduce the artwork or change its position. A suitable alternative platen may also help. The calculation does not establish a universal 12 mm requirement.
Check height as well as width. Check hood seams and thick pocket edges. They can affect how the garment sits on the platen. The print field must remain suitable throughout the printer’s movement.
Epson’s platen-height guidance calls for the correct setup. Review it when the platen type or garment thickness changes. Follow the instructions for the actual machine. Do not bypass height detection to force an unsuitable garment through.
Test loading without distorting the garment
A blank should load consistently while remaining in the intended state. Pulling a knit until it looks flat can stretch the print area. The image may change shape when the garment comes off the platen.
Mark a temporary reference rectangle on a trial piece. Use a method that will not affect the print. Measure it before loading and after release. Where practical, also measure it while loaded. This can reveal a handling change that a finished photograph conceals.
In a hypothetical check, a 100 mm reference width becomes 106 mm while loaded. That is 6% extension. Printing in that state applies the artwork to a stretched surface. The team then releases the fabric. The exact final image change still needs measurement.
Use the garment maker’s construction lines carefully. A side seam may twist, so it may be a poor sole reference for centring. A pocket can also be slightly displaced within its own tolerance. Decide which landmarks define the artwork position.
The SC-F2270 sleeve-loading instructions warn against pulling too hard. They also explain that raised seams can affect print quality. Prove the loading method on the actual garment and platen. This is the broader lesson.
Record the approved loading aid and orientation. Include sleeves, hood cords and other loose parts in the check. One operator may use an unexplained hand movement. Other staff may struggle to repeat it.
Establish a printer control before blaming the blank
Run the machine’s required maintenance and checks before the garment comparison. Keep a known suitable control blank in the trial. Print that control at the start and again when needed during a longer test.
The control may change at the same time as a candidate. If so, investigate the print process. A nozzle fault, ink condition or press change may be the cause. Do not mistake it for a garment problem.
Use one approved test file for the first comparison. Lock its dimensions, colour settings and print mode. Keep the software version or profile identity with the record. A revised file should not quietly replace the original midway through the trial.
Epson’s print-quality troubleshooting guidance sets out several possible causes. These include nozzle condition, platen distance, surface fibres and uneven pretreatment. The symptoms overlap, so a controlled reference helps narrow the investigation.
A candidate may be printed early in the day. Do not compare it with a control printed after several adjustments. If the process must change, identify a new trial group. The record should show which observations belong to each condition.
Build a test image that reveals useful differences
Use a compact target containing features from the real artwork. Include solid light and dark areas. Add fine lines, small text and boundaries between colours. Add a large white area when white coverage is part of the product.
Leave enough plain garment around the test print. This helps reveal halos, press marks or dirt. A full-coverage graphic may hide the pretreatment boundary. Around a small logo, that boundary may be clear.
Choose detail sizes that matter to the order. Very fine lines may reveal a print limit. If the actual design uses thicker lines, that limit may not affect the decision. Conversely, a target with only broad shapes cannot qualify tiny lettering.
Label the target version and print position. Photograph samples under the same conditions and retain physical pieces. A camera’s exposure or screen setting can change the apparent whiteness and colour.
Judge the real artwork after the diagnostic target. A target helps explain differences. The final design confirms that the chosen blank meets the brief. Use both when a failure could hide in the artwork’s particular shapes or coverage.
Measure pretreatment on a defined area
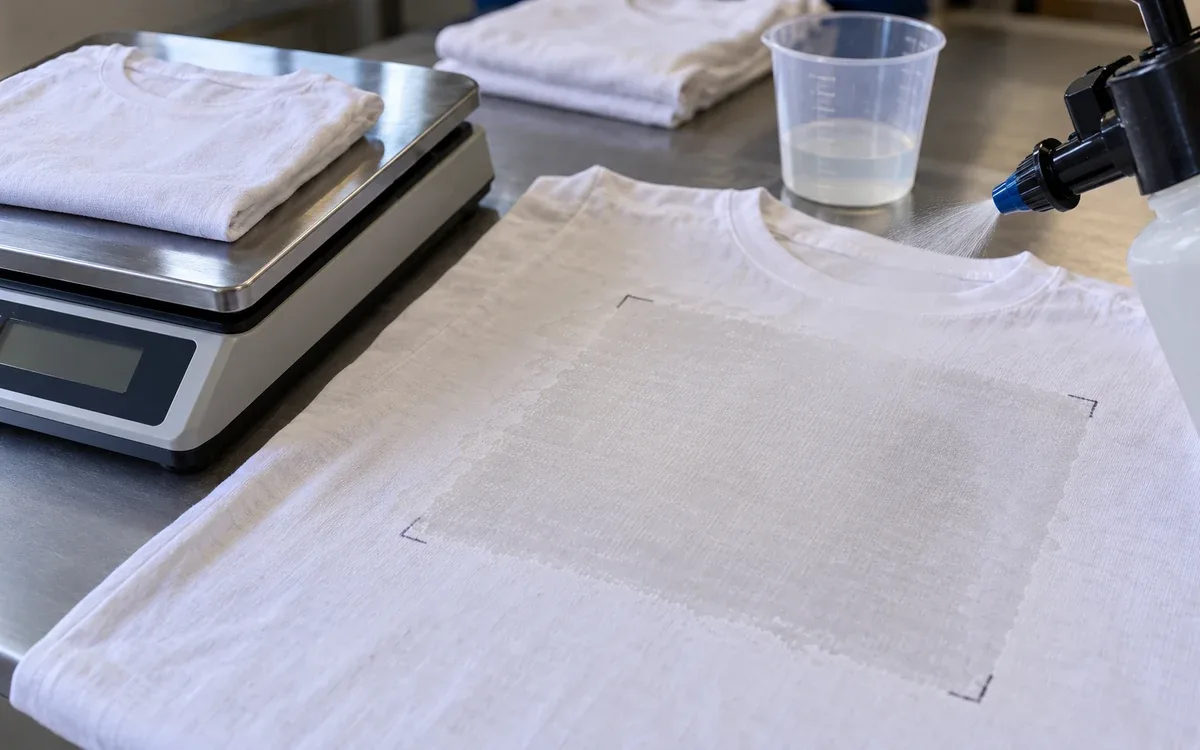
Record pretreatment identity, dilution basis, application method and treated area. “Twenty grams per shirt” leaves the area unclear. One operator may spray a small chest zone. Another may spray the whole front.
The Brother GTXpro Bulk operations guide describes how to weigh the amount applied to a defined area. It links this with how the garment absorbs the liquid. Use the exact dimensions and product instructions relevant to your system.
For an original example, a treated rectangle measures 30 cm by 40 cm:
Area = 0.30 × 0.40 = 0.12 m².
Suppose a garment weighs 184.6 g before spraying and 205.0 g immediately afterward. Net wet application is 20.4 g. The area-based application is:
20.4 ÷ 0.12 = 170 g/m² of mixed solution.
This is wet mixed-solution mass. It is not dry chemical add-on. The active content and water loss would need separate evidence.
If the same 20.4 g is spread over 0.16 m², the rate falls to 127.5 g/m². The spray area may change while “grams per shirt” stays fixed. That creates a different treatment per unit area.
Use the same weighing timing and handling. Water loss and overspray can alter the result. Check that the garment rests correctly on the scale too. Check the treated zone as the trial requires. Repeat the measurement on several garments.
Design a small pretreatment comparison
Keep trial levels within the supplier-supported range for the actual system. Label them by measured application rather than an unexplained machine dial number. Hold dilution, area, garment and print settings steady.
The following hypothetical plan compares two blanks at three permitted application levels. It illustrates the structure of a trial, not recommended DTG doses.
Blank | Lower level | Middle level | Upper level |
|---|---|---|---|
Candidate A | Three separate garments | Three separate garments | Three separate garments |
Candidate B | Three separate garments | Three separate garments | Three separate garments |
Control blank | Agreed reference condition | Repeated during the trial | Agreed reference condition |
Print the groups in a balanced order where practical. Do not always print low-level pieces first and high-level pieces last. The process may change with time. Those changes could be mistaken for a treatment effect.
Assess more than initial colour strength. Record edge clarity, hand, visible residue, white coverage and later care results. The darkest-looking first print may not be the best complete result.
Keep failed specimens. If one piece differs from the other two, inspect its loading and application history. An average cannot explain the odd result. It may come from a local spray fault or a real difference in the blank.
Prove the curing route separately
Follow the requirements for the chosen ink system and garment. The press displays a temperature. That alone does not prove what happened across the whole print. Use the manufacturer-supported measurement approach and record the equipment.
Pretreatment drying and final ink curing are separate stages. Record both. A garment may look dry on the surface. Yet its preparation may still vary across the print zone.
Epson’s pretreatment-fixing guidance calls for complete drying. It notes that moisture left after preparation can harm white-ink results. It also treats fixing conditions as dependent on the process and material.
Check the full artwork area, especially when seams or thick regions alter contact. A small central patch tests only that area. It cannot approve an image that extends toward the platen edge.
A heat-sensitive blank may look better with a lower cure. That alone is not a reason to change the cure conditions. The ink still needs its validated cure. The garment may not tolerate that route. If so, investigate a supported ink process or choose a different blank.
Watch heat effects and dye migration
Inspect the blank after a process-only trial as well as after printing. Check a prepared but unprinted garment. It can reveal press shine, colour change or the treatment boundary. The image might hide these effects.
Polyester-containing garments deserve system-specific review. Heat-related dye movement can contaminate a light print. The actual dyed garment and process affect the risk. The fibre percentage alone cannot predict it.
Brother’s polyester-printing guidance sets out which garments suit its system. It also describes dye migration problems. Those details should not be expanded into a rule for every current printer and ink.
Inspect at the agreed later stages as well as immediately after cure. Keep printed samples separated so contact does not create a second contamination route. Record any appearance change during the observation period.
Use a matched plain control when investigating a colour shift. The blank itself may change under heat. The final image may then show effects from both the garment and the print. Use the trial to separate those effects. Do this before adding another layer of white ink.
Assess the garment through its required care
Qualification should include the care route promised for the finished garment. Keep the same sample identities before and after treatment. Record drying and any other steps that affect the image or garment.
Evaluate print appearance alongside garment shape. A graphic may stay clear after care. It can still fail the brief if the body twists or the print area changes size unevenly. Measure relevant distances on the garment without stretching it flat.
In an example care trial, an image starts at 240 mm wide. After the agreed care route, it measures 232.8 mm:
Width reduction = (240 − 232.8) ÷ 240 × 100 = 3%.
If height changes from 180 mm to 176.4 mm, its reduction is 2%. The unequal changes may alter the artwork’s proportions. Whether that is acceptable depends on the design and requirement.
AATCC TM61 addresses accelerated laundering colourfastness. AATCC TM8 tests colour transfer through rubbing. It notes limits for very small print areas. Use these public scopes to choose relevant tests. They do not supply every procedure or passing grade.
Keep print cracking and colour change separate. Record staining, rub transfer and garment dimensions on their own too. Passing one does not establish the others. An accelerated test gives a colourfastness result. It does not prove how many years a shirt will last.
Diagnose a weak result with matched comparisons
A useful failure record identifies where and when the problem appears. “Bad print” gives little direction. A precise note gives more direction. For example: “White coverage becomes patchy near the left sleeve seam after cure.” This suggests a focused comparison.
Observed problem | First evidence to compare |
|---|---|
Fine lines blur on all blanks | Printer control, file and platen setup |
Patchy white occurs on one blank lot | Surface, pretreatment distribution and cure record |
Image changes shape after unloading | Garment extension during loading |
Halo remains outside the image | Process-only sample and treated-area boundary |
Light ink takes on garment colour | Blank shade, heat history and supported migration trial |
Print looks good before care but cracks later | Cure evidence and the complete care route |
The table offers starting questions, not automatic diagnoses. Several causes can act together. Preserve the original sample before trying a repair.
Consider a made-up trial. Candidate B has pale edges. Candidate A and the control look even. A smaller repeat target prints well on B’s centre. The problem returns only near a raised panel join. That pattern directs attention toward loading and local geometry.
The next trial should test a suitable approved platen or placement change. Adding pretreatment everywhere would change the whole garment. It would leave the suspected shape problem unresolved. After the correction, confirm the full artwork through care.
Compare cost per accepted printed garment
Blank purchase price is one input. Include the actual ink, pretreatment, handling and reject burden when comparing candidates. Keep development trials separate from expected repeat production.
Suppose two hypothetical routes have the following measured planning values:
Route | Cost per attempted garment | Accepted yield | Cost per accepted garment |
|---|---|---|---|
Blank A and its qualified process | 5.40 currency units | 97% | 5.57 |
Blank B and its qualified process | 5.05 currency units | 88% | 5.74 |
The calculation is cost per attempt divided by accepted yield. For A, 5.40 ÷ 0.97 = 5.567. For B, 5.05 ÷ 0.88 = 5.739.
This simple example gives rejected output no recovery value. The stated cost per attempt covers the defined route. It excludes selling costs and profit. The result shows why the cheaper blank may cost more per acceptable piece.
Review the causes behind the yield estimate. A tiny development sample gives weak evidence for a long-run percentage. Use a suitable pilot and retain its counts. State the uncertainty if production data are still limited.
Control repeat orders and approved substitutions
Retain a physical approved print and its process record. Identify the blank lot, artwork version, preparation route, printer settings and cure evidence. State what was approved in the record. The name of the person who signed is not enough.
When a replacement lot arrives, compare the features that mattered in qualification. The style code may match while other features have changed. Check yarn, finish, dyeing and construction. Ask the supplier to report relevant changes before production.
Use a defined repeat check suited to the risk. It may include a control target, the actual artwork, care samples and a review of loading. Do not silently transfer approval from one garment colour to every colour in the range.
Keep substitutions visible to the product team. A change made to solve availability may alter appearance, cost or care performance. The evidence should reach the person who can approve those consequences.
Questions about DTG blank qualification
Is 100% cotton always the safest choice?
It is a common starting material for many systems. The label alone does not qualify the finished blank. The trial must cover the actual surface finish and structure. Test loading and the print process too.
Can one pretreatment amount cover every garment size?
Only if the defined treated area and validated process justify it. Changing the spray area changes application per square metre. Size can also change loading and the position of raised features.
Is a wash test enough?
It answers only the questions included in that test. The product may need placement, rub transfer and surface-feel checks too. Assess its initial appearance and any change in dimensions.
Should a failed blank be rejected immediately?
First establish that the reference process remained sound. Then investigate a focused, supplier-supported adjustment. Reject or restrict the blank if a repeatable route cannot meet the complete brief.
Approve the combination that production can reproduce
A successful DTG trial produces more than an attractive sample. It defines the garment, artwork and process. They must continue to work together through loading, cure and care.
Use controlled comparisons to separate blank variation from print-room variation. Preserve the measurements behind the decision. This gives repeat orders a clear reference. It helps the team spot an unsuitable substitute before it reaches customers.
References
Epson SC-F2270: Required equipment and garment preparation
Epson SC-F2270: Determining platen height
Epson SC-F2270: Loading a sleeve
Epson SC-F2270: Poor print quality
Epson SC-F2270: Fixing pretreatment
Brother: GTXpro Bulk daily operations guide
Brother: Printing on polyester
DuPont: Artistri DTG inks and pretreatment process guide
AATCC TM61: Accelerated laundering colourfastness, public scope


Discussion0
Loading the discussion…