
A pilling grade needs a test history
A fabric offered as grade 4 for pilling may still be hard to assess. Which method produced the grade? How long did the test run? Was the material washed first? Did the assessor rate pills alone, or a broader change in the surface? Answer those questions before using the number to compare fabrics.
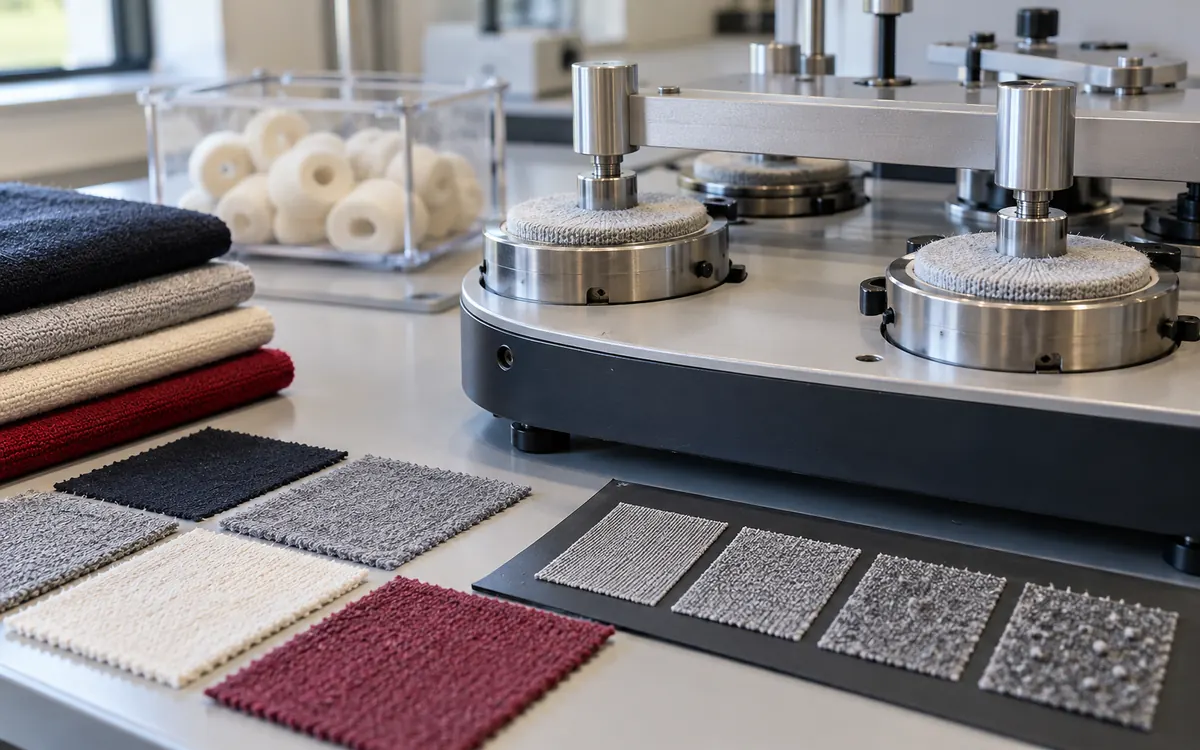
Pilling is the formation of small balls of tangled fibres at the fabric surface. Pills can make a garment look worn while it remains strong enough to use. A pilling test puts cloth through a controlled mechanical action. It then grades the surface. Keep both the action and grading consistent.
Buyers and mills need cloth that meets a defined appearance goal. Use a suitable method and useful grading stages. Test finished cloth that represents bulk production. Keep each result too. A good average must not hide a poor part of the sample.
Understand formation and wear-off
Pills do not simply accumulate at one fixed rate. Surface fibres emerge, tangle, and form pills. Some pills fall off later as the fibres holding them break. What you see is the result of both processes.
The original work by Gintis and Mead on the mechanism of pilling separated fuzz formation, entanglement, and pill wear-off. Their experiments linked fibre properties to these stages. The study helps explain how pills form. It is not a modern fabric specification or a recipe for all finishes.
A made-up count shows why the surface may look cleaner later. Suppose a marked area has 60 pills. In the next interval, 80 new pills form. A total of 100 old and new pills fall off. The visible count becomes:
Later count = 60 + 80 − 100 = 40 pills.
The count fell, yet 80 pills formed during the interval. A lower final count does not prove that the cloth resisted pills throughout the test. This sum is a teaching model. It is not a standard pilling grade. Real grading also considers how the pills and nearby cloth look.
This explains why assessment stages matter. A single late observation can miss a poor earlier appearance. Use the required intervals. Do not choose the best-looking stage after seeing the results.
Distinguish pills, fuzz, matting, and snags
Pills are separate tangled balls. Fuzz is a layer of fibres that stick out. Matting occurs when surface fibres press or tangle into a less distinct layer. A snag is a pulled loop or yarn feature. It needs its own grading method.
James Heal's pilling overview distinguishes pilling from snagging and explains that visible pilling depends on surface development, entanglement, and wear-off. This keeps the broad phrase poor surface from hiding several different defects.
Inspect the untested fabric first. A raised fleece starts with a different surface from smooth jersey. Keep a reference so the grader can see which features appeared in the test. A change in pile direction may be visible. That does not make it a pill.
Record the properties required by the chosen method. Do not report good pilling and omit severe fuzzing if the brief needs both. Do not call every small loop a pill to make it fit a spreadsheet column either.
For a complaint, photograph the affected garment areas and describe the damage. Use this evidence to choose a test. Check the defect before calling a snagging complaint a pilling failure.
Match the method to the agreed product question
Test methods create different mechanical actions. Similar grade numbers do not make those exposures equal.
Method family | Publicly stated test approach | Main comparison caution |
|---|---|---|
ISO 12945-1 | Rotating pilling box | Mounting, box condition, and rotation programme belong to this route |
ISO 12945-2 | Modified Martindale | Pilling setup must be distinguished from abrasion setup |
ISO 12945-3 | Random tumble tester | Chamber action and specimen movement differ from the other methods |
ASTM D3512/D3512M | Random tumble pilling | Use its own preparation, assessment, and precision guidance |
ASTM D4970/D4970M | Martindale pilling | A shared instrument name does not establish method equivalence |
The official scopes for ISO 12945-1:2020, ISO 12945-2:2020, and ISO 12945-3:2020 identify the respective exposure methods. ISO 12945-4:2020 addresses visual assessment of pilling, fuzzing, and matting.
Use the buyer's specified method and edition. If none is specified, the buyer and lab should agree a method. It should suit the cloth and the planned comparison. Public scope pages help with that choice. Use the full method to run a test and claim compliance.
The harshest-looking test may not be the most useful. Ask whether its action and grade give useful product evidence. It may create a surface unlike the complaint. That makes it a poor choice for diagnosis, even if the failure looks dramatic.
Keep the machine setup tied to the method
A Martindale can support different forms of testing. Having the machine does not prove that the lab used the right pilling setup. Check the holders, motion, load, rubbing material, and program. Confirm that each matches the named test.
The same care applies to box and random tumble methods. Inspect wear surfaces and sample holders as the machine procedure requires. Worn or dirty contact surfaces may change results even when the cloth is the same. Record replacements as the lab system requires.
Follow the method for edge preparation, mounting, and any required additions. A loose edge, poor seam, or wrong tube mounting may change the action. Do not quietly trim damage after testing. That could make the remaining area look like a valid result for the full piece.
If a specimen fails to move as required, record the event. Use the method or lab procedure to decide if the result is valid. The clock alone does not prove the intended exposure. A piece may get trapped or the machine may stop.
Keep method changes visible in long-term records. A new test route may shift the rating series. Mark the change in the records. Compare matched fabrics before treating new results as part of the old trend.
Calculate duration on the correct counter basis
Time sums can reveal a program error if you know what the counter counts. A rotation, rub, cycle, and full motion pattern may mean different things on different machines.
For a made-up box program, assume a checked speed of 60 revolutions per minute. The target is 6,000 revolutions. If there are no stops or speed changes:
Time = 6,000 ÷ 60 = 100 minutes.
At that same speed, 18,000 revolutions would take 300 minutes, or five hours. Neither target is a universal pilling-box requirement. Choose the program from the required method and specification. Then use the sums to check whether the machine record makes sense.
If the apparatus stops for 12 minutes, wall-clock time and running time differ. A test that ends 112 minutes after starting may still contain 100 minutes of motion. Record the stop and follow the method's rule. Do not add or remove exposure by guesswork.
Do not use machine speed alone to convert tumble time to a Martindale count. Contact, force, motion, and fibre response differ. Equal time does not mean equal action. Equal counts do not prove equal damage.
Sample the fabric state that will be sold
Record the yarn route, construction, colour, and finish. Testing a greige knit does not represent a final brushed or softened version. A prefinish sample helps diagnosis. Label it separately from the finished product sample used for acceptance.
Follow the sampling locations and directions required by the method and agreed plan. Avoid selecting only a neat central area if the roll shows a known surface difference. Keep selected fault samples separate from those meant to represent normal output.
For patterned or textured fabrics, record where the specimen falls in the repeat. A dense and a loose patch may meet the rubbing surface differently. Plan how to cover that variation. Do not assume every cutting gives the same contact.
Four yarn routes, two finishes, and two care states give 16 trial combinations. With three pieces per combination, the plan needs 48 test pieces. Add retained references and any extra pieces required by the method.
This count is a planning example, not a required sample size. Three cuttings from one small fabric trial are not three separate spinning lots. State the number of source trials as well as test pieces. Repeated readings alone are not broad production evidence.
Keep care pretreatment explicit
New-fabric performance and performance after care are different claims. Washing, drying, or dry cleaning can alter the surface and the finish. Use the care route and cycle count in the brief. Record the state of the cloth at the start of pilling.
Maintain separate references for those states. If grading compares the final look with the starting look, use a washed reference for washed test cloth. Without it, care changes may be mixed with changes from the pilling test.
For a made-up trial, compare finishes F1 and F2 as delivered and after the same care. F2 may do better when new but lose that gain after care. Report that limit. Do not call the first gain permanent.
Keep the care sequence consistent. Pilling then washing asks a different question from washing then pilling. Either order may help a defined study. Match the order to the claim.
Check the care label and intended use before suggesting a process change. A treatment may improve the lab rating but change feel, size, colour, or care needs. Include those effects in the decision.
Control the visual assessment
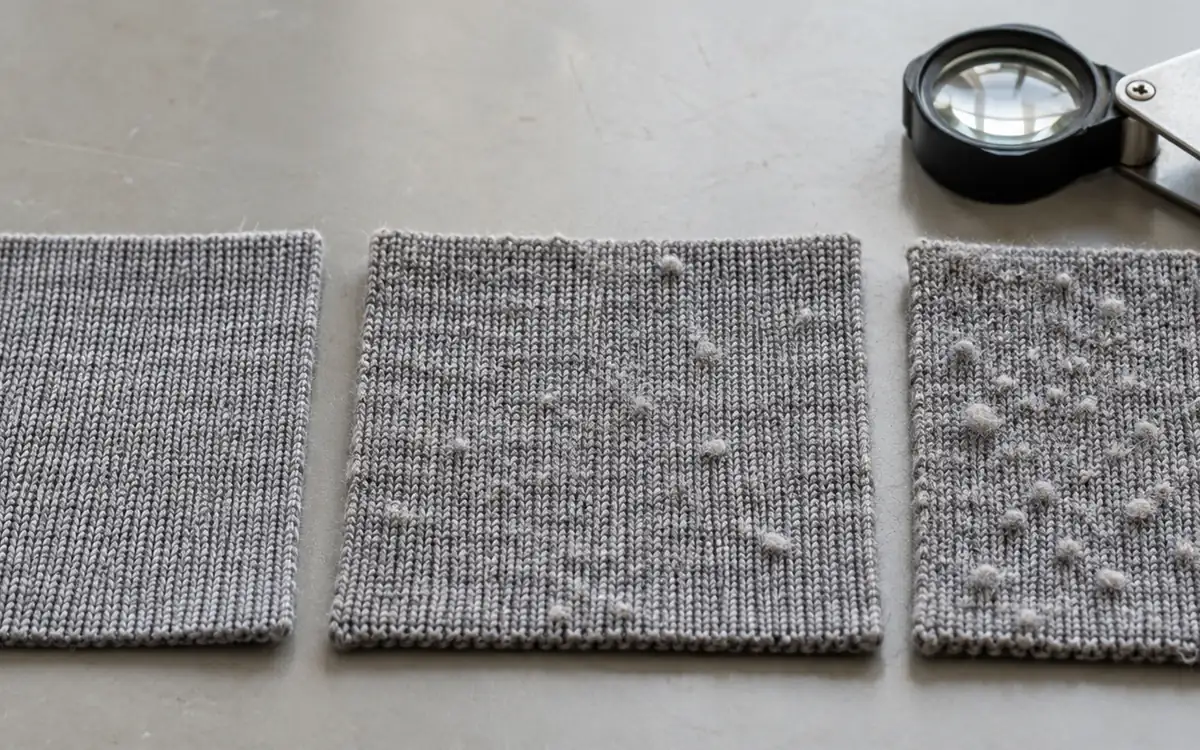
Use the specified assessment arrangement and reference standards. Light direction, viewing angle, background, sample direction, and reference state affect what the grader sees. A phone photo on an uncontrolled screen cannot quietly replace the method's visual comparison.
ASTM D4970/D4970M-22(2026) describes comparison with visual standards. Its arbitrary scale runs from 5 for no pilling to 1 for very severe pilling. The grade ranks the look. It is not the percentage of fabric still intact.
Use the reference set required for the fabric and method. Pills may be less obvious on dark textured cloth than on pale smooth cloth. That does not permit use of an unrelated reference photo. Agree how to grade before choosing between suppliers.
For internal development, hide the route names from assessors where practical. The label improved finish may shape expectations before grading. Use neutral sample codes during assessment. Keep the key to those codes in the trial record.
Retain independent ratings when several assessors are used. Follow the method's rule for the reported result and any rounding. If discussion is allowed to settle a dispute, keep the first readings. Record why the team chose the final grade.
Use assessor agreement as a diagnostic
A small internal agreement check can reveal grading problems. Use the same exposed cloth, references, and viewing conditions. Hide the sample identities. The exercise must not train graders to favor a preferred supplier.
Suppose two graders each rate 12 test pieces on their own. They agree on eight. They differ by half a grade on three and by one grade on one.
Exact agreement = 8 ÷ 12 × 100 = 66.7%.
Agreement within half a grade = 11 ÷ 12 × 100 = 91.7%.
These two figures describe different questions. Neither gives a full measurement-uncertainty statement or an official pass rule. Do not use the second figure to hide the piece with a larger disagreement.
Review that specimen against the reference and the defined assessment conditions. The cause may be texture, light, a damaged reference, or how the grader reads the surface. A fresh blinded review can test a controlled correction. Focus on consistent grading. Keep this exercise separate from bulk acceptance.
Interpret a rating sequence instead of one endpoint
Consider an invented trial with three assessment stages. The stage names below avoid implying a particular standard programme.
Fabric | Early stage | Middle stage | Final stage |
|---|---|---|---|
A | 4 | 3 | 4 |
B | 4–5 | 4 | 3–4 |
C | 4 | 4 | 4 |
At the last stage, A and C share grade 4. Their histories differ. A showed a worse appearance at the middle stage. That later gain may fit with pill wear-off. The table alone does not prove the cause. Inspect the pieces and keep the earlier record.
If the example requirement is at least grade 4 at every listed stage, only C meets it. If the specification names one endpoint, apply that rule. Keep other readings for development. Do not rewrite the rule after a preferred sample fails.
The change from grade 3 to grade 4 is one grade step. It should not be described as a 33.3% improvement in pilling resistance. The grade numbers do not have that ratio meaning. If the method requires an average, report it as directed. It still is not a linear measure of physical damage.
Compare laboratories before declaring a material shift
ASTM D3512/D3512M-22 warns against using its random tumble method for acceptance testing. Precision between labs is poor. The current Martindale method also cautions about acceptance testing. Keep these limits in mind when a buyer and supplier dispute a small grade gap.
First compare the method, edition, care pretreatment, and test stage. Check mounting, wear materials, and grading references too. Box and Martindale results are not repeat readings of one exposure.
For a dispute, divide a matched cloth set between labs under an agreed plan. Balance locations and finish states. Do not send one lab edge cloth and the other centre cloth. Sample variation may then look like lab bias.
Examine both the exposed specimens and the ratings where the investigation permits. If two labs produce similar surfaces but different grades, check grading. If the surfaces differ, check preparation and exposure. This helps avoid repeat tests that never address the cause of disagreement.
Improve the fabric through a controlled trial
The whole material system affects pilling. Yarn surface, fibres, cloth structure, and finish all matter. Change a defined part in a trial. Then test the finished cloth.
Woolmark's design guidance points to fibre length, twist, and fabric cover as relevant choices for wool. Use these as trial directions for the relevant material. More twist or cover may change softness, stretch, mass, or look. A higher setting is not always the best choice.
ApparelDiary's yarn hairiness guide explains the upstream surface measurements. A lower hairiness number tells you about the yarn. It does not prove a fabric pilling grade. Test the planned cloth structure and finish route.
For an original two-factor trial, compare yarn Y1 and Y2 with finish F1 and F2. Produce all four combinations under matched construction conditions. If only Y2 with F2 improves, study that pair further. It does not prove that either change works alone on every fabric.
Test promising combinations after the required care. Check the other product needs, including strength, dimensions, colour, and handle. A treatment may remove too much material and leave a cleaner surface. The cloth could then fail another property. Apply the full brief.
Check whether the visible pills include outside fibres
A pill on a garment can contain material from more than one surface. Check whether pills look like the garment yarns or contain contrast fibres. A dark pill on pale cloth is a clue. Its colour alone does not identify the source.
Control the lab environment and test materials. Foreign fibres must not create a hidden difference between trials. Some methods require added material. Record that addition. Do not call every loose fibre contamination.
For field samples, preserve pills with their garment location and inspect them alongside unused fabric. Microscopy or suitable fibre analysis can test a possible source. A different fibre does not alone show when it arrived. Nor does it prove acceptable pilling. It may explain why the contrast looks worse than on the lab piece.
This distinction is useful when a complaint appears only with one lining, outer layer, or contact surface. An extra contact trial can test that pair. Keep the original standard result unchanged in the record.
Link the result to garment use without claiming a lifespan
A fabric test creates a defined contact and motion. A garment encounters varied contacts at sleeves, side panels, bag straps, and other locations. The lab result helps screen cloth. It does not convert directly into months of wear.
Use a structured wear trial when the product risk calls for one. Record garment design, size, use conditions, care, and assessment locations. Link the lab result to the wear trial. The team can then learn whether its test separates good and poor choices for that product.
Do not merge seam damage with fabric pilling. ApparelDiary's seam abrasion guide covers exposed stitching and construction decisions. A smooth body cloth does not prove that a raised seam will resist its contacts.
If wear reports conflict with a pass, keep the garments and inspect the actual change. It may involve another contact, a different process state, or another defect. Use that evidence to refine the test plan. Do not dismiss either side.
Frequently asked questions
Can grade 4 from two methods be compared directly?
The grade alone does not prove equal results. Compare method, program, care state, references, and grading. Use matched samples to establish a link if the business needs to change methods.
Why can a later rating look better?
Pills may wear off as testing continues. Other surface changes may also affect appearance. Keep the full sequence and inspect the pieces before deciding on a cause. A cleaner late surface does not erase an earlier poor result.
Does a strong fabric always pill less?
No. Breaking strength and pilling appearance measure different behaviour. Pill formation and wear-off depend on the materials and test action. Test each required property with its own method.
Can a photograph replace the physical reference?
Use the reference type allowed by the method. A specified photo standard is different from an uncontrolled image sent in a message. The light, scale, image quality, and viewing conditions must suit the required grading.
Write a specification that another laboratory can use
State the fabric and finish, method and edition, care pretreatment, exposure stages, assessment route, and acceptance rule. Keep each piece's rating and relevant surface notes. Mark departures from the method. Explain how the final result was reached.
Then use the result for the question it can answer. A controlled pilling test compares cloth under a defined action and guides development. It supports a decision that another lab can repeat for the same product. Show clear evidence when a trial improves the surface. State the limits when it does not.
References
Gintis and Mead, 1959: the mechanism of pilling.
James Heal: pilling mechanisms and distinction from snagging.
ISO 12945-1:2020: pilling box method.
ISO 12945-2:2020: modified Martindale method.
ISO 12945-3:2020: random tumble method.
ISO 12945-4:2020: visual assessment.
ASTM D3512/D3512M-22: random tumble method and precision limitation.



Discussion0
Loading the discussion…