
A clean fabric surface needs controlled treatment
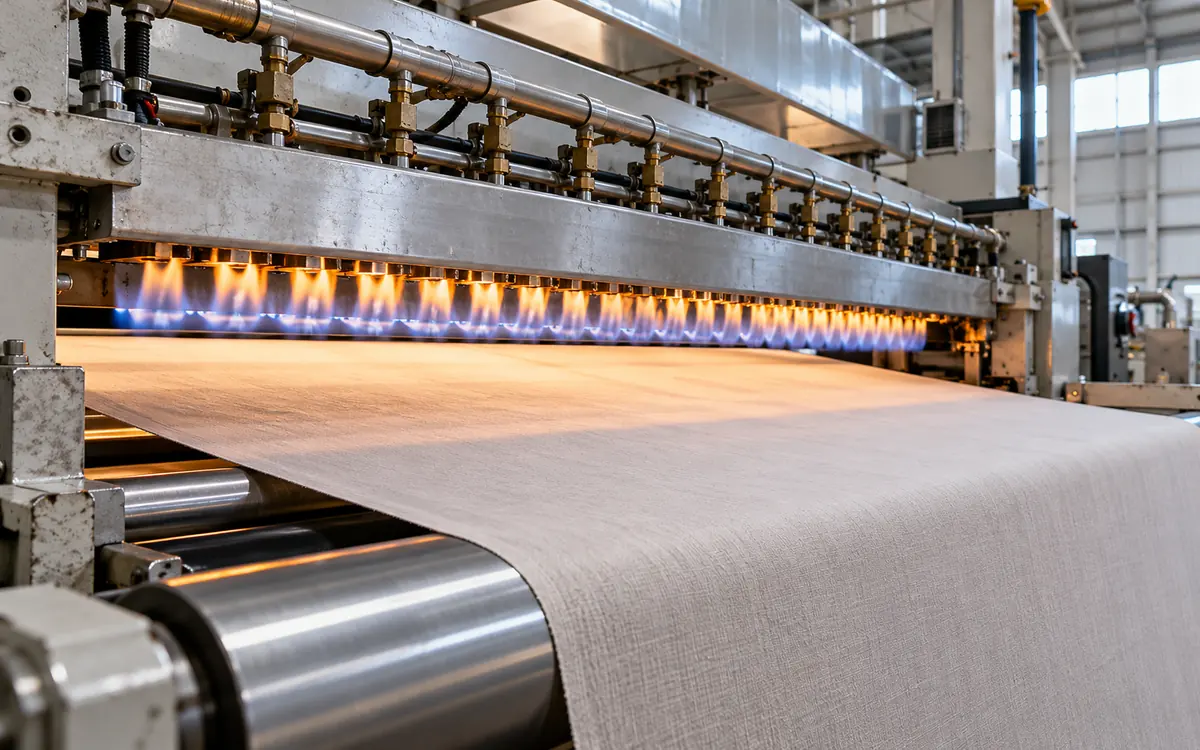
Singeing uses controlled heat to remove fibres that project from a fabric surface. In gas singeing, the fabric passes a burner arrangement. The arrangement must suit its construction and fibre content. The aim is to remove unwanted surface hair while preserving the cloth beneath it.
That balance matters. Smoother fabric may still have faults. Check for shade change, harsh points, weak areas, and damaged edges. Inspect the surface and test fabric performance. Follow the cloth through the next wet process too.
This guide focuses on fabric singeing. For yarn hairiness tests and causes in spinning, see ApparelDiary's yarn hairiness guide. The calculations below use teaching examples. They do not give burner settings or operating instructions.
Define the surface that the product needs
Begin with the intended fabric appearance. A crisp woven surface and a deliberately raised or soft pile surface have different goals. Removing every visible projection may erase the effect the customer wants. Set a target that suits the product.
Osthoff-Senge makes singeing machines. Its description covers heat treatment of fibres not secured within the yarn or cloth. See its technical brochure. Choose the treatment for the required surface. Consider the later process route too.
Write the target in a form that can be checked. It might name an approved surface reference and prohibit visible heat marks. Add required strength and appearance after dyeing. State which fabric face each requirement applies to.
Do not approve a production route from an attractive photograph alone. The photograph may show one small area that was treated well. The decision concerns the defined lot and its intended use.
Identify which face needs treatment
A fabric may have different yarn exposure on its two faces. The garment's outer face may need a different surface effect from its reverse.
Mark face and back before the trial. Record the direction of travel and the active burner positions. A note saying “two burners” is incomplete. Did each face receive one treatment? Or did one face receive two?
Use a simple treatment map:
Machine position | Fabric face presented | Status in the trial |
|---|---|---|
Burner position 1 | Face | Active under approved setting A |
Burner position 2 | Back | Active under approved setting B |
Later position | As threaded | Inactive or separately documented |
The map must match the actual machine. Its purpose is traceability, not to prescribe an arrangement.
Match the method to the fibre and construction
Fibre content affects the thermal response. Fabric mass, openness, yarn structure, and surface finish also belong in the material description.
A thermoplastic fibre can respond differently from a cellulosic fibre. A treatment proved for one blend may not suit another. A new construction also needs review. Speed alone cannot justify a process transfer.
The Woolmark Company's fabric finishing guide discusses how singeing geometry can vary. It also describes cooled supports for fabrics that are sensitive to heat. It also places singeing within a larger cleaning and finishing route.
Review each new fabric with the machine supplier or a qualified process specialist. Discuss the material and intended effect. Confirm the allowed operating range and fabric path. Agree on any required support or cooling.
Do not treat all flame arrangements as equivalent
Equipment can present freely guided fabric to the flame. Another arrangement supports it on a cooled roller. A third uses a tangential approach. The geometry changes how the flame meets the cloth.
The Osthoff-Senge brochure describes these alternatives. These options suit different fabric responses. Their settings cannot simply replace one another.
Keep geometry in the recipe record. Changing the fabric path or support arrangement changes the process. This remains true with the same displayed speed and burner setting.
Avoid describing one geometry as universally best. Check whether it suits the machine design and material. It must also deliver the required surface.
Clean and guide the fabric before the flame
The cloth should enter with a known surface condition and a stable path. Loose dirt or debris can confuse a trial. An uneven fabric path can do the same.
Pre-cleaning is a distinct machine function. Fourwents lists brushing and beating units with dust collection. It also lists post-cleaning units. See its singeing preparation equipment.
Inspect the entry system against the approved setup. Confirm that the cloth spreads and travels as intended. Mark folds, edge damage, or contamination found at entry. Then assess what the flame stage changed.
Do not add heat to compensate for poor entry control. Check the input surface and fabric path first. Do they match the conditions used to approve the route?
Keep the cleaning comparison fair
In a development trial, sample three points where safe arrangements allow. Take material before cleaning and after the flame stage. Take another sample after the defined post-cleaning stage.
These samples answer different questions. The first shows the incoming condition. The second shows the immediate treatment result. The third shows what the next operation will receive.
Keep more than just the final sample. Otherwise, the source of loose residue may be unclear. Was removal incomplete, or did later handling add the residue?
Label the stages clearly. A specimen described only as “after singeing” can mean different points on different machines.
Understand the interaction between speed and exposure
The main control variables form a package. Denge Kimya's textile pretreatment booklet lists several singeing controls. These include fabric speed, flame intensity, and burner position. Burner-to-fabric distance and gas pressure also matter.
Speed changes the time a fabric point spends in a zone. It does not describe the full heat treatment. Geometry and heat transfer still matter.
For this simple example, assume an effective exposure length of 10 mm. Measure it along the travel direction. At a line speed of 90 metres per minute:
Speed = 90 ÷ 60 = 1.5 metres per second
Nominal exposure time = 0.010 ÷ 1.5 = 0.0067 seconds
That is about 6.7 milliseconds. At 60 metres per minute, the corresponding calculation gives 10 milliseconds.
These are invented geometry and speed values. Use the equipment and process details to assess real flame exposure. A ruler measurement alone is not enough. The example shows why speed matters even in a short treatment zone.
A second pass is a new treatment
If a surface fails, it may be tempting to run the fabric again. The second pass does not start with the original material. It starts with a surface and fabric that have already received heat and handling.
Assess repeat treatment as a separate route. After the full sequence, check surface, shade, and strength. Test any other affected requirement too.
Do not assume that two mild passes equal one stronger pass. Their total nominal exposure time may match. Yet cooling, cleaning, and surface state between passes can differ.
Record whether the extra pass treats the same face, the reverse, or both. That record is needed to repeat a successful repair reliably.
Distinguish a process signal from a fabric result
A temperature signal helps control the machine. It does not measure every aspect of singeing quality.
Fourwents describes its controls in the Singe-O-Matic control system. These include non-contact fabric temperature sensing and machine interlocks. Use such signals within the machine's defined control system.
Keep the sensor location, setup, and maintenance under control. One reading describes one point. It cannot prove the intended treatment reached every part of the fabric.
Use the signal to detect or manage process changes. Then verify the fabric. A stable display with a visible untreated stripe still needs investigation.
Likewise, a good surface sample does not justify ignoring an abnormal machine signal. Both forms of evidence matter, for different reasons.
Plan a trial that can answer one clear question
Use matched fabric for the first trial. Compare the approved reference route with one proposed change. Use enough material to examine steady running. Include the key transitions too.
Keep the input lot, previous preparation, and later processing consistent. A trial may use a different yarn lot or dye route. Record that change. Limit the conclusion to what the comparison can prove.
Choose the question before changing settings. For example, test an approved alternative geometry on this construction. Can it give the same surface with less damage? That is clearer than asking which setting “looks best.”
Set acceptance requirements before viewing the trial results. Define unacceptable heat marks and defects. State whether they are forbidden at every sampled location.
Preserve evidence through the next wet stage
Some surface differences become easier to see after washing or dyeing. Use matched trial samples for the next route. Keep the conditions the same.
Keep the samples linked to their singeing settings and length positions. A shade line may appear later. It is harder to explain if its location cannot be linked to the process record.
Use the later result to assess the route, not to rewrite the history. A trial may have an abnormal stop or failed machine check. Keep that event in the record. One acceptable dyed sample does not erase it.
Inspect surface quality without hiding the tradeoff
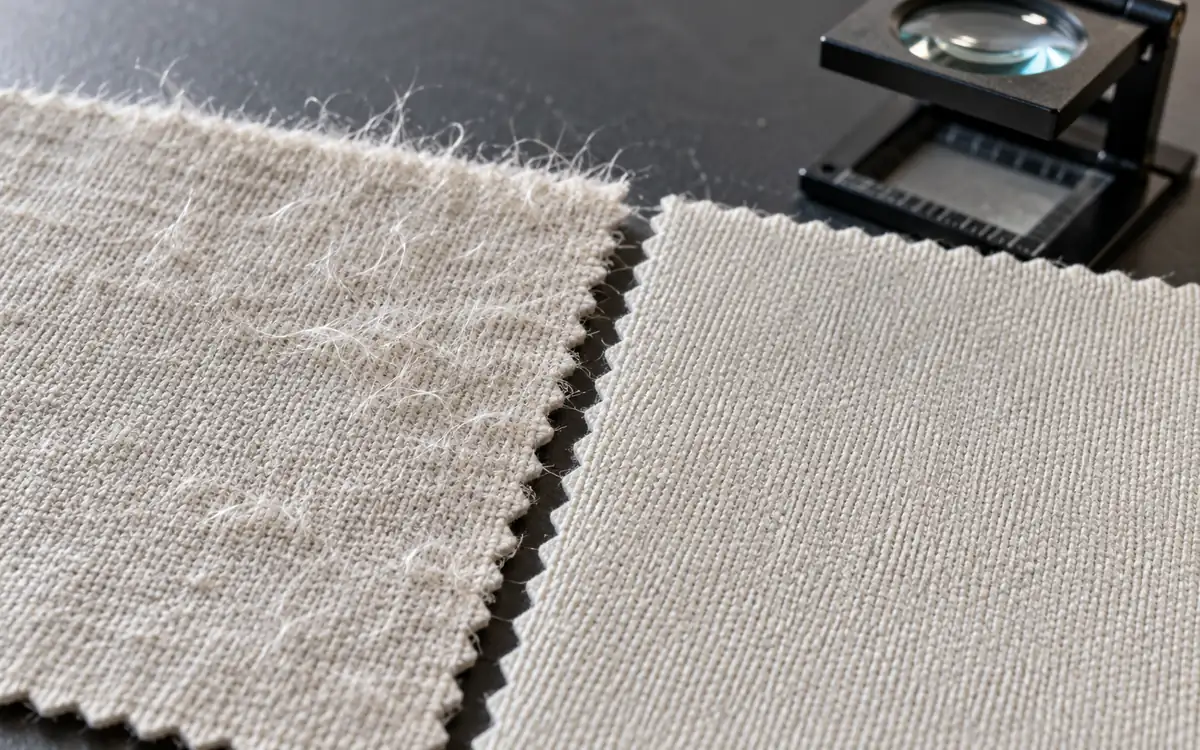
Compare the treated face with a retained reference. Keep lighting and viewing conditions fixed. Look for residual fuzz, stripes, patchiness, harsh points, and local thermal marks.
Keep the face, direction, and specimen state consistent. Examine several predefined positions across the width and along the trial.
Record the defect type and location rather than one vague “singeing grade.” A small dark spot and a broadly fuzzy surface may lead to different actions.
A house grading scale needs physical reference samples. Write down how to assess them. Do not call the scale an international standard unless it follows one.
Use microscopy for a narrow question
Magnification helps compare remaining fibres, hard points, and residues. Ask a narrow question. Does the harsh feel come from a surface feature changed by treatment?
Keep the images linked to the fabric location and processing stage. Include representative fields, not just the most dramatic one.
Microscopy supports the investigation. It does not prove that the full lot meets a performance limit. Nor does it prove which machine part caused the feature.
A result may be disputed. Agree on the comparison method with the lab or customer before relying on images.
Check strength and later surface performance
The surface should improve without unacceptable loss of fabric performance. Choose strength tests that match the construction and buyer requirement.
Keep the method, direction, sample condition, and processing stage consistent. Compare matched input and treated specimens where the investigation needs a treatment effect.
A clean new surface does not prove resistance to pilling in use. ISO provides a separate modified Martindale method for pilling, fuzzing, and matting. Use the agreed product test when that property is part of the claim.
A trial may meet its immediate surface target. It can still fail the final product requirement. Report both findings. Neither replaces the other.
An example of a useful decision
Imagine three hypothetical routes for a woven fabric. The project requires the approved surface appearance. It also requires a breaking force of at least 500 N. Use the project's chosen strength method.
Route | Surface assessment | Breaking force | Trial decision |
|---|---|---|---|
Current reference | More fuzz than the new target allows. | 548 N | Surface improvement needed. |
Candidate A | Matches the approved surface reference. | 526 N | Meets these two trial requirements. |
Candidate B | Cleaner than the reference. Harsh points remain. | 492 N | Reject under the stated rule. |
Candidate B should not be selected because it removes the most visible hair. Its force result and harsh points matter to the product.
The example uses single summary values to show the decision logic. For real release, use the agreed specimen count. Assess variation and follow the reporting rules.
Diagnose defects from their spatial pattern
The pattern often helps choose the next inspection. Preserve the fabric's width position and direction of travel when marking defects.
A narrow lengthwise stripe may suggest a persistent across-width difference. A mark repeating at a regular interval may point toward a rotating contact. Neither observation proves the cause without a check.
For a hypothetical roller diameter of 0.42 metres:
Circumference = π × diameter = 3.1416 × 0.42 ≈ 1.32 metres
Marks may repeat near that spacing. If so, check the relevant roller's surface and contact history. Follow the approved maintenance procedure. The agreement is a clue. Other causes can share a similar interval.
Do not inspect moving or hot equipment by reaching into the line. Fault investigation must use the site's isolation and safe-access procedures.
A practical fault table
Fabric observation | Evidence to collect first | Useful next comparison |
|---|---|---|
Fuzzy stripe along the length | Record width position and burner or guide history. | Compare matched surfaces before and after an approved repair. |
Dark or yellowed region | Check input appearance and process events. | Compare an untreated reference with defined treated stages. |
Harsh points on a blend | Check fibre content and the magnified surface. | Run a matched trial with a supplier-approved alternative treatment. |
Edge damage | Check entry condition and guidance. Mark the affected edge. | Compare fabric before the range and after each accessible stage. |
Repeating contact mark | Measure mark spacing and roller dimensions. | Compare defect spacing with machine contact locations. |
Loose residue after treatment | Check post-cleaning and stage samples. | Compare material just after treatment and after cleaning. |
Treat the table as an investigation guide. Avoid diagnosing a fault from its name alone.
Manage stops and transitions explicitly
A steady operating recipe does not describe a stop, fabric break, or restart. Use the machine's designed protective response for these events. Follow the site's approved procedure.
Fourwents describes checks for gas and cooling water. Its controls also check burner position and machine faults. The exact logic differs by installation. Operators should know the response expected on their own equipment.
Never defeat a protective function to keep a trial running. Investigate the fault and restore the approved condition before resuming production.
Mark the affected cloth so that its disposition is deliberate. Identify the length that passed as the machine slowed. Mark the cloth affected by the event and restart too.
Calculate the review length from the event record
Take an example controlled restart. It runs at a recorded steady speed of 30 metres per minute. After 12 seconds, normal conditions return.
The corresponding length is:
30 × 12 ÷ 60 = 6 metres
This simplified calculation covers only that recorded interval. Other material may also be affected. Check acceleration, stopping distance, cloth in the path, and the machine's response.
Use the real time–speed record where speed varies. Normal production speed may not apply throughout the event. Do not use it to claim an exact length.
The goal is a traceable review length, not an arbitrary cut-off chosen after looking at the defect.
Compare fuel use per accepted fabric area
Fuel per hour is useful for equipment monitoring. It cannot judge treatment efficiency alone when speed or width changes.
For a steady fabric line:
Area rate = line speed × fabric width × 60
Use metres per minute and metres to obtain square metres per hour. Keep the width basis consistent.
Consider two hypothetical runs:
Measure | Run A | Run B |
|---|---|---|
Line speed | 80 m/min | 60 m/min |
Fabric width | 1.60 m | 1.60 m |
Area processed per hour | 7,680 m² | 5,760 m² |
Measured gas use | 18 m³/h | 15 m³/h |
Gas per 1,000 m² processed | 2.34 m³ | 2.60 m³ |
Run B uses less gas per hour but more per unit area. The calculation is 15 ÷ 5,760 × 1,000 = 2.60 m³ per 1,000 m².
When comparing meters or periods, use the same gas-volume conditions. Keep the energy-content convention the same too. State the pressure and temperature basis of each volume reading.
Include rejected sections
If 97.5% of Run A's area is accepted at this stage, accepted output is:
7,680 × 0.975 = 7,488 m²/h
Its gas use per 1,000 accepted square metres is:
18 ÷ 7,488 × 1,000 = 2.40 m³
Track reprocessed material carefully so the same output is not counted twice. A slower route may still be valuable if it improves accepted yield or meets a required appearance.
Keep this calculation separate from the quality decision. Lower fuel intensity cannot approve fabric that misses the product specification.
Give cleaning and maintenance a measurable purpose
A maintenance record should connect the work with the machine function and fabric evidence. “Burner serviced” gives little detail. Name the inspected part and its fault. Describe the repair and post-service check.
Follow the maker's maintenance instructions. These cover burners, cooling, guides, and cleaning units. Include extraction and protective systems too. Use qualified personnel for gas and electrical work.
After a relevant repair, process an approved reference. Compare its surface across the width. Check any affected control signal as well.
Retain the before-and-after evidence. Did the repair solve the observed problem? Or did it coincide with a different input lot? The evidence helps separate these possibilities.
Include the incoming fabric condition in that comparison. The reference may have been stored dry. The problem lot may arrive damp or with a different finish. Those runs cannot isolate the effect of maintenance. Record the differences. Repeat on matched material when needed.
The same caution applies to a change in usable width. A narrow trial fabric may leave the outer working zone untested. Check the full width needed for release. Cover the relevant fabric range too.
Base cleaning frequency on equipment needs and the actual load. A fabric that sheds more material may need more maintenance. The stable reference fabric may create less work.
Make the route reproducible across shifts
The production record needs more than a recipe name. Include fabric identity, face map, and geometry. Name active positions, speed, relevant settings, and approved limits.
Record entry and post-cleaning arrangements. Add key sensor checks and any break in steady treatment. Keep changes under revision control.
Make the limits clear to operators. They must know when a normal adjustment becomes a new process trial. That distinction protects both quality and the value of the trial evidence.
For a new construction, test the intended downstream route before release. Confirm the final surface and performance. Define which checks continue in routine production. State which extra checks a material or machine change will trigger.
Frequently asked questions
Does singeing remove all causes of pilling?
No. It changes the current surface. The finished fabric's response to wear or a specified pilling test is a separate property. Test that requirement directly when it is part of the product claim.
Can speed alone control the result?
No. Speed affects exposure time. Flame geometry, intensity, fabric presentation, and material also matter. Use the settings proved for the machine and fabric.
Should both sides always be singed?
The product and fabric construction determine the need. Identify the intended face and reverse requirements, then validate the actual treatment arrangement.
Is a second pass a safe automatic repair?
It needs its own approval. The cloth has already received heat and handling. Check repeat treatment against surface, shade, strength, and the other requirements.
Can fabric temperature replace inspection?
No. A temperature signal supports process control. The actual surface and product performance still need verification.
Approve the whole surface-treatment result
Effective singeing removes the unwanted surface hair that matters to the product. It also preserves acceptable fabric strength, appearance, and performance through the later route.
Keep a clear face map and control the geometry. Record events and check matched fabric samples. These steps make the result easier to repeat. They help the team investigate fuzz, stripes, or harsh points. Each burner adjustment can then follow evidence and leave a clear record.
References
Osthoff-Senge: Singeing technology and machine brochure.
The Woolmark Company: Wool fabric finishing facilitator guide.
Fourwents: Pre-treatment and fabric surface cleaning units.
Denge Kimya: Textile pretreatment booklet.
Fourwents: Singe-O-Matic process controls.
ISO 12945-2:2020: Modified Martindale pilling, fuzzing, and matting method.


Discussion0
Loading the discussion…