
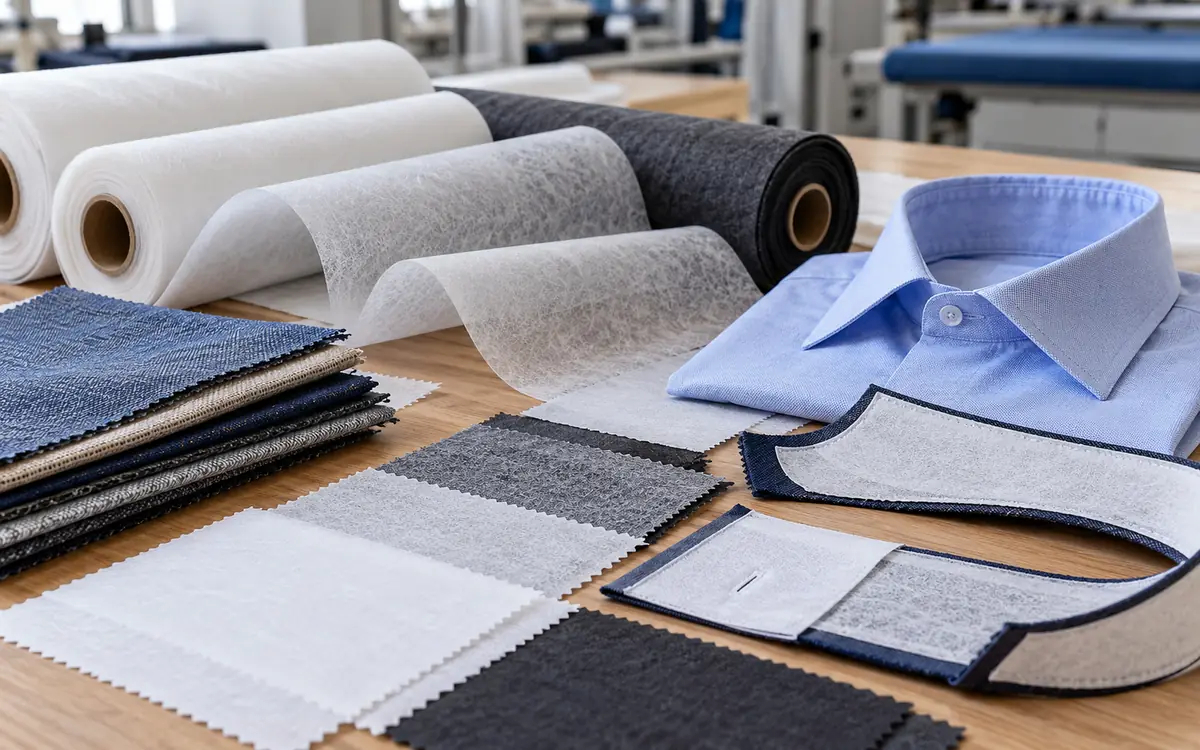
A fusible interlining can bond firmly and still be the wrong choice. It may make a blouse front too stiff. It may limit a stretch waistband or show through a dark shell. Another may feel ideal before care. Washing may then change its shape.
The task is to choose the right combined layers for a garment area. This joined material is the fabric composite. The shell, interlining base and adhesive must work together. Judge how they behave together. One material’s catalogue description cannot show that result.
Start with the garment’s required shape and use. Then choose candidates and test them with the actual shell.
Define the job the interlining must do
Write the support requirement before asking for samples. “Good quality interlining” leaves the job unclear. Does the garment need a crisp collar, soft front or stable button area?
A collar stand may need to hold a shape around the neck. A shirt placket may need enough support for clean buttonholes. A jacket front may need controlled drape across a broad area. A stretch waistband may need support without blocking movement.
Use a sample or a clear description to define the desired hand. People may read soft, firm and full in different ways. This judgement may drive the choice. If so, keep an agreed physical reference.
State the intended care route too. Identify the factory’s available fusing equipment. The shell must tolerate the heat needed to form the bond. If it cannot, reject that candidate. An attractive final handle cannot resolve this conflict.
Describe the garment area and shell construction in the brief. Add expected movement, care and appearance. These inputs narrow the search. Asking for a certain weight alone gives much less direction.
Understand the two parts of a fusible interlining
A fusible interlining has a supporting base. It also has an adhesive system that bonds with heat. The base contributes to shape, stretch, bulk and feel. Under suitable conditions, the adhesive bonds the support to the shell.
The stated fibre content may describe only the base. It may not identify the adhesive chemistry. Ask the supplier to make that distinction clear.
Check the stated mass too. Does it include the coating or only the base? Confirm the basis before comparing two products.
Freudenberg’s shirt-interlining range includes several fibre blends and both fusible and sew-in constructions. These products serve different uses. A cotton shell does not always need a cotton interlining.
Keep the full product code. It gives more detail than a broad label such as “polyester interlining.” Keep the construction, coating and intended care information attached to that code.
Compare woven, knitted and nonwoven bases
These categories describe structure, not a universal ranking.
Base structure | Useful selection questions |
|---|---|
Woven | Does its directional stability suit the garment shape and grain? |
Knitted | Does its extension and recovery suit the shell and intended movement? |
Nonwoven | Does its support, directionality and hand suit the local area? |
A woven base can provide defined support. Different woven products can still feel quite different. Yarn, weave, finish and coating all affect the result.
A knitted base can help retain flexibility. Knitted interlinings may stretch by different amounts in each direction. They may also differ in how well they return to their original length.
A nonwoven can provide useful support across many applications. Do not assume it has no preferred direction. Check the supplier’s cutting instructions. Compare the directions that matter in the garment.
Wendler’s interlining guidance links the choice to fabric construction and garment function. Appearance and care matter too. The base category is one input within that wider decision.
Read product examples as specific evidence
Two products from the same manufacturer can have quite different purposes.
Vlieseline H 609 is a light, soft knitted interlining. The maker describes it as bi-elastic and intended for elastic outer fabrics. Its listed mass is 41 g/m². The base is polyamide.
Vlieseline H 250 is a firm, stable nonwoven. It has a fully coated surface. Its listed mass is 62 g/m². It is intended for shaped areas such as cuffs and belts.
These examples show why “choose the lighter one” is not a complete rule. Their structures and intended functions differ. They also carry product-specific processing and care guidance.
One retail product may give hand-iron instructions. Do not transfer those settings to an industrial continuous press. One product’s care claim does not approve the finished garment. Use the data sheet as the starting point for the actual application trial.
Assess the shell before choosing support
The shell’s surface and structure influence both appearance and bonding. Record more than its fibre percentage and mass.
Check whether the reverse side is open, dense, brushed, coated or heavily finished. Note any surface treatment that may affect contact with the adhesive. Ask the mill and interlining supplier about known restrictions.
A loose construction may allow a coating pattern to become visible. A fine, smooth surface may reveal stiff spots or impressions. A more textured fabric may hide them.
Use production-representative shell material. A development swatch may differ from bulk fabric. Finish, dyeing or compaction may have changed. A fabric change may look minor in the record. It can still alter the fused result.
Include colours that present a real visual challenge. A white support behind a dark or sheer shell may change its appearance. A pale shell may reveal a darker support or adhesive dots. Test the relevant colour combination. Do not rely on one mid-tone sample.
Match movement by direction
A stretch shell does not require maximum stretch from every supported area. It requires the right movement for the design.
A waistband may need to extend around the body. It may need to stay stable vertically. The knit around a placket may move. The placket may still need to resist lengthwise distortion. A collar may need a stable edge with enough flexibility to sit comfortably.
Mark the shell and interlining directions before cutting trial pieces. Test the intended alignment and keep it consistent across comparisons.
Consider an example comparison under one defined load. An unfused shell extends from 100 to 118 mm. Its extension is:
(118 − 100) ÷ 100 × 100 = 18%.
Candidate A extends 4% under the same defined comparison. The fused composite is observed to extend 6%. These trial results are made up. They are not a formula for predicting composite stretch.
Measure the composite itself. Bonding changes how its layers share movement. Do not calculate its extension by averaging the two separate percentages.
Check recovery as well as extension
A material that stretches easily may not return well. Its length may stay changed after stretching. The garment can then grow or lose shape in use.
Define the comparison load for the trial. State the hold time and recovery period. Use a recognised method when formal performance testing is required. An internal comparison should still follow one documented procedure.
Suppose a marked composite starts at 100 mm. After the agreed load and recovery sequence, it measures 102 mm. Its residual extension is 2% of the original length.
Another composite may stretch less during loading. It may return to 100.5 mm. Whether that is preferable depends on the required comfort and shape.
Record extension and residual change separately. A single comment such as “good stretch” hides this difference.
Check the garment area as well. A small flat strip may not reveal what happens around a curved waistband, a buttonhole or a seam. The strip helps compare materials. The sewn part confirms the intended function.
Choose hand and shape on the bonded composite
Handle the shell alone, each interlining alone and each fused combination. This makes the source of a change easier to understand.
Assess drape, bending and surface smoothness. Check how the piece returns after gentle handling. Compare samples at the same size and in the same direction.
A large fused front may feel much stiffer than a narrow strip. Use a specimen large enough to represent the garment area. For collars and cuffs, make the actual folded and sewn shape.
Do not let the strongest bond automatically win. Excessive stiffness can be a product failure even when adhesion is excellent. A soft feel is not enough either. The bond must survive the agreed care.
Use an agreed reference and clear comments. “Too board-like at the fold” gives more guidance than “bad hand.” “Collar point collapses after care” identifies a different problem.
Calculate added mass on the correct basis
Mass helps compare bulk and handling. It cannot stand for all performance.
Suppose an example shell weighs 130 g/m². Candidate A is a coated interlining at 45 g/m². Candidate B weighs 65 g/m². Both quoted masses include their adhesive coating.
Ignoring small process-related mass changes, the combined areal masses are:
Composite A = 130 + 45 = 175 g/m².
Composite B = 130 + 65 = 195 g/m².
The difference is 20 g/m². For a supported area of 0.035 m², Candidate B adds:
20 × 0.035 = 0.70 g more than Candidate A.
That is a small mass difference in one piece. It does not predict the difference in stiffness. The coating pattern and structure also affect bending. Their effect may be greater than the mass difference suggests.
One supplier may quote only the uncoated base mass. Add the coating data before making the same comparison. Otherwise the table compares unlike quantities.
Select adhesive performance from the actual product data
Broad resin names can help technical discussions. They do not establish one care or fusing rule for every product. Formulation, coating construction and application all matter.
Ask for the supplier’s recommended processing range and care suitability for the exact product. Ask what the values describe. Are they adhesive-interface measurements, machine settings or another measured point?
Do not assume that every product in a resin family needs the same temperature. Freudenberg’s published information on its 46xx shirt range describes a specific lower-temperature bonding application. This evidence applies to the named range. It is not a setting for all cotton interlinings.
Check whether the adhesive system suits the shell finish and required care. The supplier may need fabric samples to advise on the choice. Provide the actual material and its finishing history.
The words “washable adhesive” leave too much unclear. They cannot support the choice alone. State the relevant care temperature, chemistry and process through the agreed testing route.
Look for a usable heat window
The shell must tolerate enough heat for the adhesive to form the required bond. Selection fails if those needs do not overlap.
Consider an example shell. Its approved appearance trial shows damage above a measured interface temperature of 140°C. The supplier confirms a 145–155°C trial range for Candidate A. This range applies to the proposed use.
There is no overlap in those stated ranges. Choosing a setting of 142°C does not solve the problem. The adhesive may receive too little heat. The shell may still face a risk of damage.
Candidate B has a proposed range of 128–138°C. This gives a possible overlap. Test it on the shell and equipment to confirm it. Time, contact and pressure also affect the result.
These invented ranges demonstrate selection logic. They are not recipes.
At this stage, the aim is to reject combinations that cannot work under realistic conditions. First, build a credible material shortlist. Then map the press and confirm its operating range during process validation.
Treat appearance defects as selection evidence
Several visible changes can reveal a poor material combination.
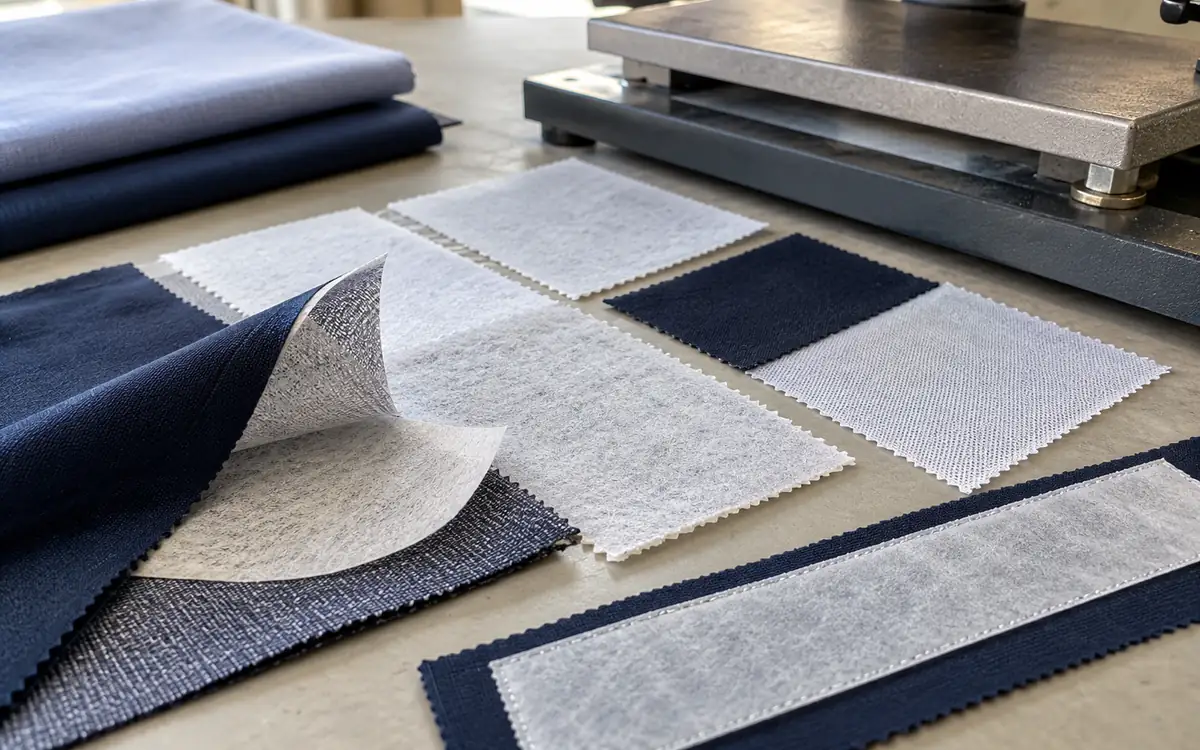
A support may show through a thin shell. A coating pattern may become visible. A bonded area may look darker, shinier or flatter than the surrounding fabric. A regular pattern in the two layers may create an unwanted visual effect.
Wendler’s guidance describes moiré. It can arise when the fabric and interlining structures interact. A different structure can therefore be a useful candidate when that pattern appears.
Do not change cutting angle without checking the resulting support and stretch direction. A new cutting angle may reduce a visible pattern. It can also change how the garment moves or holds its shape.
Compare fused and unfused controls under the same lighting and viewing position. Examine the face after cooling and after the required care. A defect that becomes visible only at an angle can still matter in a finished garment.
Compare dimensional change before blaming adhesion
The shell and support may change dimensions differently during fusing or care. That can create distortion even when the bond remains present.
Assume separate marked specimens begin at 300 mm. After a defined treatment, the shell measures 294 mm and the interlining measures 297 mm.
Shell reduction = 6 ÷ 300 × 100 = 2%.
Interlining reduction = 3 ÷ 300 × 100 = 1%.
The difference is one percentage point. This flags a possible mismatch. It does not predict the exact result after bonding. The layers constrain one another in the composite.
Measure the fused combination and inspect its shape. Fusing may cause some changes. Later care may cause others. Separate them where that distinction matters.
Avoid prescribing an extra shrinkage allowance as the first remedy. The composite may distort in one area. A larger pattern may leave that defect in a different size.
Include the full care route in selection
A product must retain its function after the care the garment will receive. The initial appearance is only one stage.
Choose representative care conditions through the buyer’s requirements and applicable methods. Include the actual drying or professional-care route where relevant. The garment may also be tumble dried or pressed. If so, washing alone is not a complete assessment.
ASTM D2724 covers bond strength in bonded, fused and laminated apparel fabrics. Testing can take place before or after laundering and drycleaning. Its scope supports checking adhesion after relevant exposure. It does not set one acceptance value for every garment.
Assess the shape, handle and face appearance alongside the bond result. A composite can remain bonded yet become too stiff, wrinkled or visibly marked.
Keep an unexposed reference. Without a reference, gradual change can be hard to judge from memory. This matters when several candidates look similar at the start.
Build a shortlist with clear rejection gates
Use a small number of technically plausible candidates. A large collection of anonymous swatches often produces more opinions than useful evidence.
Record each candidate’s product code, base structure and coated mass. Add direction, care data and proposed process range. Mark the shell lot and colour used in the trial.
Apply essential requirements before preference scoring. A candidate may fail the required care test. A high initial hand score cannot make it pass.
A hypothetical collar comparison might look like this:
Criterion | Candidate A | Candidate B | Candidate C |
|---|---|---|---|
Initial collar shape | Acceptable | Too rigid | Acceptable |
Face appearance | Acceptable | Acceptable | Acceptable |
Required care result | Local bubbles | Stable | Stable |
Neck comfort assessment | Acceptable | Poor | Acceptable |
Selection outcome | Reject this combination | Reject for this design | Advance to process validation |
The table does not prove Candidate C works for every shell or colour. It identifies the candidate that meets the stated gates in this trial.
Record why each option was rejected. This helps a later buyer or factory understand the decision. A lower unit price does not remove the reason for rejection.
Select support by garment area
One garment may need more than one interlining. Using one product everywhere may simplify purchasing. It can also harm shape or comfort.
A collar stand, collar leaf and cuff can have different support needs. A jacket chest, lapel edge and pocket opening also serve different functions.
Map the areas before the final material decision. State whether the design uses full-area support, a narrow reinforcement or a shaped piece. The supported area affects drape and the visibility of edges.
Where two interlinings overlap, assess the combined thickness and stiffness. A good result from each material alone does not establish the behaviour of the overlap.
Keep the number of products manageable. Do not force one material to perform jobs that need different properties. The useful balance is enough variation to meet the design, supported by clear cutting and placement information.
Check edge transitions and small details
The boundary between fused and unfused fabric can reveal a poor support choice. A sudden stiffness change may show as a line or alter the way the part bends.
Make trial pieces with the intended interlining shape and seam allowance. A full rectangle cannot show the effect of a shaped edge around a neckline or pocket.
Inspect buttonholes and folds after the support is added. Confirm that the local structure is stable enough without becoming too bulky. Check whether the interlining edge lies where it could create an unwanted ridge.
A light shell may benefit from less support area or a different edge position. Test those changes only if the design still gets enough reinforcement. Reducing coverage to hide a mark may weaken the area that needed support.
Record the final placement with the material choice. An approved product used in a different shape or position is a changed construction.
Avoid false savings in material substitution
A cheaper interlining can raise cost if it creates slower handling, more repair or an unacceptable garment. A more expensive one is not automatically better.
Compare cost at the same finished performance. Include the material route that passed the trial, not an idealised process the factory cannot hold.
For a substitute, ask what changed. Check the base, coating, mass, width and colour. Review the care claim and supplier process too. A matching fibre label is not enough to prove equivalence.
Recheck the characteristics affected by the change. If a new base has different stretch, repeat the movement assessment. If the coating or processing range changes, repeat the relevant bonding and care work.
Use ApparelDiary’s trim approval and substitution process to connect these technical findings with the wider material release. Keep the interlining record specific to the shell and garment use it represents.
Hand over a complete selection record
The selected material should reach production with more than a swatch and a price.
Provide the exact product code and approved shell combinations. Add cutting direction, supported areas and the supplier data sheet. Include the appearance reference and the care evidence that justified the choice.
Record any restrictions. A product may be suitable for one colour but show through another. It may support a collar well while being too firm for the front.
State that the factory must validate the actual fusing process. Material selection establishes a plausible, tested combination. Production validation shows how the equipment can make it consistently.
If the shell finish, interlining or care requirement changes, review the affected evidence. The earlier selection remains useful history. It cannot automatically show that a changed combination will work.
Frequently asked questions
Should the interlining always have the same fibre as the shell?
No. Fibre matching alone does not establish compatibility. Shape, structure, movement, adhesive performance and care are more useful decision inputs.
Is a knitted interlining always best for a stretch garment?
It may be a useful candidate, but the garment area may need controlled stability. Measure the composite in the required directions and check recovery.
Can the heaviest candidate be assumed to give the most support?
No. Mass, structure and coating affect the result in different ways. Compare the bonded composite and the actual garment shape.
Does a strong peel result prove the choice is right?
No. The garment also needs acceptable hand, appearance, movement and care performance. Adhesion is one necessary part of the decision.
Can one successful colour approve every shell colour?
Only where evidence supports that extension. Different colour depth, transparency or finishing can change appearance or bonding. Test the combinations that create distinct risks.
Choose the composite the garment needs
Fusible interlining selection joins a design requirement with a material system. The right choice provides the required support while preserving the shell’s useful qualities.
Compare identified candidates on actual shell fabric. Check the intended movement and care. Inspect the sewn shape. Then pass a clear selection record into process validation. This moves the choice beyond a catalogue description. Production gains evidence for the garment decision.
References
Freudenberg: Interlining options for shirts
Wendler: Interlining selection and compatibility guidance
Vlieseline: H 609 product data
Vlieseline: H 250 product data
Freudenberg: Product-specific lower-temperature shirt interlining


Discussion0
Loading the discussion…