
Start with the mark, then change the process
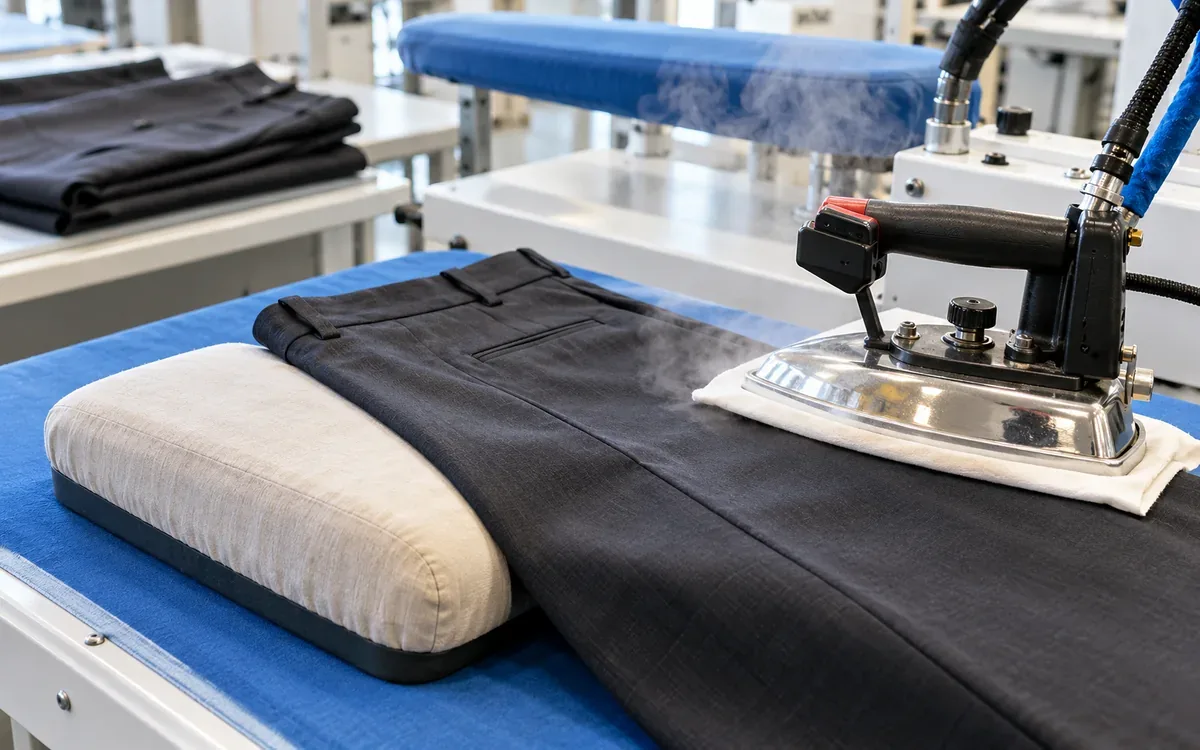
A dark trouser leg looks smooth on the pressing table. Under a low light, the pocket bag appears as a bright rectangle. More steam removes a crease beside it, but the rectangle remains. The operation has improved one feature while harming another.
Garment pressing defects need a diagnosis before they need another pass. A shiny patch may involve surface flattening. A brown patch may be heat damage. A dark wet ring may come from condensate, contamination, or a fabric response to moisture. Treating all three as a temperature problem wastes samples and can make the damage worse.
Control the pressing operation as a whole. Include the garment, iron or press, and support surface. Also track moisture, contact time, force, and cooling. Each interacts with the others. A setting that works on a flat panel may fail over a thick seam.
This guide covers final garment pressing and local touch-up. It provides a way to develop and troubleshoot a pressing method. All numerical examples are hypothetical. They show how to reason from observations; they are not approved settings for a fabric or machine.
Name the defect precisely
Inspect the garment before pressing. Mark any existing crease, shade band, seam ridge, or moisture spot on a simple sketch. Keep an unpressed sample from the same material for comparison. Without that reference, a sewing defect may be blamed on finishing.
Examine the face under both normal viewing light and light from a low angle. Move the garment rather than changing several lights at once. Note whether the mark changes strongly with viewing direction. A surface reflection can look like a colour difference in one photograph.
Use the same inspection conditions when comparing trials. Include the reverse side, since a residue or a scorched backing may explain a face defect.
Observation | First question | Useful comparison |
|---|---|---|
Bright area that changes as you move | Has the surface been flattened or polished? | Unpressed fabric under the same light |
Outline of a pocket, seam, or button | What raised area lies beneath the face? | Same area with isolated support |
Permanent shade change | Did heat or moisture change the colour? | Unpressed control and suitable laboratory assessment |
Dark patch that fades while drying | Is moisture still present? | Inspect again after defined recovery |
Ring left after drying | Was liquid or residue deposited? | Clean equipment test on a spare sample |
New twist or uneven hem | Was the garment stretched or held unevenly? | Before and after measurements at fixed points |
These observations narrow the investigation. They do not, on their own, prove a chemical or mechanical cause.
Separate heat exposure from the dial setting
The temperature printed on an iron control is a setting. The fabric experiences a changing temperature during contact. A thick assembly, a damp cloth, a shoe fitted to the iron, and repeated passes can all alter that exposure.
Record how temperature is checked. A reading taken from the soleplate differs from a reading at the fabric interface. Use a suitable measuring method and follow its limits. Shiny metal can also be hard to measure with an infrared instrument. The method must account for the surface. Check this before trusting the reading.
Start trials within the material supplier's recommended processing range. Include the full assembly, particularly coatings, prints, fusible parts, and trims. The shell's fibre name alone cannot define a safe setting for everything attached to it.
Do not increase heat merely because a thick region remains damp. Check steam delivery, suction, support, and the time allowed for drying. More heat may damage a thin region before the thick region reaches the desired condition.
AATCC TM133 addresses colour change and colour transfer from hot pressing. Use its scope to plan tests for colour failures. Its public scope distinguishes dry, damp, and wet conditions. Select the relevant condition with the laboratory. Obtain the full test procedure. Agree the product pass criteria as a separate step.
A garment can pass the colour test yet still have shine or seam impressions. Its shape may also change. Those features still need examination on the garment.
Control pressure where it actually acts
An operator may apply the same hand force to two areas but create very different local contact. A pocket edge concentrates load. A soft, even panel spreads it. This is why one area can shine while the rest appears sound.
The basic relationship is:
Pressure = force ÷ contact area.
Consider an illustrative force of 30 N. If it spreads evenly over 0.015 m², the average pressure is 2,000 Pa, or 2 kPa. If a raised feature carries that force over 0.003 m², the average becomes 10 kPa. The second value is five times the first.
Actual contact is less uniform than this example. The calculation explains the direction of risk, not the exact pressure inside a seam. It also does not convert a machine's air-pressure gauge directly into fabric pressure. Cylinder size, leverage, padding, and contact area affect that relationship.
Inspect the support first. Then decide whether the operator needs to press more gently. A hard seam ridge beneath a fine shell may remain a problem even with careful handling. Support the target area. Let nearby bulk sit clear if the design allows it.
Specify a practical technique that different operators can repeat. “Light pressure” is weak on its own. Pair it with an approved tool, support, contact sequence, and visual result.
Investigate shine without hiding it
Shine often becomes obvious only after the garment moves under light. Keep that viewing step in the inspection method. A fixed overhead view can miss it.
Check the product and care limits first. Where allowed, press one small trial from the reverse. Press a second from the face and compare them. Test a suitable press cloth or approved iron shoe. Check whether changing the support reduces the mark. Alter one factor at a time during the first diagnosis.
A protective layer changes heat transfer as well as direct contact. It may need a different validated contact time. Do not just add a cloth and keep a long dwell. The assembly may stay too damp. The operator may then add more passes.
Rotondi's Series 388 information lists an anti-shine shoe among its options. That is evidence of a tool intended for this problem, not proof that any shoe prevents all shine. The tool must suit the iron and garment.
Do not use aggressive rubbing to make a shiny area look temporarily dull. It may raise or damage the surface and produce a different defect after handling. Keep any recovery method separate from the approved bulk process.
If the mark remains after a gentle, approved recovery trial, classify it honestly. A garment that looks better while damp may still fail when dry.
Remove seam impressions by managing support
A seam impression often traces a feature on the reverse. Look for a seam allowance, pocket edge, hem fold, label, or button. Open the garment and compare the outline with those features. The match is a useful clue.
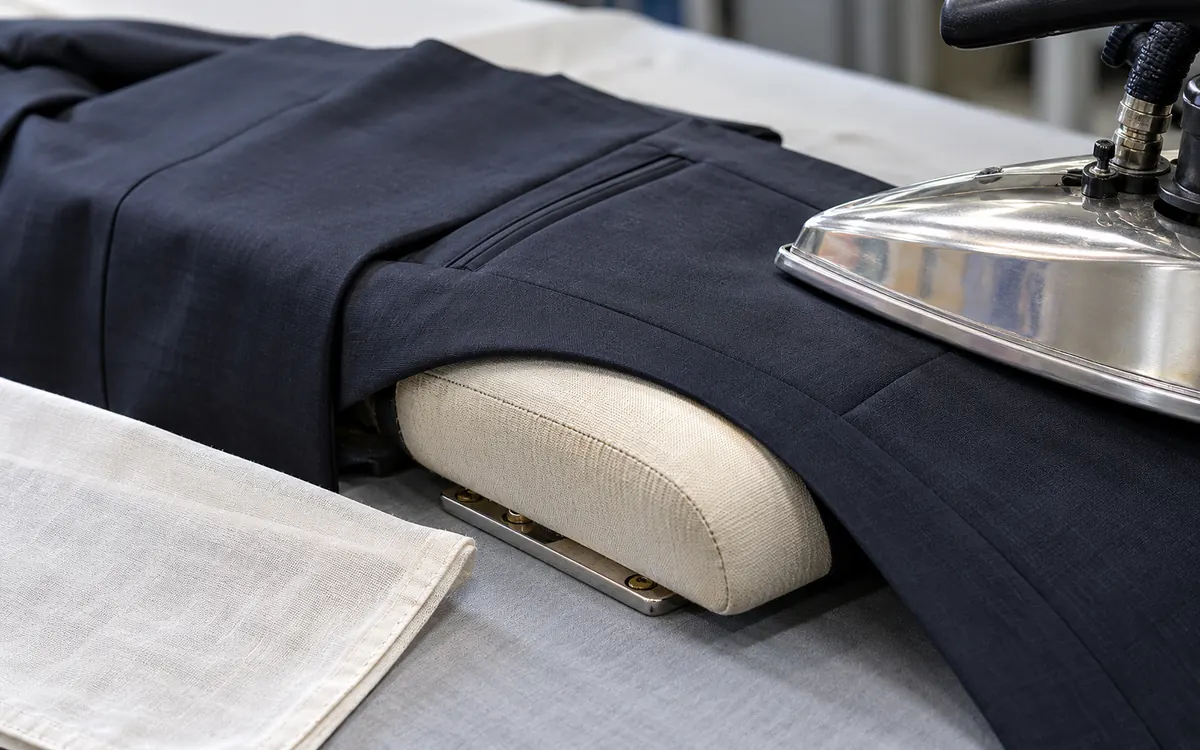
Try a narrow pressing support beneath the seam area. Check that nearby layers do not carry the load. Use forms suited to curved areas. Some sleeve heads and shaped fronts need a shaped support. A flat board may change their form.
Electrolux Professional's FIT1-WC description shows how these features help. The table has a sleeve arm and shoulder support. Users can adjust its vacuum and blowing. It also supports lightweight fabrics. Such features address different jobs within pressing.
Inspect the board cover and padding. A worn, compressed, wrinkled, or dirty cover can transfer its own pattern. A repair in the cover may create a local hard edge. Keep a record when the cover changes, since a new cover may alter the result.
Some impressions start with too much bulk in the sewn garment. Pressing cannot remove that bulk. Refer those cases to the sewing or product team. ApparelDiary's guide to garment seam construction and seam allowance helps identify what the pressing station has inherited.
Do not flatten a designed roll or rounded edge just to hide an allowance line. The approved garment shape remains the target.
Trace water spots through the steam path
If a water spot appears during steam use, check the equipment first. Do this before treating the fabric. Note whether it occurs at start-up, after a pause, or during continuous work. These patterns help locate the cause.
Use the maker's procedure to test the steam output. Choose a suitable spare cloth for this check. Keep the test away from finished goods. Check the visible hose route, steam head, and water supply. Compare these with the normal start-up condition. Maintenance staff should investigate internal faults.
Jiffy's operating guidance states that its steamer hose should stay upright. This lets condensation return. Its troubleshooting guidance also lists causes of water spitting for certain models. These include damaged heads and hose kinks. Use the manual for the equipment in front of you. A portable steamer rule may not suit an industrial system.
A clean water drop and a contaminated drop can leave different results. If a ring remains, check the liquid source. Inspect the board cover, soleplate, and press cloth. Also check any finish already on the garment. Avoid applying an unknown spot chemical to every affected piece.
Check the spot after drying. Does it vanish, change the handle, or leave an outline? Record what you find. A temporary wet patch is still a process concern if it leads to packing while damp. A permanent ring is a separate defect. Use evidence from a trial to decide whether it can be recovered.
Use vacuum and blowing for defined purposes
Vacuum can help hold fabric and remove moisture after pressing. Blowing can reduce hard contact and assist handling of light materials. The useful setting depends on the table, garment, and task.
PONY's Silver range includes several versions. Options include vacuum, vacuum plus blowing, and an extra up-steaming function. These are distinct machine configurations. Name the installed version in the work instruction. The phrase “use the table” leaves too much unclear.
Test airflow with the garment in place. An empty table may work well. Add a dense stack of fabric and airflow may change. Check whether the cover or padding blocks flow. Also check that air reaches the correct surface or arm.
Avoid treating the strongest available suction as the best setting. It can make handling difficult and may hold a fine fabric against an uneven support. Too little suction can leave moisture or allow movement. Find a range that gives the required finish without creating a new mark.
The operator needs a clear sequence. For example, first support the garment. Apply steam briefly, then use controlled contact. Keep the garment in position during a drying stage. The exact sequence must be developed for the assembly.
Observe the released garment, not just the surface while the fan is running. A shape held flat by suction may move once the holding force stops.
Allow shape to settle before judging it
A garment can look correct on the table and change after removal. A hot or damp panel may be moved while it is still easy to distort. Pulling it from one corner adds another uncontrolled force.
Support the garment during transfer. Use the agreed hanging or flat-rest method. Set a clear time for inspection. The wait must fit the work schedule. It must also allow enough time to see how the shape settles.
Woolmark's care guidance covers steam pressing within suitable wool care conditions. It also gives different storage advice for woven and knitted wool garments. It does not provide a universal factory recipe. A wool blend with decoration still needs its complete assembly checked.
Consider a hypothetical marked distance of 620 mm before pressing. It measures 610 mm immediately afterward and 616 mm after the agreed rest.
Immediate reduction = (620 − 610) ÷ 620 × 100 = 1.61%.
Reduction after rest = (620 − 616) ÷ 620 × 100 = 0.65%.
The two results answer different questions. Reporting only the first overstates the settled reduction. Reporting only the second can hide a handling problem. Staff may struggle with the garment as it leaves the station.
Measure from the same points without stretching the fabric. Record the before condition too. Was the starting piece damp and the finished piece dry? State that difference alongside the result.
Run a trial that can explain the result
Choose garments that reflect the job. Include a difficult colour and the thickest local assembly. Add a sensitive surface where relevant. Use the same material lot and construction while finding the first cause.
Use a small trial sheet that records settings and observations. Photograph defects with a reference and stable lighting. Keep the physical samples; photographs may fail to show shine or handle.
The following example investigates a pocket outline on a hypothetical dark trouser. It is a diagnostic sequence, not a statistical proof.
Trial | Change from the starting method | Observed result after rest | Interpretation |
|---|---|---|---|
A | None | Clear pocket outline | Establishes the reference defect |
B | Shorter contact only | Fainter outline, crease remains | Less contact reduces damage but misses finish target |
C | Support isolates pocket bulk | No outline, crease removed | Support is a promising control |
D | Same as C, garment moved while damp | No outline, new local distortion | Transfer condition also needs control |
Do not conclude that support alone solves every case. Repeat the promising method with the intended operators and material range. Check adjacent areas for new defects.
Once the main cause is clear, test the proposed operating range. Include the changes likely to occur during normal work. Include the expected start-up and restart conditions. One carefully handled sample may pass. That alone does not show the process is ready for a long run.
Build an operation-specific pressing instruction
A useful instruction shows the target finish. It also explains how to achieve it. Show the allowed crease, roll, and edge shape. Mark areas where defects are not allowed.
List the machine, iron, shoe or cloth, board cover, and support form. Describe the garment's condition as it enters the station. Identify the relevant settings and how they are checked. State the order of work. Flag any step that may damage one area while another is pressed.
Include the resting and handling method. If approval relied on a drying stage, that stage belongs in production time. It cannot disappear from the instruction when output pressure rises.
Separate routine checks from maintenance tasks. Operators can identify a wet cover or unexpected spitting. Qualified staff must repair steam, electrical, and control systems. They must follow the equipment procedure.
Define the response to a defect. Set a clear hold point. This stops repeated pressing just to make a piece look sound under one light. Record any approved rework limit and the required reinspection.
Retain a reference sample with a date and material identity. Replace it if storage changes its appearance. A faded or crushed sample makes a poor decision standard.
Know when pressing is not the root cause
Pressing is often the last step before inspection. It can receive blame for faults created earlier. Use evidence to separate those cases.
A puckered seam that exists before heat may involve construction or differential feeding. A bubbling fused area may involve the bonded assembly. A garment that twists before pressing may carry cutting, fabric, or sewing distortion. Pressing can reveal or amplify these problems without originating them.
Compare untreated and processed pieces from the same lot. Examine where the defect first appears. If a pocket outline occurs only after pressing, local support is a strong lead. If the same outline is already visible in the sewn panel, construction must also be reviewed.
Avoid using force to correct a size error. Stretching a short garment may bring it to size for a short time. It can also create uneven recovery. Measure the finished garment in the agreed condition. It needs to meet the size requirement then.
Send a concise record when asking for help. Identify the material and machine condition. Include before-and-after observations, trial changes, and the fault that remains. That is more useful than a request to “improve pressing quality.”
Judge rework against the original requirement
A recovery trial should have its own pass criteria. Removing a mark is only one part of the decision. Check the recovered area against the control. Look for changes in handle, surface direction, colour, or shape. Compare the boundary as well as the centre of the treated area.
Use a small, identified group for the trial. Record how many pieces were treated and how many passed after the agreed rest. Keep unsuccessful pieces in the result. Some pieces may receive a second treatment. Record both cycles for those pieces. A report of final appearance alone hides their extra exposure.
Consider a hypothetical group of 20 marked garments. Suppose 16 pass after one approved recovery cycle. The first recovery yield is 16 ÷ 20 × 100 = 80%. That figure describes this trial. It does not set an acceptable defect rate. Nor does it justify treating the remaining four again.
Before further treatment, review the material limits. Inspect for damage caused by the earlier treatment. Some garments may need rejection or a construction correction. A rework decision should not silently become a new bulk method.
Check changes during the shift
Look for the point at which the result changed. Were the first garments sound, with rings appearing later? Compare the cover condition, steam output, and pause history at each stage. If a defect follows one size, inspect its local construction. Check how it fits the support.
Record an equipment or cover change against the garments processed around it. This allows a focused hold rather than an unexplained mixture of good and suspect pieces.
After a long pause, verify the restart condition with the normal approved check. The table may have cooled. The hose may hold condensate. Check whether either condition calls for the maker's restart steps. Do not use saleable garments as the warm-up test.
These checks keep the instruction connected to the actual station. They also help distinguish a process drift from an incoming material change.
Frequently asked questions
Can every shiny mark be removed with steam?
No. Some surface changes may respond to a suitable recovery method, while others remain. Test only an approved method on a representative piece. Judge it after drying and rest, under the same viewing conditions. Do not promise recovery from the appearance of a damp sample.
Should a press cloth always be used?
A cloth can reduce direct contact, but it also changes the transfer of heat and moisture. Its own texture, cleanliness, and thickness matter. Validate it as part of the operation. A cloth used successfully on one fabric may leave an impression on another.
Does a higher steam supply pressure mean more pressing pressure?
No. Steam supply pressure describes one part of the system. Mechanical force on the garment describes another. Record each with its proper units and measurement point. Use the machine manual to understand how its controls affect the process.
Why does a good sample fail when production starts?
The trial may have missed a real change. Look for a different operator, worn cover, or start-up condensate. Check handling speed, colour, and assembly thickness too. Compare actual production with the approved sample method. Do this before changing several settings.
When should a garment be measured after pressing?
Use the product's agreed measuring and conditioning method. Also inspect earlier if transfer or recovery is part of the problem. Label immediate and settled measurements clearly. Keep the two results distinct in the report.
Release a finish that survives normal handling
Good pressing removes unwanted creases while retaining the intended surface and shape. Check the result after the garment leaves the table and rests. It should also survive normal packing.
Start by naming the defect. Confirm heat exposure, local support, steam condition, airflow, and handling. Use a controlled trial to identify the changes that matter. Then put those changes into a repeatable instruction.
A sound pressing method gives a consistent finish. The operator should not need to rescue each garment. Record clear observations and run a small, controlled trial. Use those results to choose the next step.
References
AATCC: TM133, Colorfastness to Heat: Hot Pressing.
Electrolux Professional: FIT1-WC ironing table.
Rotondi: Series 388 technical information.


Discussion0
Loading the discussion…