
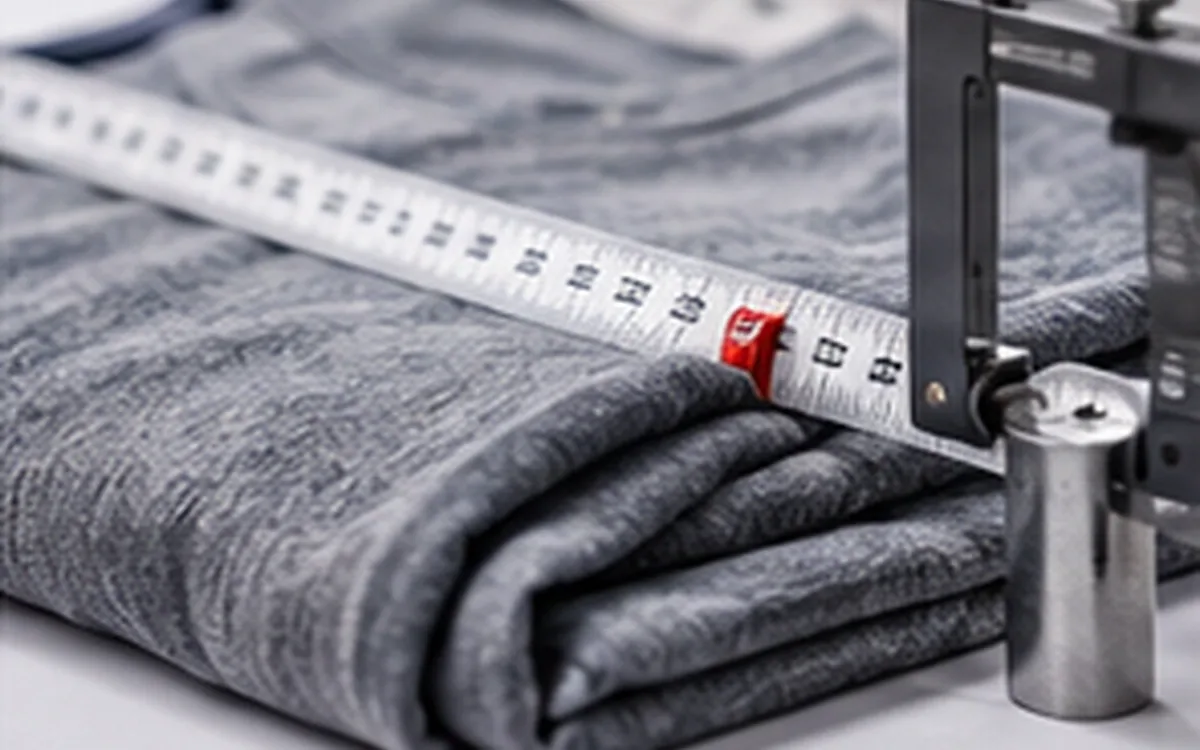
Two people can measure the same shirt and disagree without either reading the tape incorrectly. One may place the chest line just below the armhole while the other measures farther down. One may follow a curved edge while the other pulls a straight line between its ends. The numbers describe different measurements.
To measure garments reliably, control the method before judging the result. Identify the garment and its specification first. Prepare it in the required state, then locate the agreed points of measure and record the readings. Then compare those readings with the correct limits.
A point of measure, often shortened to POM, is more than a name such as chest or sleeve. It needs a start, an end, a path and a defined garment condition. This guide explains how to make those details repeatable during finished-garment checks. Its tables and numerical examples are hypothetical; the approved buyer method controls a real order.
Keep body, pattern and garment dimensions separate
A body measurement describes the person the garment is intended to fit. A pattern measurement describes a part used to make the garment. A finished-garment measurement describes the sewn product in a stated condition. These values can be related, but they are not interchangeable.
ISO 8559-1 concerns body-measurement definitions for clothing. ISO 18890 concerns garment measurement points and methods. That distinction helps prevent a body size chart from being used as a finished-product inspection sheet.
Do not add ease to a finished-garment target during inspection. The technical team should already have considered fit and design when setting that target. The inspector's task is to measure the defined garment dimension, not redesign it at the table.
A pattern dimension may include seam or shrinkage allowances. Another may exclude them. Check what it includes before comparing it with the finished garment. A cut panel that seems longer than the finished target may be correct for its intended assembly.
Confirm whether a width is a flat half-measurement or a full circumference. Do not double a flat reading automatically. The method must say what the number means. This is especially useful when the garment has overlap, gathers or a shaped waistband.
Prepare the table, tools and garment
Use a clean, stable surface large enough to support the area being measured. A sleeve hanging over the table can pull on the body and change its position. Move the garment or provide support so the measured area rests without an unintended load.
Select a tool suited to the path and required resolution. A flexible tape can follow a specified curve; a suitable ruler can help check a straight offset. The tool should have clear markings and a sound zero reference. A loose end fitting, stretched tape or damaged scale needs attention before use.
Follow the agreed procedure to check the tool against the site's controlled reference. Include lengths relevant to the work. Record or report a failed check rather than compensating from memory. A casual comparison between two unverified tapes does not establish which one is correct.
Read at the proper scale without twisting the tape. Keep the zero point in view while placing the far end. Do not assume that one shape of metal tip is for horizontal readings and another is for vertical readings. Check the actual zero and how the tool is designed to work.
Identify the garment before unfolding it. Record style, size, colour, sample or production identity and specification revision. If its label conflicts with the selection record, resolve the identity before assigning a measurement failure to a size.
Prepare the closures, ties and adjustable parts as the method requires. A buttoned shirt, an open shirt and a shirt with its front edges overlapped by hand are different measuring conditions.
Establish the required condition before taking readings
Confirm whether the garment is being checked as received, after its production wash or after a specified care trial. Note any treatment that could affect the result. A freshly pressed piece may differ from an unpressed reference. That difference need not be a sewing error.
Allow relaxation or conditioning when the agreed method requires it. Follow the stated procedure rather than inventing a fixed waiting period for all fabrics. Record any departure that could affect the decision.
ISO 139 defines standard atmospheres for textile conditioning and testing. Where a test or contract calls for that standard, its conditions must be followed. Leaving a garment on a table does not prove that it has met laboratory conditions. Describe the actual preparation used for the check.
Smooth unintended folds gently without pulling the material into the target size. Keep intentional pleats, gathers, crinkles and shaping in the state specified for the POM. Pressing them flat to make measurement easier can change what is being measured.
Reposition the garment between different areas as needed. A flat chest check may require a different arrangement from a sleeve or inside-leg check. One fixed layout is rarely suitable for every point on a shaped product.
Translate each POM into a physical action
Before measuring a new style, read the method and identify its landmarks on the actual garment. A familiar POM code may have a buyer-specific meaning. Do not assume that the same short label always uses the same endpoints.
The method should name the side that faces up and the start and end points. It must define the path between them and say whether to apply stretch. It should also show how to arrange closures and adjustable parts.
The URBN how-to-measure guide separates straight paths from curved ones. It also defines seam-to-seam and edge-to-edge checks, and several chest locations. These distinctions show why a POM name alone can be insufficient.
If the method is unclear, ask for a marked sketch or approved demonstration. A photograph can help show placement, but the written instruction must still define the path and state. Perspective and a hidden tape end can make a photograph ambiguous.
Use consistent abbreviations only after defining them. HPS often refers to a high shoulder point, while CB commonly means centre back. Locate the landmark on the actual style. Its seam may be absent or in a different place by design.
Build a short method table for the style
The following table illustrates how a team might define four checks on a simple woven shirt. It is an original example, not a reproduction of a standard or a universal measuring method.
POM | Example setup and path | Detail that must stay consistent |
|---|---|---|
Flat chest width | Shirt closed and front up; straight across at an agreed line 25 mm below the underarm reference | Exact underarm reference and offset direction |
Centre-back length | Back up; along centre back from the collar-attachment seam to the finished hem | Collar excluded; same hem endpoint |
Sleeve length | Sleeve supported; from the agreed shoulder-seam point to the cuff end along the defined outer path | Path and cuff inclusion |
Cuff opening width | Cuff fastened in its specified position and laid in the agreed shape | Button position and relaxed state |
The table becomes useful when it is checked against the real garment. If the shirt has a dropped shoulder, a curved hem or two cuff buttons, add the detail needed to remove doubt. A generic instruction can leave several plausible readings.
Keep the method visible beside the size targets. Separating the drawing from the measurement sheet can lead to correct readings taken by the wrong method. If the method changes, identify the revision rather than silently replacing a diagram while retaining the old results.
Measure chest width without changing the garment
For the example shirt, close the front as specified and support the body on the table. Arrange the front and back without trapping a fold under the measured area. Locate the agreed underarm reference on each side.
Mark the measurement line using the required offset. Do not estimate the position by eye when the method calls for a defined distance. On a shaped shirt, moving the line down can change the width even if the garment remains untouched.
Place the tape across the defined endpoints along the required straight path. Keep it in contact with the garment without bowing, lifting or pulling the side edges outward. Read the distance only after checking both ends and the line between them.
If fullness must be included, arrange it as the method directs. Remove hidden folds that shorten the reading. Keep the fabric relaxed instead of pulling out every natural ripple. If the garment is hard to arrange as instructed, resolve the method before judging the piece.
Record the actual width immediately. Avoid holding several measurements in memory while moving to the next garment. Note an unusual reading and follow the agreed check. Do not replace it with the number you expected.
For mirrored features, confirm whether the plan requires both sides. One sleeve or pocket may differ from the other even though the overall chest measurement is correct.
Follow length paths and endpoints precisely
For centre-back length, find the specified upper reference and the correct hem point. A collar edge and its attachment seam are different starts. A curved shirt tail can also have different lengths at centre back and side seam.
Use the stated path. Measuring straight between two points and following a shaped seam can produce different lengths. Neither result is automatically wrong; each answers a different definition.
Keep a long garment fully supported. If it cannot fit on the table, use an agreed arrangement that preserves its position and path. Folding and moving it can lose the tape's position. Guessing where the last section ended adds another error.
Sleeve methods deserve the same care. Some begin at a shoulder point; others begin at a neck or centre-back reference. A raglan sleeve may not have the shoulder seam used in a set-in sleeve method. Do not borrow a convenient seam from another construction.
Confirm whether the cuff, rib or other extension is included. Measure it in the prescribed state. The same physical sleeve can yield several valid dimensions, but only one may match the target being checked.
Handle waistbands and trousers without forcing them flat
Close the waistband and fly according to the method. Align the garment in the intended position before locating a waist, hip, rise or leg point. Check whether the method includes the waistband or begins below it.
A shaped waistband may not rest as a straight strip without distortion. Its method may call for a curved path, a defined flat width or another controlled arrangement. Do not pull it into a different shape merely to obtain a convenient straight reading.
For a hip width, use the specified distance from the agreed upper reference. A measurement from the top edge can differ from one taken from the waistband seam. The offset must use the same reference as the size table.
For inseam and rise, identify the seam junction or other start precisely. Bulky intersections can hide the intended point. Place the tape along the required route rather than cutting across a curve to shorten the reading.
Record leg-opening measurements with their stated basis. A flat width, an opening circumference and a stretched opening are different quantities. Label each quantity clearly. A conversion mistake can otherwise turn a valid reading into a false failure.
Treat relaxed and stretched measurements as different tests
Elastic parts need more than the instruction “pull firmly.” The result depends on the applied force, the endpoint and the time under load. Agree the method for any stretched measurement before comparing results between people or sites.
The method may define a force, a fixture, a specified extension or another clear endpoint. Use what the product requirement calls for. Do not invent a load or pull until the stitching appears close to damage.
Keep relaxed and stretched readings in separate fields. A relaxed waistband dimension describes one state. A stretched opening can answer a different question about how the garment works. Averaging the two produces a value with no clear physical meaning.
Repeated stretching can affect the relaxed result. Follow the stated test order and allow the required recovery time. A piece just stretched may differ from an untouched piece.
The stretched dimension alone cannot prove comfort, recovery or durability. Record the measured value. Use the relevant product tests to check those other needs.
Keep units and reporting precision under control
Read and record in the specification's unit whenever practical. A sheet that mixes inches, centimetres and millimetres needs explicit labels. Never rely on the number's appearance to identify the unit.
NIST's length guidance gives the exact inch relationship: 1 inch equals 25.4 mm. Therefore 25 inches equals 635 mm, or 63.5 cm. A measurement location stated as 1 inch below a reference is not exactly the same as 25 mm below it.
Use the agreed reporting increment. A tape marked in millimetres does not justify a reading with several decimal places in centimetres. Report only the detail the method and tool support. Extra digits from a calculator do not create extra measurement knowledge.
Keep the original reading when a system converts units. Set the conversion and rounding rule before evaluating limits. Do not change rounding direction for a borderline result simply to move it into tolerance.
Compare each reading with its own limits
Use the approved target and tolerance for the exact size and POM. A single general tolerance should not replace a specific requirement. Some limits may be unequal above and below the target.
For a symmetric tolerance:
Lower limit = target − tolerance.
Upper limit = target + tolerance.
Signed difference = actual measurement − target.
The following hypothetical shirt results use centimetres throughout. They illustrate the arithmetic after the measuring method has been confirmed.
POM | Target | Tolerance | Actual | Signed difference | Result against stated limits |
|---|---|---|---|---|---|
Flat chest | 50.5 | ±0.4 | 50.5 | 0.0 | Within 50.1–50.9 |
Back length | 70.0 | ±0.7 | 70.8 | +0.8 | Above 70.7 by 0.1 |
Sleeve length | 62.0 | ±0.5 | 61.6 | −0.4 | Within 61.5–62.5 |
Cuff width | 11.0 | ±0.3 | 11.2 | +0.2 | Within 10.7–11.3 |
Keep the sign. A garment that is too long may need a different investigation from one that is too short. Replacing both with an unsigned amount loses useful information.
Do not average a failed length with a passed width. Each requirement applies to its own feature. Likewise, a passing average across several garments does not make every garment conform to its individual limits.
Use repeat readings to expose a method disagreement
A quick two-person check can help when factory and buyer results differ. Use the same identified garment and tool, and keep its condition unchanged. Ask each person to repeat the measurement independently. Reset the garment between readings as the method requires.
Consider these invented chest-width readings, recorded to 0.1 cm. The target is 50.5 cm with a tolerance of ±0.4 cm.
Person | Reading 1 | Reading 2 | Reading 3 | Mean, rounded | Range |
|---|---|---|---|---|---|
A | 50.4 | 50.5 | 50.4 | 50.43 | 0.1 |
B | 51.0 | 50.9 | 51.0 | 50.97 | 0.1 |
Range = highest reading − lowest reading.
Each person's range is 0.1 cm, but the difference between their unrounded means is about 0.53 cm. Their readings are consistent within each short set while disagreeing with each other.
Suppose a joint review finds that A used the required 25 mm offset and B used 40 mm. On this hypothetical shirt, the lower location is wider. The first task is to correct the location, not change the pattern to satisfy the larger reading.
After both use the agreed method, assume A repeats 50.4, 50.5 and 50.4 cm, while B reads 50.5, 50.4 and 50.5 cm. Their means now differ by about 0.03 cm. These averages describe the sets of readings. They do not mean that the tape can read hundredths of a centimetre.
This small exercise identifies a plausible method problem. It does not prove measurement-system capability or establish the true garment dimension. NIST's measurement terminology distinguishes concepts such as accuracy, repeatability and reproducibility. Similar repeated readings should not be treated as proof of all three.
A formal study needs a planned design. Include the garments, people, tools and conditions relevant to the work. NIST's gauge study guidance describes those broader considerations. Three readings on one shirt are a diagnostic check, not a substitute for that work.
Investigate borderline and conflicting results honestly
If a result is close to a limit, follow the agreed decision rule and verification process. First check that the garment and its condition are correct. Review the endpoints, tape position and recorded value before concluding that the product changed.
Repeat measurement when there is a reason to question the reading, and retain the original value with the reason for the repeat. Do not keep measuring until one result passes and then discard the rest.
Two approved methods may produce different answers. Ask the responsible technical team to resolve the difference. Record the unresolved status while it is being settled. Choosing whichever method gives a pass creates a false sense of control.
Where measurement uncertainty is part of the acceptance rule, apply that rule consistently. Do not create an informal extra tolerance at the inspection table. A product tolerance and uncertainty about a measurement are different matters.
Preserve measurement history through care tests and revisions
Routine finished-dimension inspection and dimensional-change testing have different purposes. The first compares a garment with a target in a defined state. The second compares dimensions before and after a specified treatment.
ISO 3759 addresses preparation, marking and measuring for dimensional-change tests. Keep the before-treatment readings, treatment details and after-treatment readings together. Do not overwrite the starting measurements with the final values.
The ApparelDiary shrinkage-testing guide develops that separate calculation. Measuring a garment as received cannot show how much it will shrink in use. That needs a defined treatment and a before-and-after comparison.
Retain the specification version used for each inspection. A later change to the target does not rewrite the earlier result. That result was judged against the requirement in force at the time. The ApparelDiary PLM guide explains the value of connecting those product records.
Finish with a usable record and a clear decision
Record the garment identity, date and operator. Add the method version, condition and actual readings, plus the tool identity where required. Include relevant comments about departures or uncertain points. A row of pass marks cannot reconstruct what was measured.
Keep the selection plan separate from the method. Knowing how to measure one shirt does not determine how many shirts should be inspected or which ones to choose. The ApparelDiary AQL guide addresses a different part of the inspection decision.
Use measurement results to guide investigation without claiming more than they show. A dimension outside tolerance may lead to checks of cutting, sewing, pressing or finishing. The number alone does not prove which process caused it.
A garment can meet every dimension and still fit poorly or have weak seams and other defects. Finish the required appearance, construction and performance checks as well. Reliable measurement gives the team sound evidence about dimensions. The rest of the quality work is still needed.



Discussion0
Loading the discussion…