
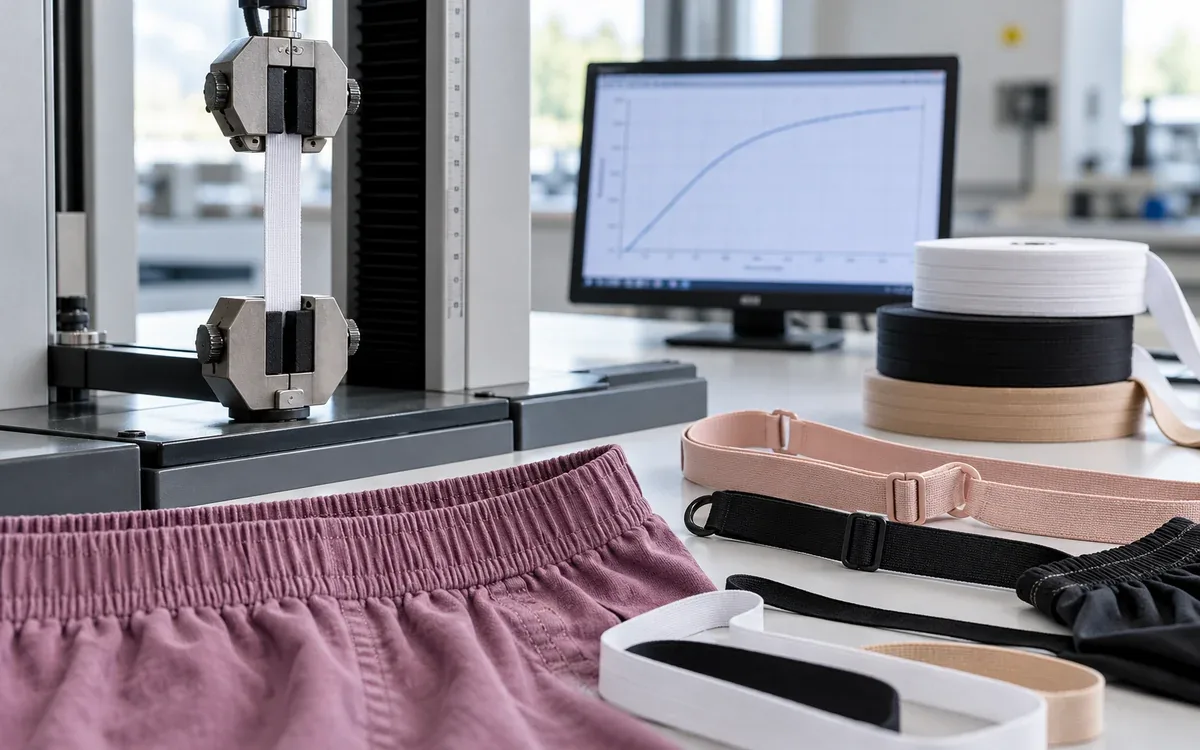
Test the component that the garment needs
A narrow elastic tape can pass its supplier's test. It may still make an awkward waistband. The cut length may be wrong or the joining overlap may vary. The casing may stop the band from opening far enough. A strap can lose its adjusted length when hardware slips. The elastic itself may still recover well.
Garment elastic testing needs two levels of evidence. The first describes the purchased narrow fabric. The second checks the component after cutting and joining. It includes attachment and care too.
This guide connects those levels for waistbands, straps, and elastic edges. It explains how to approve components and trace faults. For the underlying definitions of extension, force, growth, and recovery, see ApparelDiary's elastane fibre and fabric performance guide.
All numerical examples below are hypothetical. They show how to plan a comparison and check the arithmetic. They are not comfort limits for all garments. Nor are they settings from a test standard.
Give each elastic a specific job
Begin with a drawing of the part in use. Mark where the elastic runs and how it joins. Show where it is fixed and what must move.
For a pull-on waistband, mark the wearing opening. Also mark the larger opening needed during dressing. For an adjustable strap, show the hardware route. State the range of usable lengths. For a folded edge, show the visible part of the tape. Show which part is attached.
These details turn a broad request for “good elasticity” into testable requirements.
Component | Main functional checks | Assembly detail that needs control |
|---|---|---|
Enclosed waistband | Dressing opening, holding force, return, twisting | Casing dimensions and joining overlap |
Exposed waistband | Opening, force, edge shape, visible appearance | Attachment line and logo placement |
Adjustable strap | Working extension, length retention, hardware movement | Threading path and folded ends |
Folded elastic edge | Edge opening, return, surface shape | Fold position and attachment |
Fixed elastic insert | Movement range and local pull | Anchors and effective free length |
The width may fit several positions. That is not enough to approve one product code for all of them. Decide what evidence each component needs based on its job.
Choose a test that suits narrow fabric
Narrow-elastic specifications may use three types of test method. Keep their results separate. Do not merge them into one unnamed “stretch” value.
ISO 20932-3:2018 covers narrow fabrics. Its public scope distinguishes checks on product quality from performance in use. Name the selected method and take account of its 2025 amendment.
ASTM D4964 assesses elastic fabrics on a tensile machine that extends them at a constant rate. Agree the relevant tensions or extensions. The method's public information also stresses the need for comparable test conditions.
ASTM D5278/D5278M-26a addresses narrow elastic under a static load, before or after laundering. Its public scope says users must agree on the effective load. It warns that its elongation results cannot be compared with two other machine methods. Those methods apply a constant rate of extension or a constant rate of loading.
Choose the method with the buyer and laboratory before testing. Get the full procedure before carrying out the test. A standard's title or public scope does not give every detail. Fixtures, preparation and measurements need the full method.
A hand pull or an internal garment-opening test can still be useful. Label it clearly and define it. A shop-floor check may be useful. Do not call it a standard test just because both stretch elastic.
Make the laboratory setup visible
Send more than a strip and a target percentage to the laboratory.
Identify the product, width, colour and lot. Add its construction and declared materials. State where the specimen comes from. It may be a loose roll, a joined loop or a completed garment. Keep those identities on individual results.
Ask the laboratory to confirm the specimen form and fixtures. Check the force range and how measurements are made. The equipment maker TestResources identifies agreed loop tensions and elongations as key choices for D4964 work.
Record the method's reference length and loading route. State the reported cycle and measurement times. Use the specified preparation and atmosphere. ISO 139 provides textile conditioning atmospheres where the adopted procedure calls for them.
Do not cut a wider tape down to fit a fixture without checking the method. The laboratory should not remove an edge or decorative feature without review either. The tested product must still represent the purchased component.
Keep a fixture photograph or drawing with development records. It can help resolve later questions about the setup. Two laboratories may have tested different arrangements.
Do not confuse loop force with strip force
A loop can place two lengths of elastic in the load path. A straight strip places one. Define what each machine reading means.
Take an idealized loop. Its two parallel sides carry equal tension. If each side carries 5 N, the combined axial force is 10 N. This simple balance explains why a 10 N loop reading differs from 10 N in one straight strip.
Real fixtures have their own shape and contact points. They may add friction. This ideal example is not a rule for converting laboratory reports. Use the force definition and specimen setup in the selected method.
The same caution applies to fixture travel. A hook may move by a set distance. That does not mean the full loop circumference grows by the same distance. Check what the instrument measures. Check how the method calculates extension.
The supplier and buyer may report very different values. Check the load path before blaming the material. Request the fixture details and raw trace. Mismatched units or setups can look like a major product change.
Calculate the waistband's effective length
The relaxed cut length may differ from the relaxed circumference of the finished band.
Suppose an elastic is cut to 640 mm and joined with a 20 mm overlap. Under this simplified geometry:
Effective relaxed circumference = cut length − overlap
640 − 20 = 620 mm
If the band must open to 780 mm, its required extension is:
(780 − 620) ÷ 620 × 100 = 25.81%
Using the raw 640 mm cut length would give 21.88%. That error understates how far the completed loop must stretch.
Measure the actual loop after joining and the specified rest. The calculation assumes assembly does not change the stated dimensions. Joining may restrain or change the length in one area.
Keep the cut-length and overlap specifications separate. “Finished elastic 640 mm” is unclear. One department may read it as a cut length. Another may read it as a loop circumference.
Put the measurement landmarks on the specification drawing. A small sketch can prevent more confusion than another decimal place.
Check the combined effect of tolerances
Two dimensions can each pass their limits but combine into the most demanding assembly.
In a hypothetical order, cut length is 640 ±4 mm and joining overlap is 20 ±2 mm. The smallest effective loop uses the shortest cut and largest overlap:
636 − 22 = 614 mm
The largest loop uses the longest cut and smallest overlap:
644 − 18 = 626 mm
At a 780 mm opening, the 614 mm loop needs about 27.04% extension. The 626 mm loop needs about 24.60%. The nominal loop requires 25.81%.
These limits describe the geometry. They do not predict that every extreme combination will occur. They help the team choose useful trial samples.
Make and assess bands near the relevant limits. Check opening force, return, and appearance. The narrowest allowed loop may feel too firm. A nominal sample then cannot approve the full tolerance range.
A tighter cut tolerance may help. First find the main source of variation. Changing overlap control may matter more than changing the cutter.
Keep feed tension out of the length decision
A cutter may display the same length each time. The relaxed pieces can still vary.
Imagine a hypothetical cutting operation that holds elastic at 4% extension. A displayed length of 650 mm corresponds to this relaxed material length:
650 ÷ 1.04 = 625 mm
Subtract a 20 mm joining overlap. The simplified loop circumference becomes 605 mm. If 650 mm had been a relaxed cut length, the intended circumference would have been 630 mm.
The difference is 25 mm. This example explains the geometry. It does not set a cutting tension or correction factor.
Check cut pieces after the agreed relaxation and conditioning. Compare material from different roll positions and machine states. Record the unwind and feed setup. The team can then restore the same conditions.
Do not solve an unexplained length problem by adding a fixed allowance to every order. First find whether the problem follows cutting tension or relaxation. Measurement or joining may also be the cause. A correction for one unstable setup may fail after a setup change.
Validate the size range, not only the base size
An elastic grade may work in the base sample. Other sizes may need a different cut-length rule.
Consider two hypothetical fit conditions:
Condition | Relaxed band | Wearing opening | Dressing opening |
|---|---|---|---|
Smaller size | 600 mm | 720 mm | 880 mm |
Larger size | 720 mm | 840 mm | 1,000 mm |
The smaller band works at 20% extension during wear and 46.67% during dressing. The larger band works at 16.67% and 38.89%.
Adding the same 120 mm to all three dimensions has changed the percentage extensions. The force response can then differ even with the same elastic.
Choose trials across the size range. Include the most demanding combinations. Do not assume that the largest size always creates the highest extension. That depends on the ratio of effective band length to the required opening.
Use the measured force curve to identify checkpoints for those openings. Then confirm dressing and fit with the intended garment. A laboratory force value alone cannot prove comfort. Body shape and garment construction also matter.
Separate casing restriction from elastic restriction
A waistband can stop opening because the casing reaches its limit first.
Measure the useful opening of the shell construction as well as the elastic. Include seams, topstitching and attachment points. Check any section that cannot extend enough. A loose elastic trial leaves those constraints out.
To trace the fault, compare matched raw bands, joined bands and assembled waistbands. Observe where the movement stops. Mark reference points. Use them to compare local extension and gathering.
Do not simply pull harder until something gives. Identify the intended maximum opening and check the construction against it. Damage from an uncontrolled pull tells little about normal dressing.
Twist and roll need separate observations. A band may reach the correct circumference. Its edge may still turn inside the casing. Record the direction and location of that change. Force data will not show it by themselves.
Keep the garment orientation consistent during internal trials. Changing where the opening is supported can shift the load to another part.
Examine joins and attachment zones
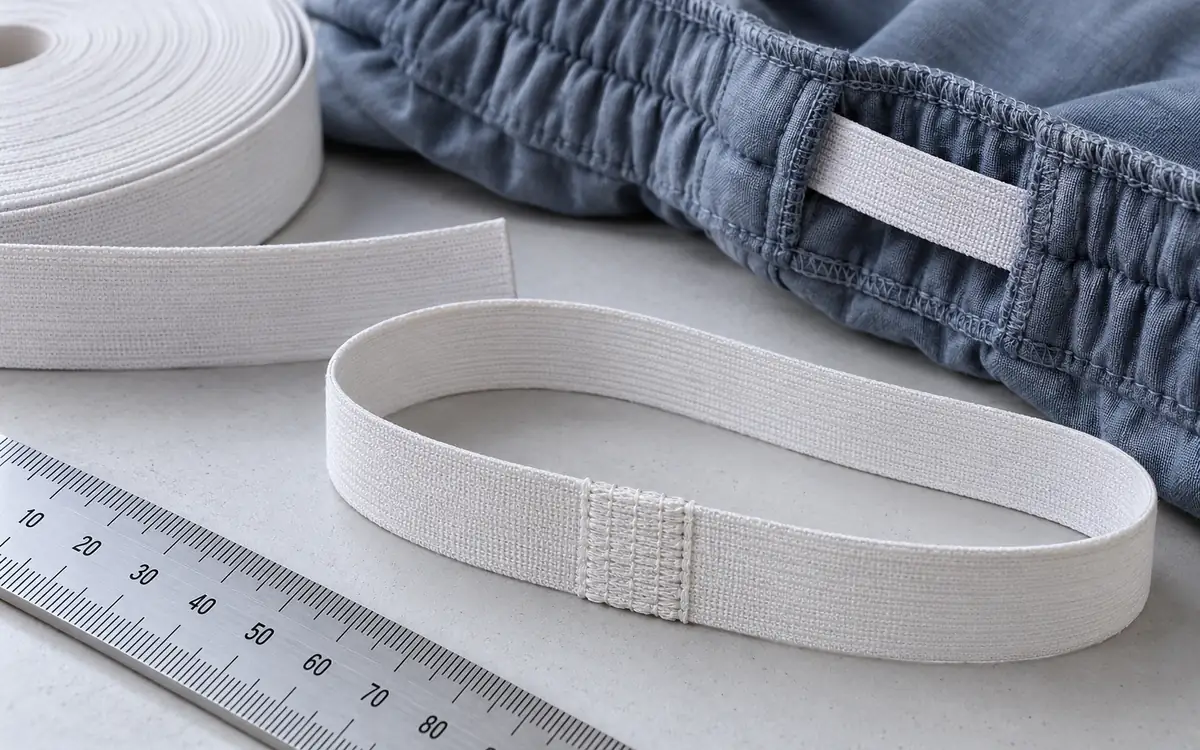
The join is a local structure within the elastic loop. It may be thicker, stiffer, or less able to extend than the free band.
Mark the join before testing. Open the band and inspect the join. Look for sharp changes at its ends, exposed thread damage, local tears and visible bumps. Measure the finished loop after repeated opening and the defined rest.
Use the actual approved overlap, joining method, and attachment pattern. A laboratory loop may use another joining method. It can give useful material data but does not prove the production join works.
Bonded elastic needs its own assembly trial. Stretchline's BondeLast guidance describes controlled heat and pressure as part of applying that product. This supports checks for the specific process. It does not prove that every bonded band performs better than sewing.
For a bonded component, check extension after the required care. Check that the bond remains sound too. For a sewn component, inspect the attachment. Check the elastic near the stitching. A raw tape result does not cover either joining route.
Locate the length that can actually extend
A component may place more stretch demand on its free section than its overall extension suggests.
Consider a hypothetical 100 mm insert between two garment panels. Assume attachments fully restrain 20 mm of that measured path. Only the remaining 80 mm can extend. The assembly must increase to 130 mm.
Its overall extension is 30%. Under these simplified assumptions, the free section must supply all 30 mm of movement:
Free-section extension = 30 ÷ 80 × 100 = 37.5%
Testing a loose strip only to 30% would miss that local demand.
Real attachments may extend in part. Load may transfer over a zone rather than at one sharp boundary. The example shows why the assembled part needs measurement. It is not a correction that fits every component.
Mark the attachment boundaries and the free section during a development trial. Observe where movement occurs. A failure may always start beside an anchor. Compare the shape and dimensions there with the intended design.
Keep this check separate from increasing elastic strength. A stronger tape may still have too little free length. It may also face an abrupt change at an attachment.
Test adjustable straps with their hardware
A strap is more than a length of elastic. Rings, sliders and folded ends affect its useful adjustment range. Attachment points also affect how well it holds length.
Build the approved threading path before testing. Record which face of the elastic contacts the hardware. Record the hardware dimensions and surface finish.
Mark the elastic near the slider and mark a gauge section away from it. After the defined loading sequence, check these marks. They help show whether the material grew or moved through the slider.
For example, a strap may become 8 mm longer because the tail has moved through the hardware. Suppose the separate gauge section returns to its starting length. First check hardware grip and threading. Calling the whole change “poor elastic recovery” would ignore this evidence.
Check both ends of the adjustment range. A strap may hold at its middle setting. The fold arrangement may differ near its shortest setting.
Assess the full attachment after care. Report hardware movement, elastic growth and attachment damage separately.
Include shape and appearance in narrow-tape checks
Record width and edge shape under the relevant component conditions. A nominal flat width does not show how wide the band looks during use.
For exposed elastic, assess edge curl and waviness at the working opening. Check logo shape and alignment too. Compare both before and after care. Use defined views and landmarks so the photographs can be compared.
For a folded elastic edge, specify the finished visible width. A nominal 24 mm tape does not by itself give a 12 mm finished edge. Fold position, curves and attachment all affect the result.
Dividing force by width does not show that two components are interchangeable. An elastic needing 8 N at 20 mm width has a value of 0.40 N/mm. Another needing 9 N at 25 mm has 0.36 N/mm. The wider product has the lower ratio but the higher total force.
Keep both the component force and any value per unit of width. The actual width, attachment and force must all suit the garment.
Compare loose and assembled elastic after care
Use a care plan that matches the selected method and product question.
ISO 5077 addresses dimensional change under specified washing and drying. ISO 6330 provides domestic textile care procedures. It treats washing and drying together. It notes that the chosen procedure affects results.
Take care when claiming ASTM D5278/D5278M-26a. Its public scope names AATCC LP1 or LP5. It specifies three washing and drying cycles. Do not replace a method's care route with an unrelated internal programme without saying so.
A development programme can add garment-care exposures beyond the standard component test’s scope. Record those as separate conditions.
Compare loose elastic, joined bands, and assembled components where the diagnosis needs them. Keep untreated controls. Both groups need the same prior stretch history for a fair comparison.
After care, measure the actual garment opening and effective relaxed band. Recheck the relevant force points. Record twist, slider movement and join condition. Add local attachment damage as well as dimensions.
Interpret care change at the component level
Suppose a hypothetical waistband has a 600 mm effective relaxed length before care. It must reach 750 mm in use, requiring 25% extension.
If its relaxed length becomes 582 mm after care, the same opening requires:
(750 − 582) ÷ 582 × 100 = 28.87%
The band now works farther along its force curve. The material's force response may also have changed. Checking only the old 25% extension point does not show what happens at the required opening.
Use a laboratory test at defined material conditions. Compare it with a component test at the required opening. Keep the two results labelled. One supports material comparison. The other supports the decision for this garment.
The assembled waistband may shrink while loose elastic does not. If so, check the shell, join and attachment. Both may change. That still does not prove the elastic caused the whole garment change. Use matched components to narrow the cause.
Trace faults using the observed evidence
Start with the function that failed. Choose a comparison that can separate possible causes.
Reported problem | First comparison | Evidence to retain |
|---|---|---|
Difficult to pull on | Free band versus assembled opening | Effective lengths and restriction location |
Too firm in one size | Size-specific working extensions | Cut lengths, openings, and force points |
Becomes loose during wear | Elastic gauge marks versus hardware marks | Timed growth and slider displacement |
Fit changes after washing | Loose, joined, and assembled groups | Care route and each group's dimensions |
Local break near attachment | Raw tape versus actual attachment | Damage location and assembly details |
Band rolls or twists | Shape under the required opening | Orientation and before/after images |
Change one relevant factor at a time during diagnosis. Changing the elastic, cut length, overlap and attachment at once may improve the sample. It may not reveal why.
Do not dismiss a real material failure as an assembly issue. A production error in shape or length needs its own correction. It does not support a claim that the elastic supplier changed quality.
Write the component specification and release record
Use a component drawing and a test schedule together.
The drawing should identify the elastic, cut length and joining allowance. Add attachment details, landmarks and finished dimensions. The schedule should name the laboratory method and edition. Add specimen form and required force or extension results. State the care route and decision limits.
State whether a limit applies to each specimen or a group result. Keep each value and the reasons for any invalid test. Keep production lot identities linked to the tested pieces.
Approve the component for its stated position and size range. A strap approval is not automatically a waistband approval. A change of hardware, join or width may need a focused repeat trial. A new cutting process may need one too.
Use ApparelDiary's trim approval and bulk-release process to manage supplier identity and substitutions. The component evidence here supports the technical decision to release it.
Frequently asked questions
Can the same elastic work in several sizes?
It can. The effective lengths and required openings must keep each size within its tested range. Check the size ratios and garment trials. Adding the same length at each size does not always keep extension or force equal.
Does a passing loop test approve a waistband?
It approves only what the stated loop test measures. The waistband adds a production join, casing and attachment. Its garment geometry matters too. Those features need their own functional checks.
Should a strap length increase be called poor recovery?
First separate elastic growth from movement through hardware or at an attachment. Then use the evidence to name the cause. Reference marks on the tape and near the slider help locate the change.
Can washing results from different procedures be compared directly?
They describe different exposures. Use the same relevant procedure and preparation for a comparison. If testing different routes, explain why. The number of washes alone is not enough.
Make the final decision on the assembled component
Approve narrow elastic using laboratory evidence and the garment's actual geometry. Keep cut length, overlap, casing, hardware, and attachment visible in the trial.
A useful approval explains why the component opens far enough and returns as needed. It shows how it holds its setting and stays acceptable after care. It also names the process conditions and size range covered by the evidence.
That record gives production a clear target and makes later failures easier to trace.
References
ISO 20932-3:2018: Elasticity of narrow fabrics.
ASTM D5278/D5278M-26a: Elongation of narrow elastic fabrics using static loads.
TestResources: ASTM D4964 tension and elongation of elastic fabrics.
ISO 139:2005: Standard atmospheres for conditioning and testing.
ISO 5077:2007: Dimensional change in washing and drying.
ISO 6330:2021: Domestic washing and drying procedures for textile testing.



Discussion0
Loading the discussion…