
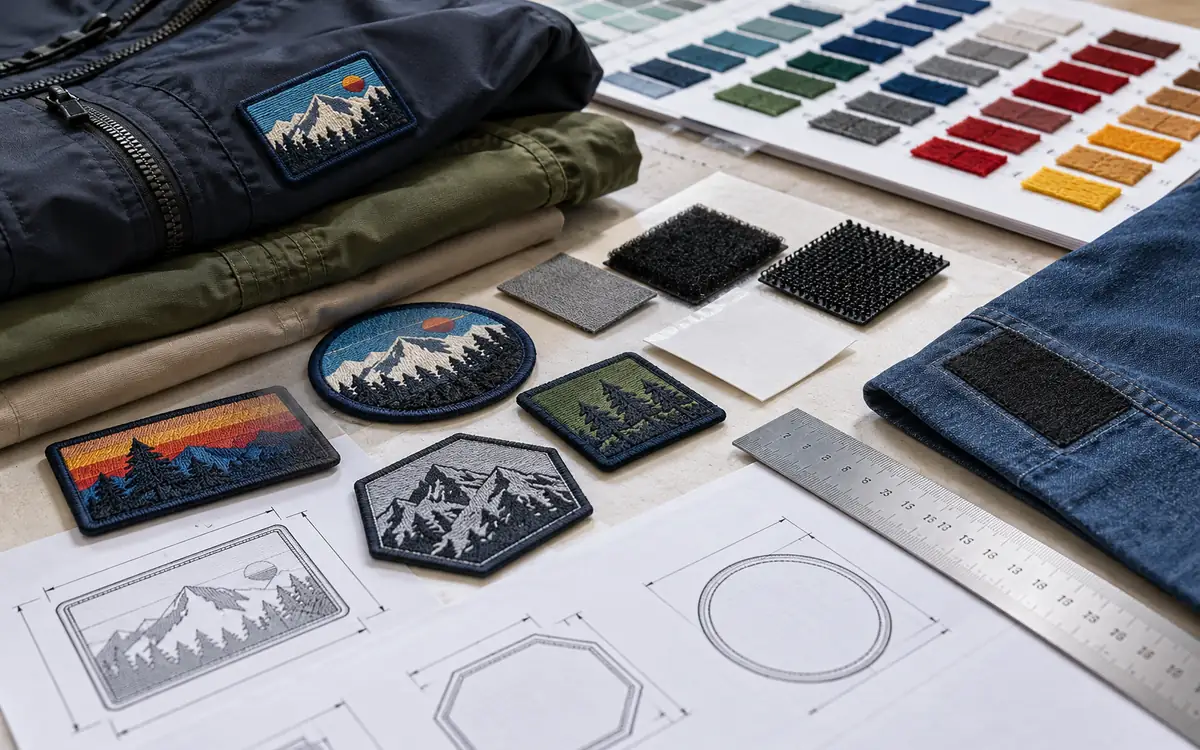
A woven patch specification tells the supplier what to make. It also tells the garment team how the finished patch must behave. The logo file is only one part of that specification. Size, edge shape, backing, attachment and care can each change the result.
Start with the patch in its intended garment position. A badge may sit on a firm jacket panel or a stretch sleeve. These locations make different demands. The same artwork may need a different edge or attachment method in those two locations.
This guide develops a practical specification through original examples. The example dimensions, tolerances, costs and test limits are made up. They show how to make a decision measurable. They are not standard rules for every woven badge.
Describe the patch construction accurately
In a woven patch, coloured yarns form the motif during weaving. An embroidered patch builds its design through stitches on a base. The difference affects surface texture and the way small detail is represented. Dutch Label Shop’s construction comparison describes the two routes.
Woven patches can have different backings and fibre contents. Do not assume they are all alike. Ask for the actual construction. A supplier may add a support layer, a bonding film or another attachment system after weaving.
List the layers from the visible face to the garment. For each, identify its material code, function and orientation. “Woven patch with backing” leaves several questions open. The backing may provide shape or bond the patch. It may carry hook material. One backing can serve more than one purpose.
State the patch’s purpose. It may be decorative or identify a role. It may carry information that must stay readable. A tiny error in a decorative line has one effect. An unreadable size or care instruction may have a different effect.
Avoid specifying a product by appearance alone. A supplier could reproduce the face with a different support or adhesive. That change may be hard to see before use. It can still affect stiffness, attachment and performance after care.
Set finished dimensions before refining the artwork
Give the overall width and height in millimetres. State whether those dimensions include the edge finish. Add a drawing for irregular shapes, rounded corners and any hole or cut-out.
A circular badge needs a diameter and an agreed method for checking roundness. An oval needs both axes. An irregular patch needs reference points. “Measure the widest part” may locate a different feature on each sample.
Identify the finished measurement state. The patch may be measured free, after attachment or after care. Keep these as separate requirements where each matters. A soft patch may stretch when pulled flat under a ruler. That changes what you measure.
Consider an example rectangular patch. Its overall width is 60 mm and its height is 30 mm. A 2.5 mm border occupies space within those dimensions. The available internal width is then:
60 − 2 × 2.5 = 55 mm.
The available internal height is 25 mm. That space must contain the motif and any further clearance from the border. It is not all automatically available for lettering.
A digital proof should show the finished size. A large image on a monitor may look clear. On the actual patch, the same small lettering may be hard to read.
Give the artwork a measurable reading test
Identify the smallest essential letter, line and gap in the design. Ask the supplier to make those features at final size. Use the proposed construction. There is no single font-size limit for every design. Check the weave, colour pair and logo.
Choose a reading condition that reflects the product’s purpose. A name badge may need to be read at a normal conversational distance. A decorative emblem may be judged at closer range. State the condition rather than relying on “looks clear.”
Test difficult characters together. Broad capital letters may look clear. They may hide problems with enclosed letter spaces, small numerals or similar letters. Include the actual words and punctuation that the order needs.
Use a physical sample to resolve disagreements. A digital proof sets out the shape and size. It also shows the intended colour relationships. It does not show the final yarn coverage, edge appearance or handle.
Consider a made-up trial with three versions of a small wordmark. Version A keeps the original narrow gaps. Version B widens the gaps. Version C increases both letter height and patch size. Compare all three in the intended garment location. Select the smallest version that meets the reading brief.
Keep the approved adjustment in the artwork file. Someone may ask verbally to “make the letters clearer.” On a repeat order, that could lead to a different change.
Design the border as part of the patch
A border affects appearance. It also takes space from the motif and provides room for attachment. A raised overlock edge and a flat cut edge give different profiles. Choose the edge with the outline and garment in mind.
Dutch Label Shop describes raised merrow edges and flatter laser-cut edges in its woven-patch range. A-B Emblem’s parts guide also shows border and attachment options. The choices affect one another in badge construction. Its dimensions describe those products. They are not limits for every woven patch.
For a complex outline, check narrow points, inside corners and short curves. These features may distort, curl or become difficult to attach. A shape that is simple in vector artwork can create awkward physical edges.
Specify the acceptable edge condition. Decide whether exposed support, dark cut lines or loose yarns are allowed. Check where the border starts and ends. State whether a visible transition there is allowed. Use close-up references when words alone leave doubt.
Provide a clear sewing route if the patch will be sewn. Give the operator room for a stable stitch path. It must clear important artwork and stay on the edge. The garment team may expect room for attachment. A narrow decorative border may leave too little space.
Inspect the complete outline after care. The straight side can remain sound while a sharp point lifts or frays. A border review should include the locations most likely to fail.
Calculate motif clearance with the actual tolerances
Border width and motif placement can vary independently. Consider both when deciding whether a design has enough space.
Suppose the example 60 mm patch may be as narrow as 59 mm. The border can reach 3 mm on each side. At that condition, the internal width is:
59 − 2 × 3 = 53 mm.
The motif is 49 mm wide, leaving 4 mm of total internal clearance. If perfectly centred, each side has 2 mm. If the motif can shift by 1.5 mm, the smaller side clearance becomes 0.5 mm.
That is the result to compare with the design requirement. Looking only at the nominal 60 mm patch would conceal the small remaining margin.
This simple size check tests the most demanding case. It assumes the listed changes can occur together. It does not predict how often they will occur. Use it to find a weak point in the design. Then agree realistic dimensions and controls with the supplier.
The team could make the motif smaller or the patch larger. A narrower, controlled border may help. Tighter placement limits are another option. Each has a trade-off. Make the decision from an actual sample, including its attachment path.
Choose backing by its job
A support backing helps the patch retain shape. An adhesive backing attaches it to another surface. Hook-and-loop backing enables removal. Name these functions separately. Do this even when one supplied assembly combines them.
Backing or attachment route | Main question for the garment team |
|---|---|
Sew-on construction | Does the edge provide a stable stitch path without excessive bulk? |
Heat-activated adhesive | Can the garment tolerate the validated bonding route and later care? |
Hook-and-loop assembly | Will both mating parts hold, release and remain comfortable in use? |
Pressure-sensitive adhesive | Is the product intended and proven for the required duration and care? |
Combined adhesive and sewing | What does each attachment contribute, and how is the whole assembly tested? |
A temporary stick-on product may hold well on the first day. That does not prove a lasting bond or show that it can be washed. Request the intended-use information for the exact adhesive.
Also check the face visible from inside the garment. A stiff backing or rough cut edge may contact skin through a thin panel. A patch may meet the appearance brief. It can still make the garment unpleasant to wear.
Test support and attachment together. A very flexible backing may improve drape but complicate feeding. A stiff backing may keep the badge flat. It may also create a visible ridge around it. The chosen construction needs to suit both production and use.
Match heat-seal chemistry to the care route
Heat-seal film is a product family, not one universal adhesive. Record its supplier and exact code. Obtain the supported bonding and care conditions for that product.
For example, Madeira describes a particular copolyamide film for fixing badges. Gunold’s BSN I product information describes a different product. It calls for trials of the planned application. These examples show why generic “iron-on backing” wording is inadequate.
Check the proposed bonding route against the shell fabric and coating. Include the print and lining too. Include the complete assembly thickness. A bulky seam under part of the patch may change contact at the bond.
Distinguish pre-bonding the film to the patch from bonding the patch to the garment. They are separate interfaces. The patch may bond well to the film. That does not prove that the film bonds well to the garment.
Allow the supplier-required interval before assessing full adhesion. Record that interval and the storage conditions. Pulling a warm patch tests it just after pressing. Testing after the specified rest answers a different question.
Compare the garment’s intended care with the adhesive’s supported range. Resolve any conflict before production. A careful press operator cannot make an unsuitable material specification disappear.
Prove the sewn attachment on the real panel
Sewing can secure a patch without requiring a heat-activated bond. It still needs a suitable edge, thread, needle and path for the actual stack.
Test on the production panel or complete garment. Firm, flat sample cloth may feed well. The real sleeve may bend or stretch. It may also leave little room to work. Include the hardest intended position in the trial.
Mark the proposed stitch path on a drawing. Record its distance from the finished edge. Show where it lies beside the border and artwork. Where the path changes at a corner, show the intended turn.
Inspect both sides after sewing. Check for missed edge capture, uneven feed, holes, distortion and an uncomfortable underside. Let the garment relax before judging it. Do not hold the panel taut during inspection.
A peel-resistant stitch line can still tear a weak shell around the patch. Test the whole attachment system under relevant use. The shell may fail before the patch. That remains a garment problem, even if the patch looks intact.
Keep general seam design in the established garment seam selection guide. The patch specification should add the exact geometry and material stack for this decoration.
Allow for garment movement
A patch can restrain a stretch panel locally. Its edge then becomes a transition between supported and free fabric. Check that transition during wear. Also check it when the garment is extended as expected.
In an example sleeve, a marked panel length starts at 100 mm. It reaches 112 mm during a defined movement. Its local extension is 12%. A rigid 60 mm badge placed within that zone will not necessarily share the same extension.
Do not subtract the patch length from the gauge and treat the result as free cloth. That alone cannot show the exact strain in the cloth. The garment’s shape, attachment and force distribution matter. The measurement raises a question about how the parts work together. The assembled trial must answer it.
Compare placement options. Move the patch away from a high-movement zone in a trial. This may improve comfort without changing the artwork. A more flexible construction may also help, but it still needs adequate support and attachment.
Assess the reverse side while the wearer moves. A badge that lies flat on a table can create a hard edge on a bent arm. Include drape, contact and return to shape in the product review.
Do not resolve a movement problem solely by adding more adhesive or stitches. That can increase local restraint. Test a design change against the actual cause.
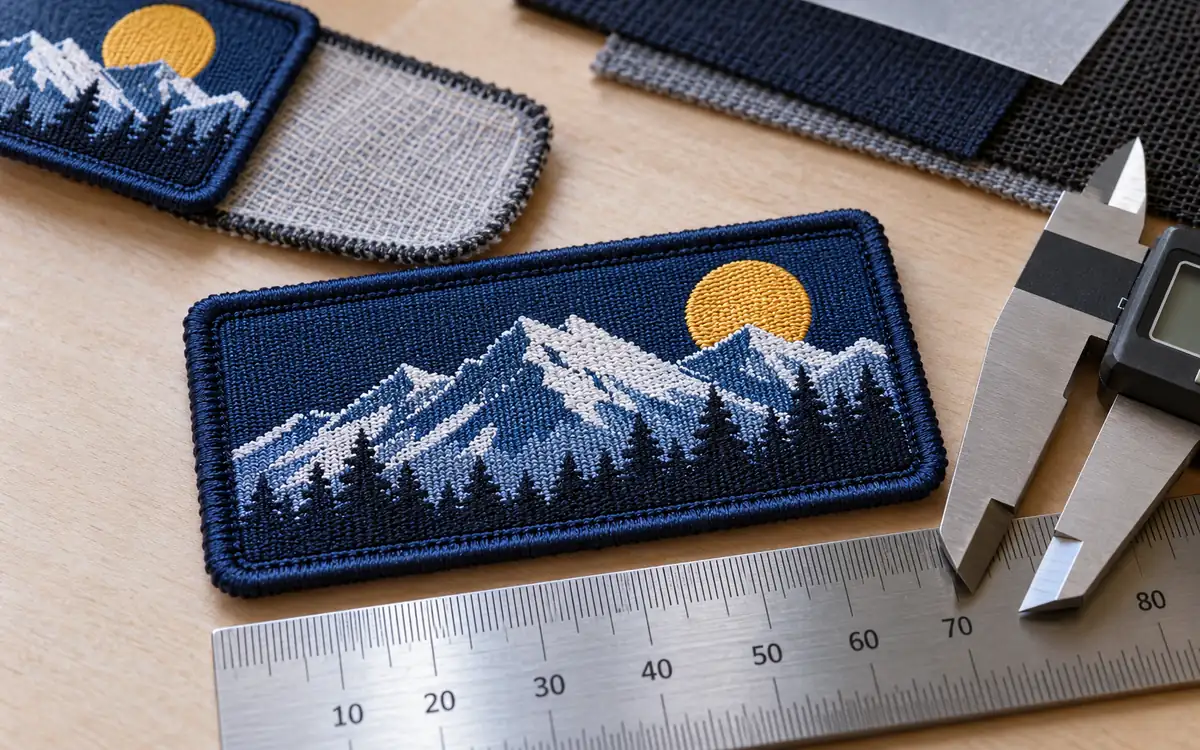
Specify removable patches as a two-part system
A removable badge needs both the patch side and the garment side. State their dimensions, orientation and compatibility. A correct hook piece alone does not qualify the assembly.
Decide whether the garment-side part must remain covered when the badge is removed. Exposed hook material may catch other textiles. Check the product in both its attached and detached states.
Define the expected number and manner of removals through the product brief. One patch may change once a season. Another may change every shift. Test the use pattern the product needs. Test the intended cycle without claiming a universal service life.
VELCRO’s care guidance advises closing hook-and-loop fasteners before washing. Keep the hooks free of debris too. Include care instructions appropriate to the specific supplied closure.
Watch which interface fails during removal. The hook-and-loop pair may release as intended. Or the sewn or bonded piece on the garment may start to lift. Those are different results.
Evaluate ease of use with the garment on. A closure can be mechanically secure but awkward to grip. The design may need a feature that helps the user grip it. If one is added, check that it does not create a snag point.
Set colour and appearance references
Name each intended colour and the physical reference used to approve it. Include the base, motif, border and visible backing. Similar names such as “navy” can conceal meaningful differences.
View the patch on the actual garment colour. A border that looks clean on white sample card may look uneven on a dark shell. Transparent or open areas can also reveal the material beneath.
Agree the viewing conditions. Keep the orientation and light source consistent when comparing samples. The product may be used under several important light sources. Include them in approval.
Do not let a digital colour code replace the physical result. A screen helps communicate the design. It cannot show the exact look of yarn and garment together.
Keep acceptable variation references where the order permits variation. A single ideal sample may leave the inspector unsure how to judge a borderline piece. The references should show real product decisions. Do not rely on memories of the development meeting.
Check colour after the required care alongside the edge and bond. A patch may stay attached but stain a light garment. Its colours may also lose the intended contrast.
Test the finished patch and attachment together
Choose tests from the product’s actual risks. A woven face, an adhesive layer and a sewn shell can each fail in a different way. The plan should identify which result addresses which risk.
AATCC TM61 addresses laundering colourfastness. AATCC TM8 addresses colour transfer during rubbing. Neither result alone proves that a patch stays attached or remains comfortable.
For formal testing, use the full agreed methods and product limits. Public method summaries help identify the right test. They do not supply complete procedures. An internal pull check should be labelled as such.
Include the whole care route. Examine the patch immediately after the agreed treatment and in the specified final state. Do not stretch it flat before judging edge lift or distortion.
A practical assessment record separates these outcomes:
Outcome | What to retain |
|---|---|
Legibility | Final-size sample and agreed reading result |
Colour | Reference and before/after comparison |
Edge condition | Location and extent of fray, lift or curl |
Attachment | Method, load direction and failure location |
Garment effect | Distortion, damage, comfort or visible mark |
Dimensions | Original and final measurements on a stated basis |
Use separate specimens when tests damage the patch. Keep the number of independent attachments clear. Several pulls may test one attached patch. They do not represent several separate applications in production.
Interpret a differential-size example
Suppose an example patch is 60 mm wide before care. It measures 59.4 mm afterward. Its width reduction is:
(60 − 59.4) ÷ 60 × 100 = 1%.
A separate 100 mm gauge on the shell becomes 96 mm under the same care route, a 4% reduction. The results differ by 3 percentage points.
That mismatch suggests a reason to examine the attached assembly. It does not predict an exact wrinkle height. Once joined, the patch and shell restrain each other. Their stiffness, shape and attachment pattern affect the final appearance.
Compare a patch-only sample, a shell-only sample and the actual assembly. The free parts may change by different amounts. If the assembly also distorts, review how those parts work together. Check other causes too, including tension introduced during attachment.
A different patch support, care-compatible adhesive or revised placement may help. Select the change from a controlled trial, then reassess appearance, attachment and comfort together.
Retain both dimensions and images. A small size change may be harmless on one design. On a straight badge beside a placket, it may be clear.
Keep chemical claims separate from durability claims
A customer may require chemical certification. Identify the exact certificate and what it covers. A certificate may cover only the yarn. It does not automatically cover each added backing, adhesive or garment assembly.
OEKO-TEX STANDARD 100 concerns testing for harmful substances and considers product use and components. Its official Label Check can help verify a certificate’s validity.
This evidence concerns harmful substances. Attachment after washing, edge durability and colour match need separate evidence. Keep those requirements in separate fields. A certification mark should not become shorthand for “all patch tests passed.”
Check whether the claimed certificate applies to the supplied colour and construction. Printing or adhesive may be added. The backing may change. Check whether these changes affect the certificate’s scope. Ask the supplier to resolve that question. Where needed, it should consult the body that issued the certificate.
Use only claims that the product evidence supports. A strong technical specification can be brief. Use defined requirements. Broad claims such as “completely safe,” “eco-friendly” or “permanent” cannot replace them.
Prepare a specification the supplier can quote
Bring the technical choices into one compact record. Include the artwork version, finished shape and dimensions. Add the border, materials and backing. State the attachment route and care requirements. Link the record to the physical approved sample.
Keep dimensional tolerances beside the dimensions. Put appearance references beside the features they govern. A general tolerance note may be unclear. Does it apply to motif placement, overall size or the stitch path?
Request a quote on that defined construction. If suppliers propose alternatives, ask them to identify the changed layer or process. Otherwise, a cheaper price may simply describe a different patch.
Consider a simple made-up order. One patch option costs 0.42 currency units. Its attachment costs 0.18. Another costs 0.50 and needs 0.08 for attachment. Their combined direct amounts are 0.60 and 0.58 before rejects and other costs.
The comparison does not choose the second option automatically. Both still need to meet the garment requirements. It shows why patch purchase price alone may give an incomplete decision.
Use ApparelDiary’s trim-approval process to manage the approved identity and later substitutions. This technical specification supplies the construction details that process needs.
Common questions
Are woven patches always better for small lettering?
They can provide useful fine detail. No construction guarantees a clear result for every tiny design. Test the actual wording, colour contrast and finished size. A physical sample should settle the decision.
Does an iron-on patch need stitching as well?
It depends on the qualified attachment and product requirements. Extra stitching may be appropriate, but it should be specified and tested. It is not a substitute for choosing a compatible adhesive.
Can one patch work on every garment in a range?
Possibly. The locations, fabrics and care routes may differ. Access for attachment may differ too. Qualify the relevant combinations instead of assuming that a shared logo makes them equivalent.
What should happen when a corner lifts after washing?
Record its location and the process history. Examine bond coverage, local contact, shape and care compatibility. Find the cause before repressing the corner. Repressing alone does not resolve the original approval question.
Make the badge work as part of the garment
Good woven patch specifications turn artwork into a defined physical construction. They protect clear lettering and reserve room for the edge and attachment. They also account for garment movement and care.
The final sample should prove the face, backing and attachment together. Clear measurements and realistic garment trials give suppliers a precise target. They give product teams evidence for repeat orders too.
References
Dutch Label Shop: Woven patch construction and options
Madeira: Heat-seal film for badges
VELCRO: Fastener selection and care questions
AATCC TM61: Laundering colourfastness, public scope



Discussion0
Loading the discussion…