
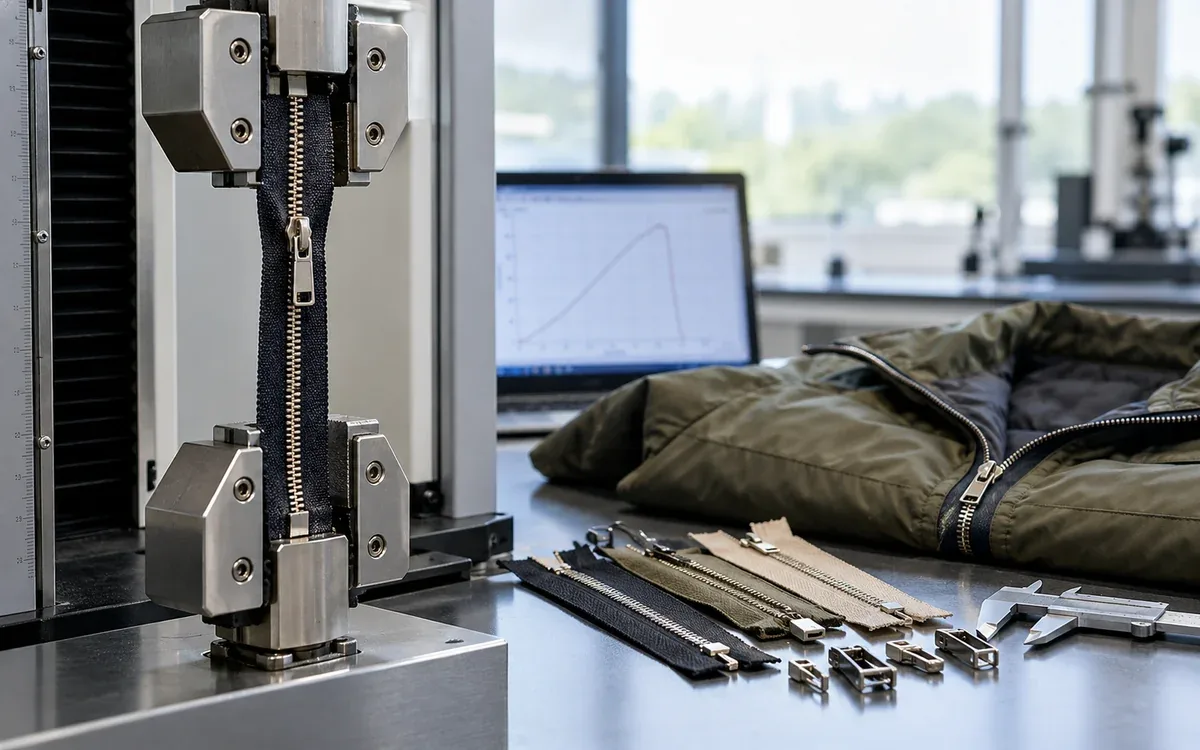
A zipper can pass a chain-strength test and still be difficult to close. It can work well before sewing and jam beside a thick seam. It may leave the sewing line in good condition. Garment washing may then harm its function.
Zipper performance testing must therefore answer a specific question. “Is this zipper good?” is too broad. Ask instead: “Does the separating unit still work after this jacket’s care route?” This gives the lab and factory a clear task.
The test plan needs component results. It also needs checks on the assembled garment. It also preserves the stage at which a failure first appeared.
Define the zipper before choosing the test
Record the supplier’s product code and full configuration. Include chain type and size designation. Add the slider, puller, stops and tape. Record finish, length and end type.
A trouser zipper has a closed end. A jacket zipper may separate. Their parts and use conditions differ. A two-way design adds further operating steps. A concealed zipper sits beside the garment edge differently. It does not use the same arrangement as an exposed chain.
Two products may share a size number. Do not assume they are interchangeable. Confirm the actual supplier specification and intended application.
Identify the failure location in plain terms. “Zip broken” can mean several things. The puller may have detached or the tape torn. The elements may have separated. The pin may not enter the box. Each points toward different evidence.
Photograph the intact product and the failed area. Retain the part code and garment location with the specimen. A photo of damaged teeth is not enough. Without identity or process history, it gives little support for a technical conclusion.
Separate strength, operation and dimensions
Three test families answer three different questions.
Test family | Main question | Examples of relevant characteristics |
|---|---|---|
Strength | What load can a part or assembly resist under a defined test? | Chain, stops, slider lock, puller and separating unit |
Operability | How does the zipper move and engage? | Opening, closing, separator function and sticking at stops |
Dimensions | Does its geometry match the requirement? | Length, tape width, chain width, straightness and dimensional change |
ASTM D2061 addresses zipper and component strength. Its public scope states a limit. Not every method suits every zipper. One result also cannot prove that a zipper suits every use.
ASTM D2062 covers how a zipper operates. This includes opening, closing, separator function and sticking at stops.
ASTM D2060 covers dimensional measurements. Its scope covers more than overall length. Check which feature the report measures.
These references identify relevant method families. A lab must use the full agreed method. Check the edition and conditions too. A short web summary cannot replace that procedure.
Map the test to the failed part
YKK Korea’s test overview illustrates several distinct strength checks. The chain, stops and separating unit use different load tests. The lock and puller need their own checks too.
A high result in one test cannot cancel a failure elsewhere. This is why the load arrangement matters.
Observed problem | Useful first test question |
|---|---|
Closed chain opens under crosswise load. | How does the closed chain resist the specified load across it? |
Slider escapes at the top | Does the top-stop assembly meet its holding requirement? |
Closed end fails near the bottom. | Does the bottom-stop region pass its defined test? |
Jacket pin or box fails | Does the separating unit meet the applicable requirement? |
Slider moves when it should stay locked. | Does the intended lock hold under the specified conditions? |
Puller breaks away | Does the puller attachment resist the relevant force and direction? |
Use the table to start the investigation. The lab still needs to choose the correct methods. Failure can involve more than one feature. A garment can put unusual side load on a sound zipper. A damaged slider can also change how the chain engages.
Distinguish a locking slider from a stiff slider
A locking mechanism and resistance to movement are not the same property. A slider may feel stiff yet have a damaged lock. Another may move freely when used correctly. It may hold well with its lock engaged.
State the intended slider type. Check its operating instructions before comparing results. The puller position and loading direction can matter.
Avoid an uncontrolled hand-pull test that continues until something gives way. YKK’s zipper instruction manual warns about excessive force in a hand lock check. It can damage the mechanism. The manual directs users to obtain the appropriate product requirement.
A routine function check differs from a destructive strength test. Use separate specimens or a defined test sequence. A zipper may already have been pulled beyond its normal use condition. Do not treat it as a new specimen in another comparison.
Record what happened. Did the slider move, the lock fail, the chain separate or the fixture slip? A force reading without the event that produced it can be misleading.
Read units before reading the verdict
Zipper reports may use newtons or other force units. Keep the unit attached to every result and limit.
Force is not the same as mass. A report may say “10 kg” but mean kilogram-force. That wording is unclear. Ask for clarification instead of copying that number into a newton column.
For an explicit kilogram-force conversion:
1 kgf = 9.80665 N.
Thus, 10 kgf is about 98.1 N. This conversion does not make two different test arrangements comparable. Their gripping, speed, specimen geometry and loading direction still need to match.
Also distinguish total force from force per unit width. A report may use newtons while a limit uses newtons per centimetre. Check the method’s basis before comparing them.
Both zipper and fabric tests may use a tensile tester. That does not make their strength rules interchangeable. The component geometry and failure mechanism are different.
Interpret the result against a defined requirement
A laboratory can report what happened. The purchase specification must establish what is acceptable for the intended product.
Consider an example component test. The project requires at least 80 N for every tested specimen. Five results are 91, 88, 94, 86 and 76 N.
Mean = (91 + 88 + 94 + 86 + 76) ÷ 5 = 87 N.
The mean exceeds 80 N. One specimen does not. The stated rule applies to each specimen. A strong average cannot make this set pass.
This example does not establish an 80 N industry limit. It shows why the reporting basis matters. Some specifications use individual limits, others use a defined statistical rule. The rule should be agreed before testing.
Read the failure mode as well. The specimen may have slipped in the grip. If that ended the test, the peak may not show the part’s strength. The lab should check whether the method allows that result. It should explain any repeat test.
Read the pattern of operating resistance
An operating complaint may be local or spread across the whole zipper. Where the resistance occurs can be as useful as its size.
In a controlled diagnostic check, mark the slider position when it catches. Repeat with fresh comparable specimens and the same defined handling. The fault may recur at a garment seam. Inspect that location before blaming the full chain.
The agreed lab method may provide a force record. Ask how its reported value was calculated. A peak shows one feature of movement. A mean and the force needed to start moving show others. They should not share a column labelled only “zip force.”
Imagine two hypothetical traces collected under the same diagnostic conditions. The first moves at a fairly even resistance through most of its travel. The second moves easily for most of the distance. It has one sharp peak near the garment join. Their averages could match. That would hide these very different user experiences.
Do not smooth away a repeatable peak simply to make the average look acceptable. Check whether it comes from the specimen, fixture or garment. A misaligned fixture can also create a false local load.
A revised assembly should be compared with the original under matching conditions. The peak may disappear while the rest of the trace stays similar. This supports the proposed cause. It does not prove durability over the garment’s life. That needs further relevant checks.
Keep this diagnostic work separate from a formal conformity statement. The procedure may differ from the specified standard. If so, call it an internal comparison and record the difference. The internal check helps locate the problem. The formal method gives the agreed basis for acceptance.
Examine changes after care carefully
A zipper may work when new but lose function after treatment. A before-and-after comparison can reveal that change. Use matched specimens and a defined care or manufacturing exposure.
Suppose separate, comparable groups are tested. The before-treatment mean is 120 N. The after-treatment mean is 96 N.
Retained force = 96 ÷ 120 × 100 = 80%.
The mean has fallen by 20%. That is not automatically a failure. Check the after-treatment value against the agreed absolute limit. Apply any retention rule too.
A high retention percentage can hide low starting performance. A part that retains 95% of a weak initial result may remain unsuitable. A lower percentage may still leave ample strength. Review its failure pattern too.
One specimen may become more damaged with each test. Repeated tests on it are not independent before-and-after strength results. Destructive tests usually require separate specimens. Keep the exposure history clear so that each comparison means what the report claims.
Start diagnosis before sewing
Keep a small, identified group of unsewn zippers from the same supplied lot. Check their visible condition and intended function before they enter production.
Look for damaged elements, bent parts, incomplete engagement and obvious irregularity. Measure relevant dimensions using the agreed endpoints.
This unsewn group provides a useful control if trouble appears later. Without this control, the cause may stay unclear. The defect may have arrived with the zipper or arisen during sewing or finishing.
The control is not permission to release the entire lot from a few hand checks. Sampling and release decisions belong to the agreed quality plan. Its purpose in diagnosis is to preserve evidence of the starting condition.
Avoid mixing halves from separate finished zippers. YKK’s manual explains a limit of nominal length. Equal lengths do not guarantee equal element pitch between different stringers. Keep matched components together. Mix them only if the product is designed and controlled for interchange.
Add a checkpoint after sewing
Operate the zipper immediately after installation and before washing or heavy pressing. Note where movement becomes difficult.
A fault at the same cross-seam on many garments suggests a local assembly issue. A fault may appear at random places on loose and sewn zippers. That pattern suggests a different investigation.
Check the relationship between the tape, seam and nearby fabric. The slider needs its intended clearance. A lining, seam allowance or loose thread can enter its path.
Look for distortion. One side may have been fed or stretched differently. The installed chain may then curve or wave. The cause may lie in assembly or material balance. A stronger zipper may not solve it.
A concealed zipper may fail near a thick join. Compare its installed shape with the supplier’s application guidance. Do not force the slider through the obstruction to prove that it “works.” That can create damage and erase the original evidence.
Use a staged comparison to locate the cause
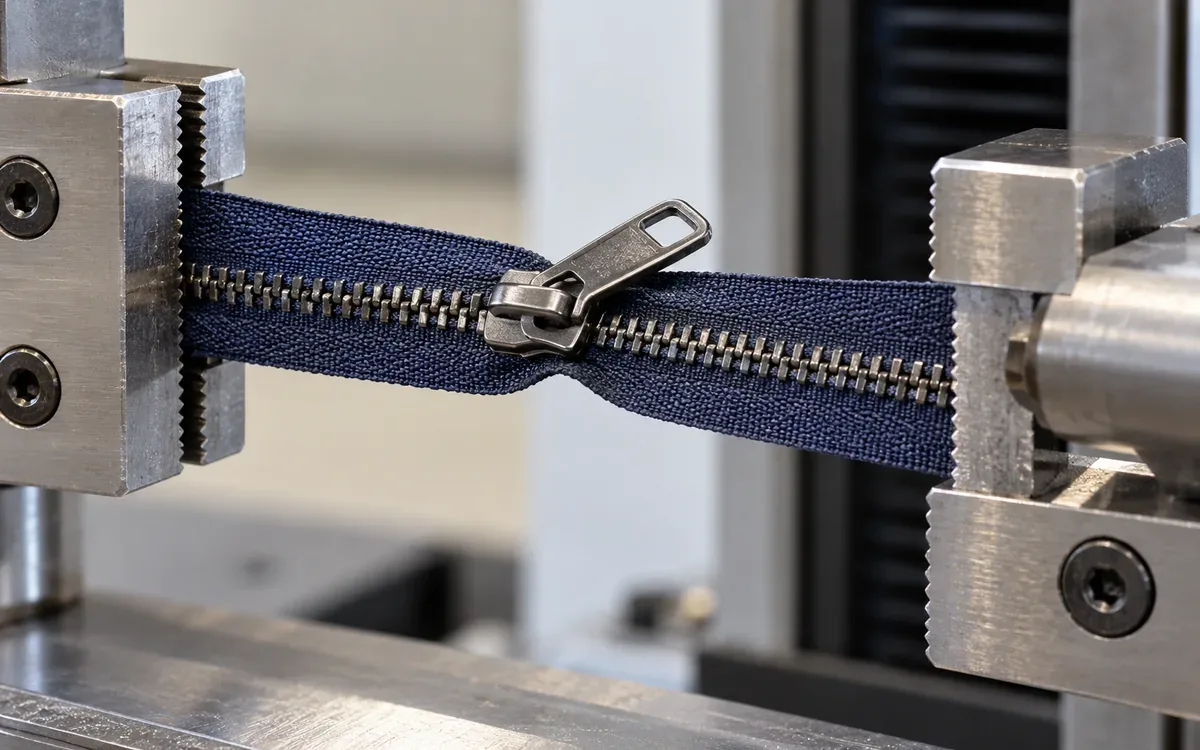
A useful diagnostic trial follows the same zipper configuration through distinct stages:
As received, before garment assembly.
After sewing, before finishing.
After the specified wash or care exposure.
After final pressing and handling, where relevant.
At each stage, record how the zipper works and looks. Measure the dimensions that matter to the complaint. Use separate matched groups for destructive tests.
The first stage showing a change narrows the search. It does not by itself prove the exact cause. A weak component may fail only when normal sewing stress exposes it. An unsuitable sewing method may also damage a sound component.
Follow the stage comparison with a controlled change. Alter one suspected factor and check whether the failure follows that change.
A request for “all zipper tests” leaves the cause unclear. Sending only the worst finished garment can also hide the starting condition. The staged sequence gives the lab more useful evidence.
Worked trial: zipper source or sewing route?
Suppose an example jacket sometimes jams at a pocket opening. Two zipper lots and two sewing arrangements are available.
The trial uses the same fabric construction throughout. It evaluates ten pieces in each combination. The numbers below are invented to demonstrate interpretation.
Zipper lot | Existing sewing arrangement | Revised clearance arrangement |
|---|---|---|
Lot A | 4 of 10 jam | 0 of 10 jam |
Lot B | 3 of 10 jam | 0 of 10 jam |
Both lots improve under the revised arrangement. That pattern supports investigation of the installation clearance. It does not prove that the two lots are identical in all properties.
Next, repeat the promising arrangement with fresh specimens. Confirm that it preserves appearance, seam integrity and intended placement. Then apply the required care exposure and check again.
The revised sewing arrangement might help only Lot A. If so, check how zipper geometry and assembly work together. Choosing the best single sample would miss that issue.
This teaching example uses ten pieces per cell. That is not a sample size for every approval test. Use a justified plan for the actual decision and risk.
Separate wash damage from colour change
Garment washing can affect both function and appearance. These outcomes should be recorded separately.
Coats’ guidance on protecting zips during washing describes abrasion and damage to elements and open-end parts. It also describes changes around reinforcement film. It relates those problems to the actual washing conditions and mechanical exposure.
Record how the zipper was prepared. Was it closed and protected as that product requires? Record the garment load, wash route and any hard objects involved.
A stained fabric beside a metal zipper does not automatically mean the tape dye bled. Abraded particles, chemical change and colour transfer can create different patterns. Compare the mark’s location with the zipper surface. Check the surface condition before choosing a further test.
Do not prescribe a spot-cleaning chemical from appearance alone. The garment and component supplier should help identify a compatible investigation or remedy.
Care requirements can differ across zipper products. Follow the instructions for the actual model. Give special attention to coated or sealing designs.
Check dimensional compatibility after care
A zipper can remain intact while the surrounding garment changes length. The result may be a wavy front, local strain or difficult engagement.
Measure comparable marked lengths before and after the relevant exposure. Keep the zipper measurement method distinct from the garment measurement.
For a hypothetical 500 mm garment opening, a change to 490 mm represents:
Length reduction = (500 − 490) ÷ 500 × 100 = 2%.
Suppose the corresponding zipper measurement changes from 500 to 497.5 mm:
Length reduction = (500 − 497.5) ÷ 500 × 100 = 0.5%.
The difference is 1.5 percentage points. Over the original 500 mm length, the two final dimensions differ by 7.5 mm.
That mismatch is a useful clue. It cannot fully predict garment waviness. Seam construction, restraint and fabric response also matter. Check the assembled sample and identify which material or process changed.
ASTM D2060 includes longitudinal dimensional change among its measurement subjects. Use the applicable method when a formal zipper result is required.
Inspect the weakest location in the application
A garment rarely loads every part of a zipper equally. The bottom of a jacket opening, a tight waistband or a curved pocket can create a local demand.
Identify how the wearer opens and closes the product. Check how the wearer brings the garment edges together before moving the slider. Can the pin enter fully? Does nearby bulk block the movement?
For an open-end jacket, assess the bottom assembly in the real hem construction. A loose zipper may work well on a bench. A folded hem or stiff facing can create problems that this test misses.
For a pocket, check the slider at both ends and through any curved section. Inspect the puller’s reach and whether it catches on a flap.
Do not solve every complaint by increasing chain size. A larger zipper may add stiffness, reduce comfort or create a new assembly problem. Match the change to the observed mechanism.
Make a test report useful to production
Identify the exact specimen, test method and edition in the report. Add conditions, units, results and a description of the failure. It also distinguishes required tests from additional observations.
For after-treatment results, name the full treatment. State whether testing took place before or after the agreed recovery period. “Washed” is not enough to reproduce the comparison.
Ask for individual values where the decision depends on variation. A mean alone can hide one weak stop or one difficult separator.
If a result conflicts with another laboratory, first compare methods and specimens. Lots, slider types or conditioning may differ. Test directions may differ too. These changes can explain an apparent disagreement.
Two labs may report materially different results. The public scopes of ASTM D2061 and D2062 discuss comparison work for this case. Ask a competent lab to help resolve such disputes. Do not average reports from incompatible tests.
Use a symptom-based troubleshooting record
Symptom | Evidence to preserve | Next focused check |
|---|---|---|
Jams only at a cross-seam. | Record exact location and local garment thickness. | Compare installation clearance and seam shape. |
Puller detaches. | Keep the failed puller and slider body. | Check puller strength in the relevant load direction. |
Slider descends when closed. | Record slider type and puller position. | Test the intended lock as specified. |
Pin or box fails after washing. | Keep an unwashed control and wash history. | Check the separating unit and its mechanical exposure. |
Chain opens behind the slider. | Keep the damaged area and a matched unsewn specimen. | Check slider condition, element engagement and garment load. |
Front becomes wavy after care. | Record marked lengths before and after. | Compare garment and zipper size changes. |
Tape tears beside the stitch line. | Record needle path and where the tear starts. | Check assembly damage and where load is concentrated. |
The record should distinguish observation from explanation. “Tape tears beside the stitch line” is an observation. “Poor zipper quality” is a conclusion that still needs evidence.
After changing the process or part, repeat the condition that caused the failure. A replacement may look different or have a higher catalogue size. Neither change alone proves that it works.
Connect testing to the permitted garment use
A laboratory result applies to the specimen and conditions tested. Keep its link to the intended garment clear.
Record which colour, finish, slider and care route the evidence represents. Some changes may leave the relevant risk unchanged. Others can alter the mechanism being assessed. Review how each change affects the risk. Some variants may need little extra testing. Others may need a different test set.
ApparelDiary’s garment trim approval guide explains the wider release process. For zippers, link each expected failure with a test. Add evidence from the garment application.
Keep tested and untested retained samples available during an investigation. A heavily pulled complaint sample may no longer reveal its original condition.
Frequently asked questions
Which single test proves that a zipper is suitable?
No single result covers all functions and uses. Select strength, operating and dimensional checks for the product. Then assess the installed garment.
Does a larger zipper always solve a failure?
No. A larger chain may still have unsuitable stops. Poor installation or a blocked slider path may also remain. Diagnose the failed feature before changing size.
Can a zipper pass strength testing and still be hard to use?
Yes. Strength and operability measure different properties. A garment can also obstruct a zipper that works well before installation.
Is hand pulling an acceptable lock test?
Only within a defined, suitable check. Uncontrolled force can damage the mechanism. It cannot give a reliable comparison with a specified lab result.
Should care testing use loose zippers or garments?
Both can answer useful questions. Loose specimens help isolate component response. Garments reveal interactions with sewing, surrounding materials and finishing. Choose the combination that resolves the actual risk.
Make every test answer a failure question
Start zipper testing with the part and garment. Identify the stage at which failure appeared. Test load resistance, movement and geometry separately. Bring those findings together in the real application.
Preserve the starting condition, compare stages and test the suspected cause. This gives the factory a specific correction. It gives the buyer evidence linked to how the garment will be used.
References
ASTM: D2061 strength tests for zippers
ASTM: D2062 operability of zippers
ASTM: D2060 measurement of zipper dimensions
YKK Korea: Zipper strength testing overview



Discussion0
Loading the discussion…