
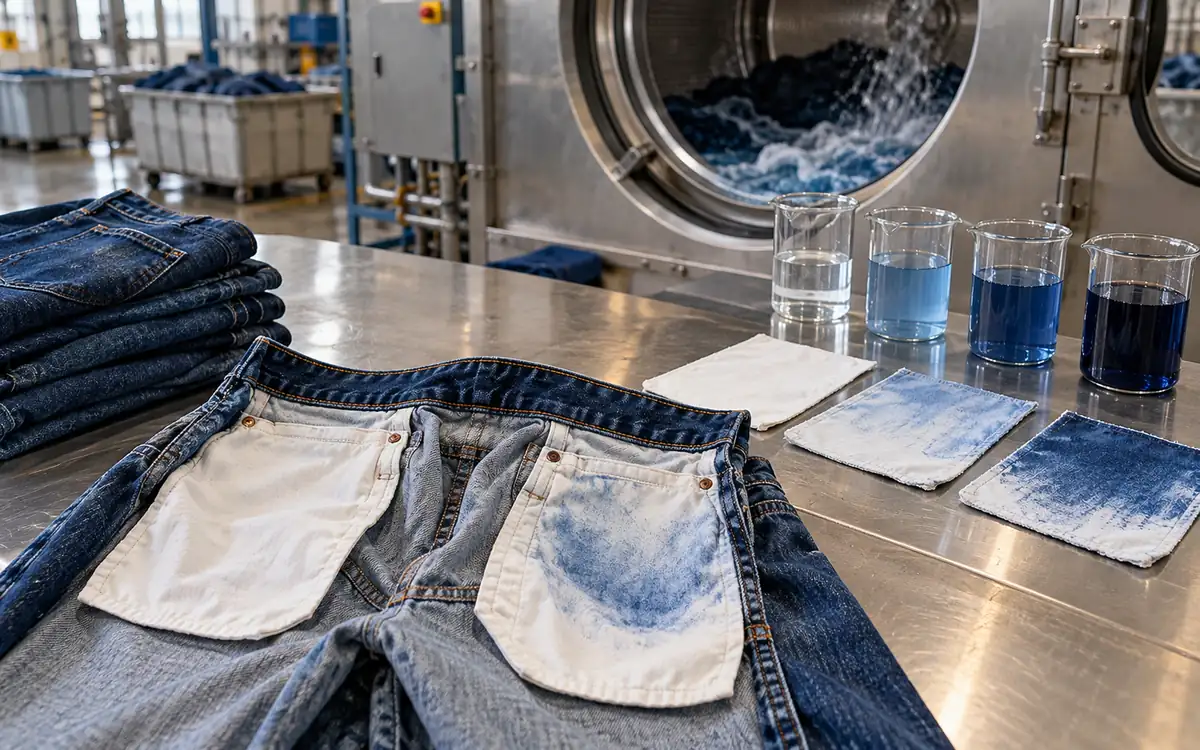
Identify what has become stained
Denim backstaining starts with colour released during processing. That colour returns to the textile or stains another garment part. It can darken pale yarn areas, reduce contrast and mark pockets or labels. Novonesis describes these effects in its denim abrasion guidance.
First, identify the stained material. A blue pocket bag, a dull fabric face and a dark seam mark may have different histories.
Record the defect before attempting correction. Note its location, colour and size. Record the stage at which it first appears. Keep an untreated reference and a sample from the last accepted batch.
Do not assume that every blue mark is backstaining. Colour transferred during handling may look similar. So may a planned tint, a starting shade difference or colour from another lot.
A useful diagnosis explains where the colour came from and how it moved. It also asks why it stayed on the affected area. Use that explanation to plan the next trial. It gives more direction than simply adding detergent or rinse time.
Separate colour removal from colour redeposition
A faded denim effect usually changes the visible dyed surface. Once colour is released, some may cause unwanted backstaining.
These processes are linked. They still need separate measurements. A route may remove more colour from the face and also stain the pockets more strongly.
CottonWorks explains the white-core structure of ring-dyed indigo yarn. Exposing lighter yarn areas can create contrast. Released colour can return to those pale areas and reduce the intended contrast.
Track at least three outcomes. Record the face effect, staining on the receiving material and garment performance. A clean pocket is not enough if the face has too little wash-down. The whole garment must meet the brief.
Do not judge the process by bath darkness alone. A darker bath can reflect more dye release, better suspension or both. A clear bath can reflect little release, settling, removal or deposition. Bath colour alone cannot show which of these is happening.
Understand why enzyme identity can matter
Cellulase products may share an enzyme name without being alike. Their makeup and activity can differ. So can the way they act in the process.
A primary study by Gusakov and colleagues examined protein adsorption. It looked at how proteins attached to indigo and cellulose. It found differences among the enzymes studied. It also found evidence of enzyme–indigo interaction. This shows why pH alone cannot explain all backstaining. See the study abstract.
Another study used small-scale assays, or tests. It assessed abrasion and backstaining from different cellulase preparations. Its design shows why both outcomes need to be checked. See Sinitsyn and colleagues’ microassay study.
These studies do not provide a current commercial recipe. They show why a replacement enzyme needs a trial on the actual denim.
Record the product code and lot. Add the supplier’s activity or application basis. Equal weights of two formulations may not give equal enzyme action.
Use the supplier’s current operating guidance. A broad label such as “acid” or “neutral” is not enough. Use evidence for the specific product.
Map the defect before changing the bath
Turn the garment inside out and compare several defined zones. Use consistent lighting and a physical reference.
Zone | Useful observation |
|---|---|
White pocket bag | Overall blue cast, local marks or edge staining |
Pale weft or yarn core | Loss of contrast against the darker face |
Labels and prints | Selective staining or an unrelated colour change |
Seams and folds | Contact marks, retained liquor or local abrasion |
Main face | Required fading, unwanted dullness and shade variation |
Areas protected from rubbing | Evidence that helps separate contact from bath effects |
Compare several garments from the same load. One marked pocket may suggest a local event. Similar staining across the load points to a shared material or process condition.
Take photos to record the locations. Do not grade colour from a screen that has not been calibrated. Keep physical samples when the decision depends on a subtle cast.
Check whether the stain is visible before drying. Record any change after the complete route. This helps show when the failure occurred. It does not assume a cause.
Verify the receiving component
A pocket bag is an active part of the problem. Its fibre blend and construction can affect the final look. Its finish and starting colour also matter.
Confirm that the pocketing matches the approved material. A substitute may look similar in the cutting room but respond differently in the wash.
Keep an unprocessed control from the same pocketing lot. Compare the processed material with that control, not with a different white fabric.
Pocketing may contain an optical brightener or another finish. Its look can then change for reasons other than deposited blue dye. Ask the supplier about relevant processing limits.
Run a small approved trial. Compare suspect pocketing with previously accepted pocketing under the same conditions. To find the cause, keep the washing route fixed while comparing pocket materials.
ApparelDiary’s trim approval and bulk-release guide helps maintain component identity. For backstaining diagnosis, keep the receiving material traceable through the whole trial.
Review the history of the denim lot
Check the fabric and garment records before blaming the current chemical. Record the fabric lot and dye description where known. Add preparation and every earlier wash stage.
An indigo-only fabric may release different material from an overdye. A fabric with another colour component may differ too. Ask the mill about the dye route if the behaviour changes without a clear reason.
Compare starting face shade and pocket condition. A lot may start with more loose surface colour. A route that passed before may then give a different result.
Look for changes in desizing, abrasion and prior rinsing. These may alter what enters the stage where the defect becomes visible.
Keep incoming variation separate from machine variation. Suppose one fabric lot runs only on one machine. The records may not show whether the fabric or machine caused the change.
One useful trial runs matched material through each proposed route. Another compares several material lots under controlled conditions. If production limits prevent such a trial, record what the comparison cannot show.
Sample the process at meaningful stages
Take stage samples using an approved procedure. Do not open or access running equipment in ways outside its safe design.
Useful points include the end of preparation and the end of abrasion. Samples may also be needed after the enzyme stop, selected rinses and final drying. The exact points depend on the route.
State how to handle each sample after removal. A wet specimen left in contaminated liquor can continue to change. An extra laboratory wash may change the specimen. It may no longer represent the stage being sampled.
If laboratory tests are planned, keep bath samples in suitable, labelled containers. Record whether the sample was taken before mixing, during circulation or after settling.
The sampling plan should show when colour is released. It should also show when staining becomes visible. This can point to the active treatment, draining or rinsing as the main concern. Later handling may also matter.
Do not treat one sample as conclusive. Repeat the observation when the suspected stage is important to the release decision.
Use receiver controls to narrow the source
A laboratory can help tell whether colour has stained the material or the material itself has changed. Agree a small test to help find the cause. Use matched pieces of the actual pocketing. Call this an internal investigation. It is a standard test only if the full adopted method is followed.
Keep one piece unexposed. Give another the relevant clean process conditions without denim. Expose a third piece to a sample that represents the suspect stage. Use a defined laboratory procedure.
The clean-process piece has no released denim colour. It helps show whether heat, chemicals or the pocket finish change its look. The suspect-stage piece helps test whether the sampled material can cause the observed stain.
Record the contact conditions. Add the final rinse, drying and conditioning steps. One test piece may be strongly washed while another retains sample liquor. That is not a fair comparison.
Include a previously accepted pocketing material if a component change is suspected. That comparison can show whether the new material responds differently under the same exposure.
Interpret the result cautiously. A blue change supports further checks for transferred colour. Its look alone does not identify its chemical makeup. Contact with the sampled bath may also differ from contact inside a folded garment.
Use the control results to select the next production trial. If clean conditions change both pocketing materials, investigate that route first. If only the suspect sample causes the defect, focus on its source and stage. If only the new pocketing responds, check if it suits the route. Do this before changing the whole wash.
Check actual carryover between stages
Residual liquor can carry released colour into the next stage. Liquid can remain in the machine and garment load after a drain command ends. Its volume matters.
Use a defined trial or engineering check to measure the carryover. Do not assume the drum is empty because the visible free bath has drained.
A simple ideal dilution model helps explain the issue. Suppose 80 litres of residual liquor remain and 320 litres of clean water are added. The combined liquid volume is 400 litres.
Assume the freely suspended material mixes evenly. No new material is released. After the volume returns to 80 litres, the fraction retained is:
80 ÷ 400 = 0.20
Thus, 100 arbitrary mass units become 20 after one ideal exchange and 4 after two.
Real denim washing is more complex. Colour may stay attached to fibres or settle. More colour may be released, and it may not mix evenly. The model predicts dilution of the freely mixed liquid only.
Use it to ask better questions about drainage and carryover. Do not use it as proof that two rinses will meet a garment requirement.
Assess the anti-backstaining product in its intended role
Anti-backstaining products aim to help prevent released colour from returning to the textile. The formulation and process determine whether they work well.
For example, Rudolf’s RUCOGEN UPCYCLE RNB fact sheet describes a dispersing product. It helps control indigo redeposition during denim washing. Its guidance applies to that product. Do not use its dose for every auxiliary.
Ask the supplier whether it works with the enzyme and water conditions. Check the other chemicals and application method too. Get current technical and safety documents for the product actually supplied.
Check the addition point. A product may be added only after heavy redeposition. It may then serve a different role from one present while colour is released.
Do not assume that more product always gives better control. Run trials within the supplier-supported range. Assess foaming, rinsing and appearance. Check garment performance too.
Do not mix unrelated auxiliaries just because both are called dispersants. Check that they work together.
Keep concentration and garment-based dose distinct
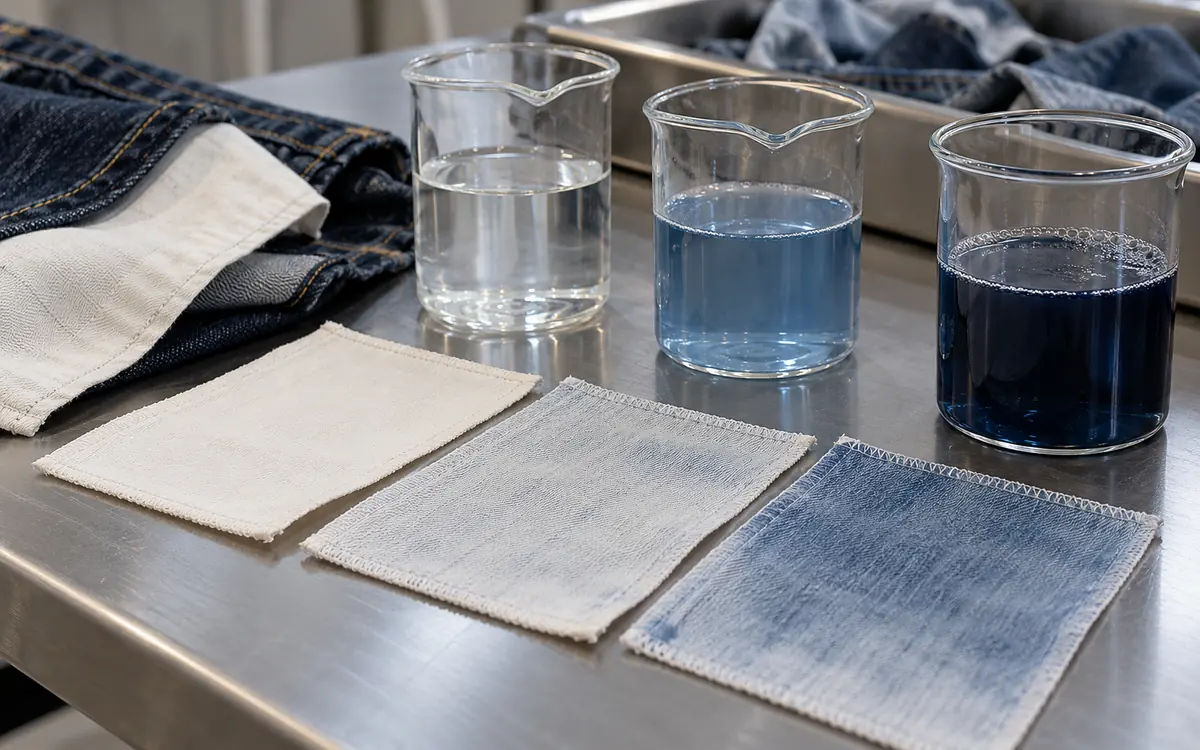
A chemical quantity written as grams per litre depends on bath volume. A percentage on garment mass depends on the textile load.
Take a hypothetical 100 kg garment load with 500 litres of application liquor. At an illustrative 1 g/L concentration, the product quantity is:
1 × 500 = 500 g
That is 0.5 kg, or 0.5% on the garment mass.
If liquor volume falls to 300 litres while concentration stays at 1 g/L, the quantity becomes 300 g. If the original 500 g is retained instead, concentration becomes:
500 ÷ 300 = 1.67 g/L
Neither choice is automatically correct. The supplier and trial must determine the relevant basis.
These values show the calculation. They are not a recommended dose. ApparelDiary’s liquor ratio and dosing guide explains the wider calculation framework.
Record both the measured liquor volume and product quantity. A recipe may say “same chemical” even when the water level changes. That note can hide a large change in concentration.
Design a small trial that separates two causes
Choose trial variables based on the diagnosis. Suppose the evidence points to both the auxiliary programme and bath carryover. A small trial can test these two factors. Keep the other parts of the route fixed.
The following results are hypothetical:
Trial | Auxiliary programme | Carryover control | Pocket staining grade | Face effect |
|---|---|---|---|---|
A | Current | Current | 3 | Approved |
B | Revised | Current | 3–4 | Approved |
C | Current | Improved | 4 | Approved |
D | Revised | Improved | 4–5 | Approved |
The pattern suggests that both changes deserve attention. It does not prove that they will behave the same on every fabric.
Keep material, load and assessment conditions the same. Use independent repeat runs to check the pattern. Several pockets from one run describe that run. They do not replace repeat runs.
Also record strength and other required performance. A cleaner pocket is not sufficient if the garment has lost too much strength.
Do not calculate a percentage improvement from the grade numbers. They are ordered categories, not a linear measure of dye mass.
Use a staining scale for the right question
To assess staining, compare the receiving material after exposure with a suitable unexposed control. It differs from measuring colour change on the dyed denim face.
AATCC EP2-2025 describes visual evaluation using the Gray Scale for Staining. Follow the full adopted procedure before reporting a result under it.
A factory process trial is not automatically a standard colourfastness test. A control cloth may travel through a production wash. Call it an internal process monitor unless the full standard method has been followed.
Keep the same control cloth type, position and exposed area. Attach it in the same way each time. A loose swatch and a sewn pocket may have different contact. Liquor may flow through them at different rates.
Record the grade for each receiving material separately. Do not combine pocket staining and face colour change into a single “wash quality” number.
Use an agreed acceptance rule and retain the assessed specimens. These records make the result easier to review. A note that pockets are “white enough” gives little basis for comparison.
Add instrument readings without creating a false stain percentage
Instrument colour data can support the diagnosis. The method must suit the material. State the instrument settings and backing. Add specimen condition and measurement area.
A rise in measured lightness can show that a stained pocket looks lighter under those conditions. It does not directly state how much indigo has been removed.
For example, a hypothetical pocket control has a lightness value of 92. A stained specimen measures 80, while a revised route gives 86.
The revised result is 6 lightness units above the stained specimen. It is still 6 units below the control. Calling that “50% less dye” would lack support. Lightness does not directly measure dye mass.
Colour hue and chroma may also matter. Two specimens with similar lightness can have different casts.
Use instrument results alongside the approved visual method. Define any internal index clearly. Do not present it as an established industry test if it is not one.
Interpret the pattern before choosing a correction
Different patterns point toward different checks.
Observation | Useful next comparison |
|---|---|
Pocket staining rises while face fading increases | Colour release and suspension under matched conditions |
Face effect stays similar but pockets improve after drain control | Carryover and rinse history |
One pocketing lot stains more | Receiving-material identity and finish |
Defect appears only after wet storage | Holding condition, contact and elapsed time |
Light loads after dark production are affected | Machine and dosing-system clean-out |
Staining worsens after an enzyme substitution | Product identity, activity basis and compatibility |
Extra washing improves pockets but harms dimensions | Full correction route and product limits |
Treat the table as a guide to controlled comparisons. It is not a list of proven causes for every factory.
Record the original condition before trying several corrections together. Combined corrections may fix one batch. They may not explain how to prevent the fault in the next.
If the evidence points to contamination, investigate its source. More anti-backstaining auxiliary may hide the symptom. The source of contamination could remain.
Control wet holding and transfer
The wash recipe can be correct while the time between stages varies widely. Record when garments leave the machine and how they are held. Note when the next step begins.
Separate batches clearly. Do not let pale components rest against unrelated wet dark garments during transfer.
Use suitable, clean trolleys and surfaces. Inspect covers or liners that can retain colour from a previous load.
If garments must wait, run a trial to set an approved holding condition. Set the allowed time and holding method for the specific product and process. A general instruction to “dry quickly” gives little help during a queue.
Compare a normal transfer with a delayed transfer when records suggest a link to staining. Keep the later route the same so the comparison remains useful.
This review can reveal a practical problem that no change to the main bath will solve.
Validate any rework as a new route
Repeated washing is not a neutral action. It can change shade, dimensions, handle, trims and strength. Approve a correction as a complete route.
Choose defective garments that represent the affected batch. Record their prior treatment history and the exact defect before rework.
Check for the intended improvement afterwards. Assess all critical product requirements too. Keep a rejected sample if the route creates a new defect.
Consider a hypothetical repair trial of 40 garments. Thirty-two pass after the first correction, giving 32 ÷ 40 × 100 = 80% first-pass recovery. A further four pass after an approved extra step. That gives 36 recovered garments, or 90% overall.
The four extra recoveries must not be described as first-pass success. Their added processing and any failures belong in the decision.
A repair that works occasionally is not a sound basis for releasing the main process. Use the evidence to improve prevention.
Transfer the successful trial to bulk carefully
Define what the approved route covers. Include the fabric family, pocketing and machine. Add load range, chemical identities, stage sequence and assessment point.
A new fabric lot may need a focused check even when the style number remains the same. A pocketing substitution may require another comparison.
Confirm the result across separate loads. Track pocket staining and face effect together. Pockets may grow cleaner while the approved denim effect gradually fades away. Track both trends.
Set a response for out-of-range results. Hold the affected batch and review its actual records. Choose an approved correction where one is available.
Keep the final approval linked to the starting materials and route version. ApparelDiary’s fabric colour approval guide supports control of the approved colour target. The backstaining record shows what happens during garment processing.
Frequently asked questions
Does neutral cellulase eliminate backstaining?
No broad enzyme label promises that result. Compare the actual formulation, material and process. Assess both the desired abrasion and unwanted staining.
Does a darker bath mean a worse process?
Not necessarily. It may reflect more released colour or better suspension. Use garment results and a defined sampling method to help interpret the bath.
Can more rinsing solve every case?
No. Rinsing may reduce carryover. It may not remove deposited colour or solve a problem caused by a changed component. It can also add processing that affects the garment.
Is pocket whiteness enough for approval?
No. The face effect, relevant strength, dimensions and other product requirements must also pass. A clean pocket is one part of the finished garment.
Make the diagnosis explain the next good batch
Aim for a stable balance. Create the required denim effect. Keep released colour from spoiling pale areas and components.
Identify the source, receiving material and timing of the stain. Use controlled trials to separate likely causes. Then approve the complete route. The factory then has a basis for repeating the result. This helps prevent a growing list of extra washes.
References
Novonesis: Enzymes for denim abrasion.
Gusakov and colleagues: Protein adsorption on indigo particles and enzyme–indigo interaction, 2001.
Sinitsyn and colleagues: Microassays for cellulase abrasive activity and backstaining, 2001.



Discussion0
Loading the discussion…