
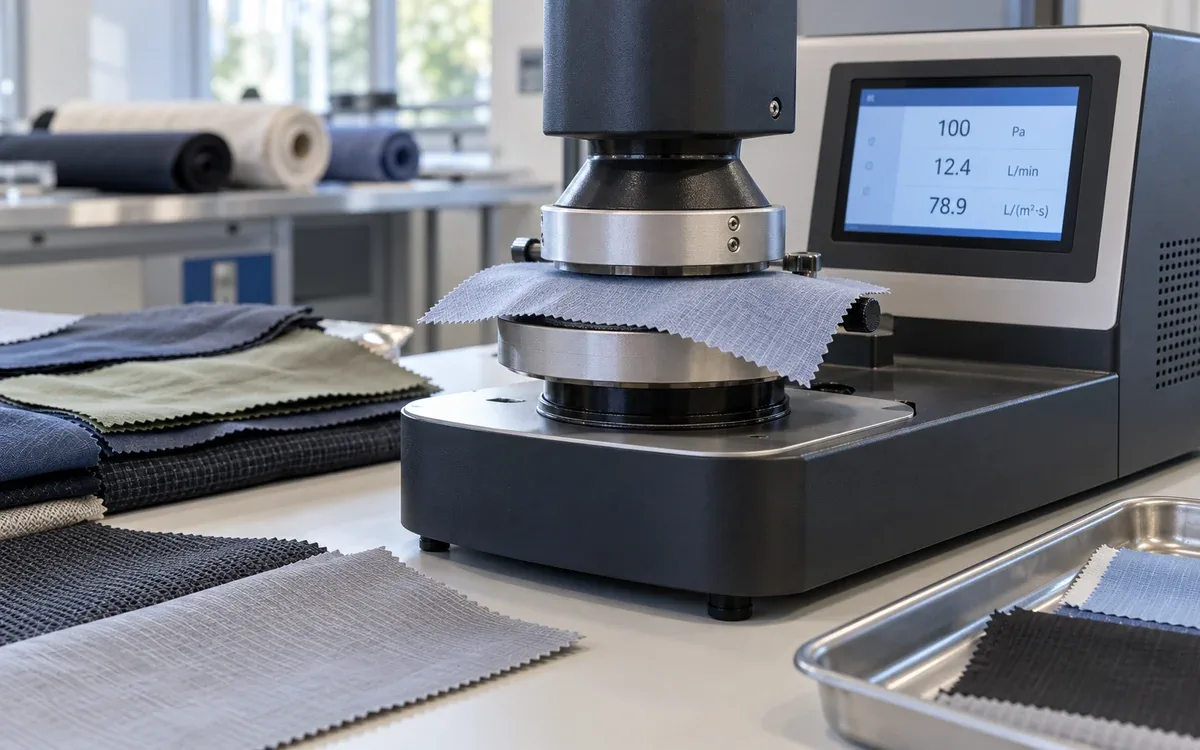
An air permeability result tells you how much air crosses a fabric at a stated pressure difference. The pressure, exposed area and fabric condition belong with the number. Without them, two reports can look comparable while describing different tests.
For apparel teams, the useful question is often specific. Will a shell block enough wind? Has a finish closed the pores of a sports fabric? Does a lining restrict the airflow of the outer fabric? A sound test helps answer these questions. It does not, by itself, establish comfort in wear.
This guide explains how to specify the test, check the units and investigate a result that changes. All numerical examples are hypothetical. They show how to make decisions and work through sums. They do not set limits for all products.
What the air permeability test measures
The instrument holds a defined area of fabric over an opening. It creates a pressure difference between the two faces and measures the resulting airflow. The reported permeability usually expresses that flow per unit area.
The basic relationship is:
Air permeability = volume flow rate ÷ exposed test area.
Keep the pressure difference with the result. A value at one pressure may not apply at another. The test head, clamp setup, and flow direction also affect the measurement.
ISO 9237:1995 covers airflow through many fabrics. These include nonwovens and permeable made-up articles. ISO confirmed this edition in 2023. Its age alone does not mean that it has been withdrawn.
ASTM D737-18(2023) covers many fabric forms and treatments. Its guidance notes that cloth structure and finishing can change airflow. Different surfaces can also give different results when flow direction changes. Use the full method for operating details. A public scope is not a full lab procedure.
Separate air, liquid water and water vapour
The word breathable can hide three different questions. Air moves through a fabric under a pressure difference. Liquid water may spread, soak in or pass through. Water vapour moves under its own transport conditions. One test cannot stand in for all three.
Product question | Useful measurement | What it does not establish alone |
|---|---|---|
How readily can air cross the panel? | Air permeability | Total garment comfort |
How does sweat spread through the material? | Liquid moisture management | Resistance to wind |
How much resistance does the assembly offer to vapour transfer? | Water-vapour resistance | Rain penetration resistance |
Does water enter under pressure? | A suitable water penetration test | Airflow under the dry test condition |
AATCC TM195 addresses liquid moisture management in woven, knitted and nonwoven fabrics. ISO 11092:2026 addresses thermal and water-vapour resistance under steady conditions, including multilayer materials. Its scope does not set comfort limits for every use.
These differences affect sourcing. A shell with low airflow may still be designed to pass water vapour. Open mesh may pass air well but block little wind. Neither result proves that the other cloth fails its intended role.
Write the specification before comparing suppliers
A specification that says only “air permeability above 100” leaves too much open. It omits the units, pressure and test method. It also leaves a question for the supplier. Does the limit apply before washing or after care?
Use a complete test statement. Name the method, edition, pressure difference, area, and flow direction. Add conditioning, sample locations, and preparation steps. State the required statistic and pass rule. For a finished product, say which panel or assembly the rule covers.
A sample trial brief could request results in L/(m²·s). It would state all test conditions. It might set different limits for the body and a vent panel. Take the actual pressure and limits from the approved product brief and method.
Do not copy another customer's pressure just because the lab has stored it. Do not choose a pressure after testing to get a pass either. A new test condition asks a new question.
Identify the supplier's cloth precisely. Record structure, finish, colour, lot, and process state. “Polyester fabric” alone cannot explain a change between submissions.
Convert flow and area on one consistent basis
Suppose the measured flow is 12 L/min through an exposed area of 20 cm². First convert time and area:
12 L/min ÷ 60 = 0.20 L/s.
20 cm² ÷ 10,000 = 0.002 m².
Air permeability = 0.20 ÷ 0.002 = 100 L/(m²·s).
The same result equals 100 mm/s, or 0.10 m/s. These units are volume flow divided by area. They are not the speed inside each pore.
Reported unit | Equivalent value in mm/s |
|---|---|
1 L/(m²·s) | 1 |
1 cm³/(cm²·s) | 10 |
1 ft³/(ft²·min) | 5.08 |
1 L/(dm²·min) | About 1.667 |
Thus, 100 L/(m²·s) is about 19.69 ft³/(ft²·min). A report marked only “CFM” remains incomplete. Cubic feet per minute is a flow rate. To compare permeability, check whether the value includes a square-foot area basis.
Preserve the original reading and units when converting a supplier report. Keep enough digits in the sums. Round the final result to a sensible precision. A conversion cannot restore missing details from the original report.
Check the actual test area
Use the exposed opening, rather than the size of the cut sample. A large piece of cloth may cover a small test head. The clamped margin is outside the intended flow area.
Area errors pass directly into the calculation. At 12 L/min, a true exposed area of 22 cm² gives:
0.20 L/s ÷ 0.0022 m² = 90.91 L/(m²·s).
If the software instead divides by 20 cm², it reports 100. The result is 10% higher than the correct value for that opening.
James Heal's AirPro brochure describes interchangeable heads and software that checks the installed area. This is a useful control. The lab must still check that the method, head, and saved report agree.
A smaller area may help test a narrow panel. It also covers less of a pattern. Get approval before changing the specified head. Record that change. Check comparability before merging the new result with data from another area.
Pressure is part of the measurement
There is no fixed multiplier for raising pressure on every fabric. Structure, changes in shape, and flow can affect the link. Measure at the required pressure. Do not convert by guesswork.
Consider an illustrative material with these results:
Pressure difference | Measured permeability |
|---|---|
100 Pa | 80 L/(m²·s) |
200 Pa | 135 L/(m²·s) |
Doubling the first value predicts 160 L/(m²·s). That estimate exceeds the second measurement by 25, or about 18.5% of the measured value. The sum is simple. The unsupported assumption causes the error.
During development, a pressure series can show how a material responds. Keep each pressure and result together. This series can add to the acceptance test if agreed. It does not let you replace that test with the best-looking point.
TEXTEST's LabAir technical page describes controlled pressure, automatic range selection and a check plate. Its range depends on the head setup. Check machine capability for the intended area, pressure, and flow together.
Stop edge leakage from becoming a fabric result
Air that enters around the clamp can raise the reading without passing through the intended fabric area. This becomes especially important when the material itself passes little air.
Imagine that true specimen flow is 2.5 L/min. An unintended path contributes another 1.5 L/min, producing a total of 4.0 L/min. Treating the total as fabric flow overstates the result by:
(4.0 − 2.5) ÷ 2.5 × 100 = 60%.
The numbers illustrate sensitivity. The display alone usually does not reveal the leak amount. Do not subtract a guessed correction.
Check the sealing surface, gasket, and sample placement under the machine procedure. Avoid folds across the seal. Seams, thick prints, pile, and coatings may prevent even contact. Use only approved setups for difficult materials.
A blank or impermeable check can help where the machine procedure allows it. It may not reproduce the leak path around textured cloth. Keep this diagnostic check separate from a valid method correction.
Do not keep tightening the clamp until a low value appears. Too much pressure may alter the cloth. Find the cause and set a controlled mounting condition.
Sample the structure that the garment will use
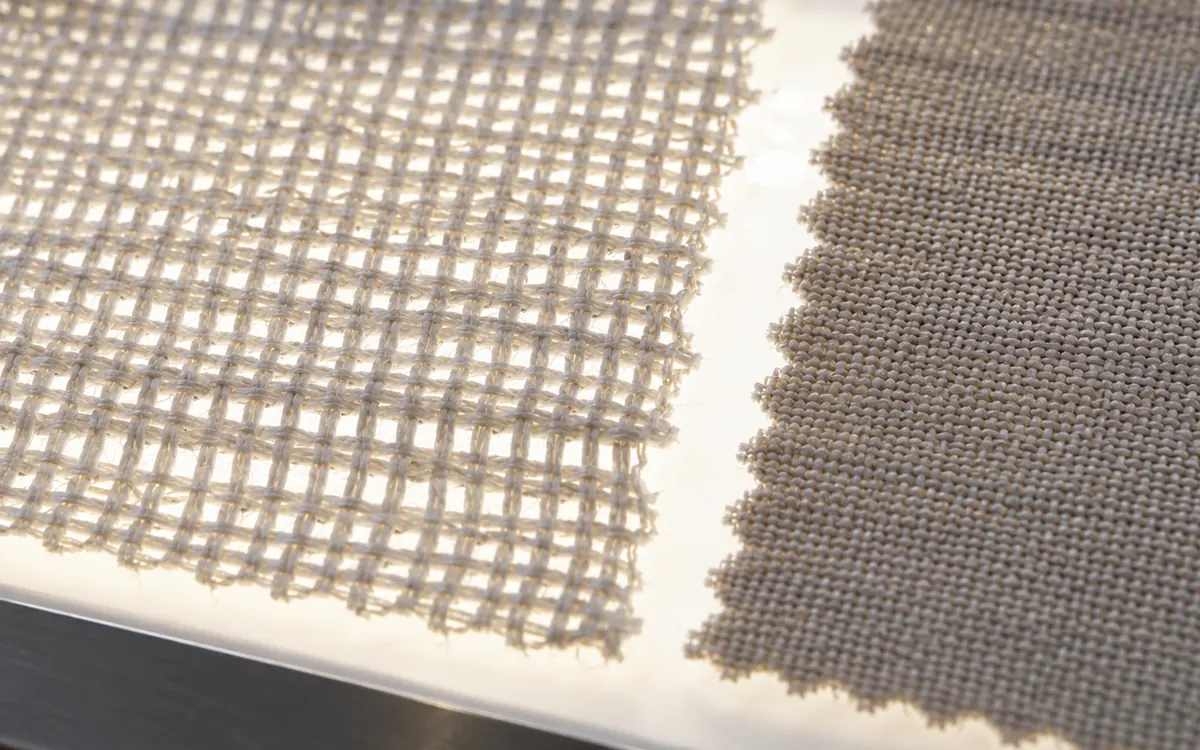
Some fabrics have a nearly uniform surface. Others contain stripes, holes, jacquard zones or changing knit structures. Test spots that look random may still miss the feature that controls the result.
Map the material before cutting. Identify the useful width and any areas that the garment will exclude. Keep body cloth and planned vent zones distinct. A head over mesh asks a different question from a head over a solid panel.
For roll comparisons, distribute locations using the agreed sampling plan. Avoid selecting only visibly open or closed spots. If testing a defect, label those targeted tests separately from the general sample.
ApparelDiary's guide to usable fabric width explains why the production area matters. Airflow tests on a selvedge that is always discarded may tell little about the panels being cut.
Record the face presented to the pressure source. For unequal faces or layered surfaces, a reverse-flow trial may help. Treat it as a separate study. Do not let the face reverse unnoticed between labs or lots.
For a two-face comparison, mark the face before cutting. Use separate codes for flow from face to back and from back to face. Keep the arrow on the sample map, outside the test area. Do not rely on which side looks brighter after handling. A coating or finish may be hard to see under lab light. Clear codes let a later reviewer tell a true directional effect from a specimen turned over by mistake.
Control handling, moisture and strain
Condition the specimens using the selected method before testing. Record prior washing, drying and storage if they are part of the comparison. Damp, relaxed, and stretched during clamping are different sample states.
Support the fabric while mounting it. Pulling a knit to remove every ripple can add unwanted tension. A fold left in the opening can block airflow or disturb the seal.
For a close fitting garment, study stretch as a separate trial question. A published study by Kumar and colleagues compared knitted fabrics under increasing extension. Its trends differed with structure and yarn system. Do not assume that stretch raises permeability in every knit.
For a custom stretched test, define extension, direction, mounting, and relaxation time. Label it as a custom condition. Keep the required standard relaxed test too.
For example, a fabric might measure 45 L/(m²·s) relaxed and 80 under a defined extension. The increase is 35, or about 77.8% relative to the relaxed result. This does not describe an unspecified fit on the body. It also does not cover another extension or repeated wear.
Interpret finishing and care changes carefully
A finish may change the cloth structure or air paths. Washing may change size, surface deposits, and how layers sit together. Test the relevant state. Do not infer airflow from a finish name.
Keep a matched untreated or earlier-stage sample when investigating a process change. Compare it with the finished sample using the same test conditions. Record width and mass per area too if they help explain the structure change.
A rise in permeability after washing might suit a summer panel but cause concern for a wind-resistant shell. The same change can mean different things for different products. Define the function before judging the result.
Do not infer pore shape from GSM alone. Fabrics with similar mass may arrange yarns very differently. ApparelDiary's woven cover factor guide gives useful construction context while explaining the limits of that calculation.
If a result changes only for one colour, examine the actual process history. The colour label alone is not a cause. Compare the finish conditions, handling, and cloth identity before blaming the dye for changed airflow.
Test the assembly when layers matter
The outer shell's result may not describe the finished panel. Linings, backings and bonding can restrict or redirect flow. Test the specified assembly and separate layers if the product decision needs both.
Do not add the permeability values of two separate layers. They are not two independent flows through one installed path. Layer contact, alignment, and compression may change the assembly result.
Suppose shell A passes more air than shell B when tested alone. Add the same backing to each. The gap may shrink. If the backing controls most of the response, the bare-shell result gives weak support for choosing A.
Record whether the layers are loose, bonded or sewn in the test piece. State the face order. The head may not hold the real thickness without a changed fixture. Resolve that before calling the measurement a standard result.
The finished garment also has openings and movement. A fabric result helps choose material. A wear or garment trial tests the full design.
Use variation to find a production problem
A single mean can hide a location effect. Keep individual values and their sample map. Check the spread against the pass rule. Do not assume that an average above a threshold is enough.
Suppose five locations give 70, 72, 74, 76 and 108 L/(m²·s). Their mean is 80. If the product has an illustrative maximum of 90 at every tested location, the average does not erase the high reading.
Check whether 108 comes from a local structure change, poor mounting, or damaged cloth. Do not discard it because it is inconvenient. An invalid test may be replaced under the procedure if the reason is recorded. A valid unusual value is still evidence.
For supplier disagreements, first align method, units, pressure, head area, condition and flow direction. Then compare samples from the same material group. Two rolls with different finishes cannot isolate lab bias.
Keep development and acceptance decisions separate. A promising prototype may deserve more work even if it misses an early goal. Bulk release still needs the agreed rule and evidence.
Troubleshoot by changing one cause at a time
Observation | First checks | Useful next comparison |
|---|---|---|
All values suddenly rise | Units, head identity, seal condition | Check plate and retained control fabric |
Low readings vary greatly | Seal, instrument range, mounting | Repeat approved checks before new specimens |
One roll edge differs | Location map and fabric construction | Matched positions across useful width |
Results reverse with fabric face | Face identity and asymmetric finish | Deliberate two-direction comparison |
Washed fabric changes | Care process and dimensional change | Matched conditioned before-and-after sets |
Two laboratories disagree | Complete test conditions | Shared, coded specimens under one protocol |
A retained control cloth may reveal a testing shift. It can also age or change with handling. Protect it, define its use, and compare old and new controls when replacing it. It does not replace calibration or the maker's checking steps.
Avoid changing the gasket, pressure and sample source together during an investigation. Readings may improve, but the cause will be hard to establish.
Read the pressure and flow trace together
A stable-looking final number can conceal an unstable test. If the machine gives a trace or status record, check it. Did it reach and hold the required pressure? Use the method's timing rule before accepting the reading. Do not choose a random pause.
The pump may reach its limit before the target pressure. That flow does not answer the test brief. Record the limit. Use a suitable machine or approved setup. Do not report target pressure as though it was achieved.
A slow drift may point to cloth movement, a changing seal, or another test problem. Watch without touching the cloth. Stop and check when the procedure requires it. Pressing a hand on the cloth adds a new condition. It does not fix the cause of instability.
Keep the achieved pressure in the exported data where possible. This helps a later review more than rounded permeability values alone. It also helps separate poor pressure control from a real change in cloth flow.
Use a small comparison to choose the next trial
Consider two fictional wind-shell candidates tested under identical conditions. Candidate A gives 18 L/(m²·s) before care and 42 after the specified wash sequence. Candidate B gives 25 before care and 28 after care. The development target is a maximum of 30 in both states.
A starts with the lower value. Its result after care exceeds the example target. B stays below the target in both states. Choosing from new-cloth results alone would miss the key need in this brief.
This does not prove that B is the better garment material overall. Its feel, life through use, vapour resistance, and other properties still need checks. Airflow narrows one part of the choice.
Now change the brief to a ventilation panel with a minimum airflow requirement. The preferred direction of performance changes. Reuse the data only if the method and conditions still fit. Use the approved pass rule for the new application.
Put these decisions in the report beside the data. A short statement such as “meets the agreed airflow limit in both tested care states” is more precise than “highly breathable.” Name the tested cloth. Do not extend the claim to colours, finishes, or assemblies that were not tested.
Questions apparel teams often ask
Is higher air permeability always better?
No. The useful range depends on the panel's role. A ventilation insert and a wind-blocking shell serve different purposes. Set the limit from the brief and test evidence. Check other relevant properties alongside airflow.
Can two different test pressures be compared?
They can be reported as different conditions. For a direct ranking at one pressure, measure at that pressure. Or establish a sound link for the materials and range in question. A simple proportional conversion is not a general rule.
Does zero mean the fabric passes no air?
A displayed zero may reflect machine range, resolution, or the reporting rule. Use a below-range statement where required. Check the seal and method fit before claiming that no air passes.
Can airflow prove that a garment is comfortable?
It supplies one material property. Comfort also depends on the whole clothing system, activity and surroundings. Combine airflow evidence with tests and trials that match the intended use.
Turn the result into a clear material decision
Keep the measured value attached to its pressure, area, units, direction and specimen state. Resolve leaks and mounting problems before debating small fabric differences. Compare like states. Test the assembly when layers matter to the product.
A useful report lets the next person reproduce the comparison and understand its limits. It shows which fabric was tested, how it was prepared, what was measured and how the result meets the stated requirement. This gives suppliers and buyers a clear apparel specification they can use consistently.
References
ISO 9237:1995: Air permeability of fabrics; current public scope and status.
ASTM D737-18(2023): Air permeability; scope and significance.
AATCC TM195: Liquid moisture management properties.
ISO 11092:2026: Thermal and water-vapour resistance.
James Heal: AirPro technical brochure.
TEXTEST: FX 3300-IV LabAir technical information.
Kumar, Sampath and Prakash: Stretch and air permeability of knitted fabrics; publisher abstract.



Discussion0
Loading the discussion…