
Qualify the garment before committing the colour
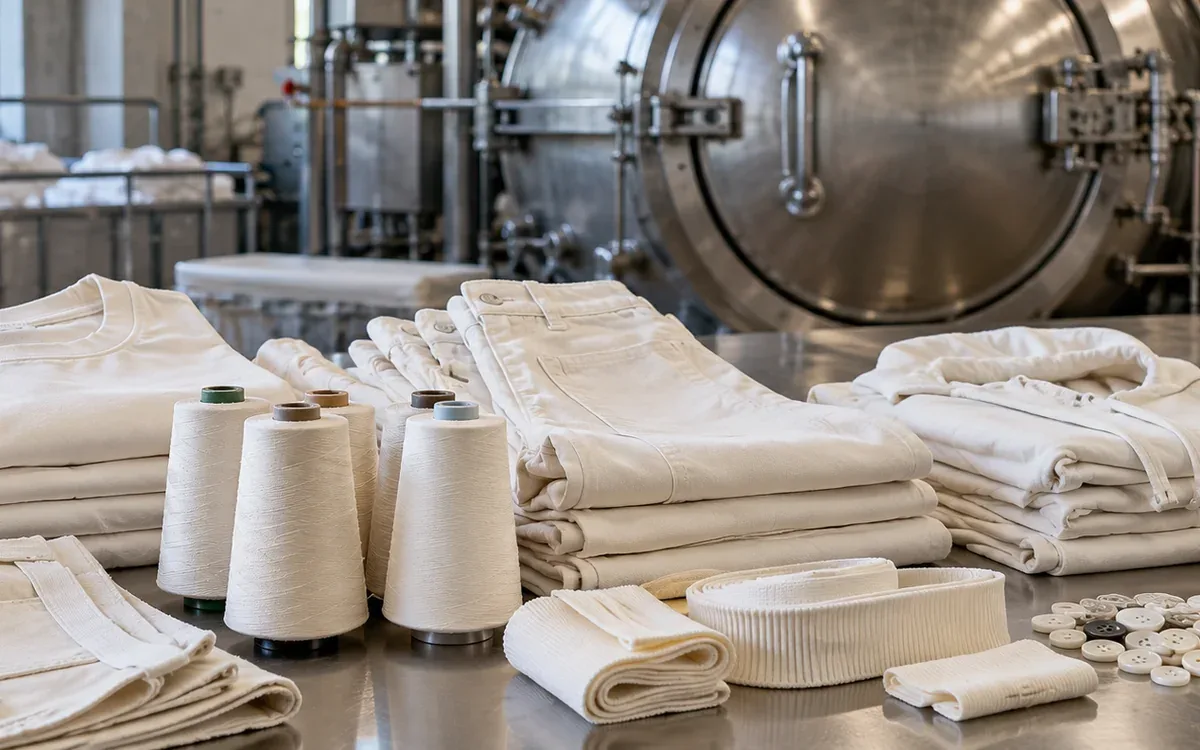
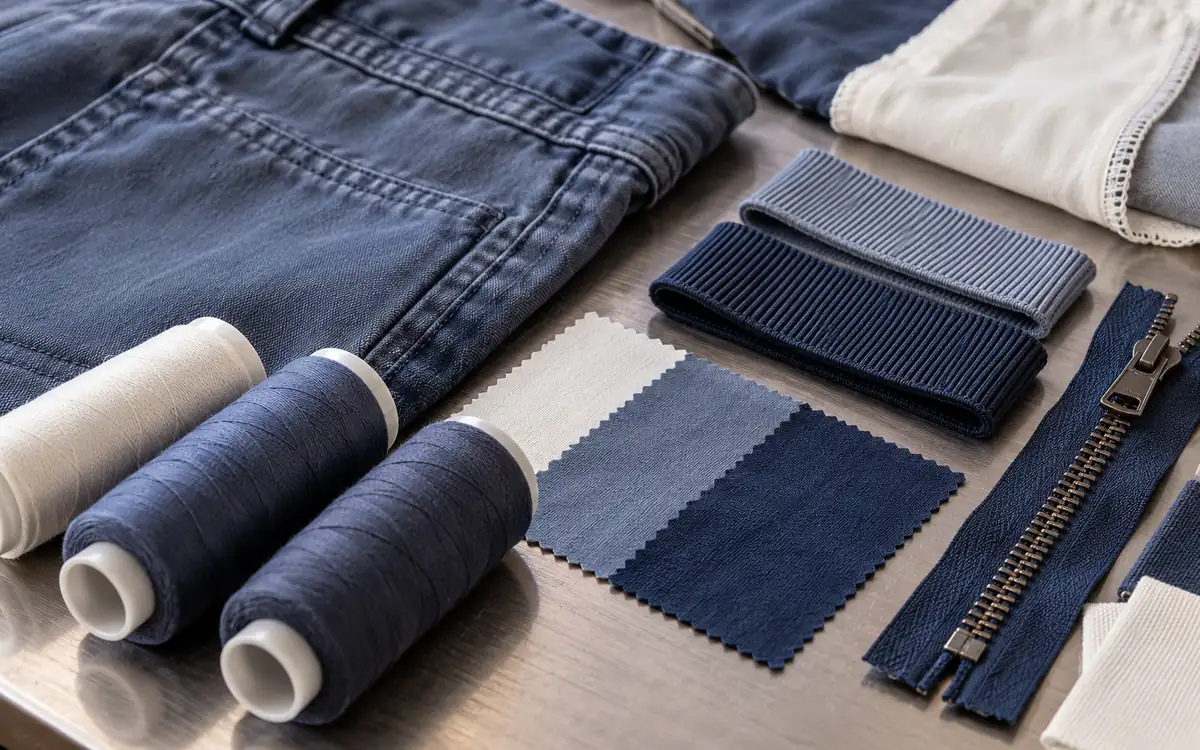
Garment dyeing brings colour into an assembled product. That product contains more than the visible shell. Sewing thread, pocketing and labels may enter the process together. So may elastic, interlining, zipper tape and metal parts. The construction route must keep out any part that should not be dyed.
The main garment dyeing precautions begin before loading the dye vessel. Identify each component. Confirm what it will face during the intended route. Decide what evidence will show that it still works afterward.
A pale seam may be a deliberate design feature. A pale seam on a garment meant to have matching stitching is a failure. The physical result is the same. The decision changes because the product brief is different.
Set that brief first. Then qualify the actual assembly, including the less visible parts. A successful fabric swatch provides useful evidence. It cannot prove that a finished waistband will recover. Nor can it prove that a zipper will remain clean.
Define the intended result in observable terms
Write a short brief for each colour family. Define both appearance and performance. Include the desired shell shade and thread contrast. Describe seam character, handle, dimensions and trim finish. State whether the buyer wants a worn seam edge or an even surface.
Words such as soft, vintage and clean need an approved reference. Two people may use the same word for quite different results.
For each feature, identify how it will be judged. Shade may need a physical standard and agreed light sources. Dimensions need named measuring points and a settled method. Closure function needs an operating check. A raised print may need both appearance and adhesion assessment.
Separate the initial appearance from performance after care. A garment may look right just after dyeing. It may still change during the wash route allowed by its label.
Also define which operations occur after dyeing. A sensitive label or metal accessory could be added later. That keeps it out of one stage of exposure. This changes the assembly sequence. The new sequence must still be practical and controlled.
Build a component map for the exact style
Start from the bill of materials and the actual sample. Inspect the sample inside and out. A broad list often misses small items.
A useful working map looks like this:
Component | Identity to record | Main question before dyeing |
|---|---|---|
Shell panels | Record fibre blend and construction. Add supplier and lot. | Will all panels take the intended shade and movement? |
Rib or binding | Record fibre blend and preparation. | Will it match or contrast as designed? |
Sewing thread | Record product, size, colour and lot. | Will its visible and hidden sections behave correctly? |
Pocketing | Record fibre, finish and lot. | Will it stain, shrink or show through? |
Interlining | Record product and fused construction. | Will the support and bond survive the route? |
Elastic | Record material and covering. Add supplier reference. | Will force and recovery remain suitable? |
Zipper or button | Record material, coating and product code. | Will colour and function remain acceptable? |
Decoration and labels | Record ink, adhesive and substrate. State how each is attached. | Should they enter the dye process at all? |
Record the approved substitute for each item. A supplier may describe a substitute as equivalent. Yet it may use a different finish or polymer grade. The fibre label alone cannot show if an item suits the process.
Make the map specific enough that the next sample can be built again. A note saying cotton thread gives little control. Record a traceable product code and approved shade reference instead.
Confirm what prepared for dyeing means for this order
Prepared for dyeing, often shortened to PFD, is a supply description. Ask which preparation steps are complete. Establish what remains to be done.
The shell may have been scoured, bleached, mercerized or treated with other finishes. The thread and rib may have followed different routes. Similar whiteness does not prove similar dye response.
CottonWorks explains preparation as controlled removal of impurities. Checks can include absorbency, residual chemistry and whiteness. Its guidance also calls for removal of preparation residues. Do this before the next stage.
Translate that principle into incoming evidence. Agree which tests the supplier will report. State which tests the dyehouse will confirm. Retain identifiable material from the actual lots used in the trial.
Look for local contamination from sewing and handling. Oil and adhesive marks can remain hidden on a pale garment. So can temporary pen marks and storage soils. Dyeing may make their effect easier to see.
Keep preparation faults separate from dye recipe faults. One pocket edge may resist wetting while the rest of the garment behaves normally. Changing the whole dye formulation could then cause new problems.
Treat thread matching as a material trial
The sewing thread must meet the visual brief. It must also meet the seam's mechanical needs. Do not choose thread just because its fibre name matches the shell. Preparation and construction may still differ.
Coats' post-dye garment guidance links dye uptake with thread selection and seam behaviour. It warns that fabric movement and swelling can affect seam appearance. This can happen even where thread shrinkage is low.
Use that information to frame a trial rather than a universal thread rule. Sew representative seams with the proposed thread products. Include visible topstitching, overlocking and buttonholes where used.
Record the stitch construction and machine setup. A trial may use one thread tension. Its results cannot validate bulk sewing at a much tighter setting.
Inspect thread colour in the finished seam, not just on a loose skein. Stitch depth, exposed area and local folds change what the eye sees. Turn the garment over and inspect looper threads too.
Before the pilot, remove unapproved thread from the relevant machines. Clear it from storage points too. Include spare bobbins. A short length from an old bobbin can leave a pale line. After dyeing, that line may be hard to repair.
Test seam movement without guessing the cause
Puckering after dyeing does not identify one single fault. The shell, thread, seam structure and finishing route can all contribute.
Compare an unsewn strip with a sewn specimen from the same fabric lot. Process them together where the test design allows. This helps show how much the fabric moves on its own. The sewn specimen shows how the seam restrains it.
Consider a hypothetical trial. An unsewn reference length starts at 500 mm and finishes at 480 mm. Its dimensional change is:
Dimensional change = (final length − initial length) ÷ initial length × 100
The result is (480 − 500) ÷ 500 × 100 = −4.0%.
A sewn specimen from the same fabric finishes at 486 mm. It looks rippled. The smaller measured change does not prove a better result. The seam may restrain the fabric yet produce an unacceptable shape.
Inspect the full geometry. Check seam extension, local ridges, stitch damage and panel balance. Opening a controlled sample may help. Do so only as part of the agreed investigation.
Keep the pre-dye sample for comparison. Processing may reveal needle damage. Do not assume the dye bath caused it.
Qualify metal and plastic trims by product
A supplier may say that a metal or plastic type suits garment dyeing. That broad claim is not enough. A finished trim has a base material. It may also have a coating, paint or plating. The way its parts are joined also matters.
YKK describes metal zipper colour changes and garment staining. These reactions depend on process chemistry. Temperature and exposure time also matter. It recommends fitting metal zippers after dyeing where possible. If that is not possible, test the intended exposure before production.
Ask the trim supplier about the actual route. Give the relevant process conditions. Include any later correction treatment. A general wash claim may not cover that route.
Examine contact areas after drying. A trim may appear sound when hanging free. Yet it could mark the shell when resting against a damp fold. Check both the trim and the nearby fabric.
Operate the closure after treatment. Smooth colour does not prove smooth function. Look for distortion, rough movement and loose finishes. Check for changes in the intended locking action.
If the design allows post-dye installation, validate its access and sewing sequence. A material route may seem safer in theory. It still needs an attachment method that workers can repeat on the completed garment.
Include elastic, support materials and decorations
A garment may dye evenly but lose its intended support. Check the hidden structure that provides shape.
After the whole route, check the fused area's appearance. Compare its flexibility and bond with the approved state. Inspect edges and bends where early separation may appear. A flat surface alone can hide a local bond change.
Check an elastic waistband before and after treatment. Compare its extension and recovery with the approved behaviour. Use the buyer's method and limits. Do not replace a force requirement with a casual hand stretch.
A decorated component may enter the process. If so, record the exact decoration system. A printed label, adhesive film and embroidered badge have different constructions. Approval for one does not cover the others.
Consider process order as a design variable. Applying decoration after dyeing may reduce colour interference. The dyed surface must still accept the decoration process. Complete the second stage in the trial.
The purpose is to qualify an assembly route. Separate supplier claims are not enough. A component that suits garments in general may not suit this route.
Use three levels of trial evidence
Start development with components. Move to assemblies, then to a machine load that represents production. Each stage answers a different question.
First, screen the chosen groups of materials. Use pieces large enough for the intended checks. Keep an untreated control. This stage can reveal a poor material match. It can do so without using many full garments.
Next, dye complete garments built with the production construction. Include difficult areas such as thick waistbands and enclosed pockets. Check fused plackets and dense seam junctions too.
Finally, run a pilot on the intended equipment and loading basis. A small laboratory trial cannot reproduce every production fold or contact point. Liquid circulation may differ too.
Do not treat these steps as three automatic approvals. If a stage fails, decide why it failed and what the fault affects. Replacing the zipper requires another check of the assembly. The shell shade may already have passed, but that does not cover the new zipper.
Record the actual route used at each level. A special manual sequence may produce an attractive sample. That sequence may be hard to repeat in normal production.
Choose samples that reveal real variation
A single medium size in one pale colour offers limited coverage. Select samples for the features that may change the result.
A larger size may fold differently in the vessel. A dense seam may dry more slowly. A deep shade may expose thread contrast that was hard to see in a lighter shade.
Use actual material lots when they are available. Development may use a substitute lot. State that limit and plan a check on bulk material.
An illustrative pilot might compare two shell lots across three colour routes. Use two repeat garments for each combination. That gives twelve garments for the stated comparison. It does not establish a statistically proven production defect rate.
Do not average away a lot-specific problem. One lot may have patchy pocket bags. Investigate that fault. An acceptable average shade across all twelve garments does not resolve it.
Retain one labelled garment from each approved combination. Keep photographs as supporting records. Do not assume they show shade accurately on every screen or under every light.
Measure size change at more than one stage
Define a pre-dye measurement condition and a post-process condition. A warm, damp garment can give a different result from a settled, dry one.
Use the same measuring points and handling method. Pulling one sample flat can change its measured size. Comparing it with a sample laid without tension creates a false difference.
ISO 5077 addresses dimensional change after specified washing and drying procedures. Use the appropriate agreed method to assess care performance. Record factory dyeing change as a separate process result.
Suppose a hypothetical trouser waist measures 820 mm before dyeing. It finishes at 795 mm. Its change is −3.05%, rounded to two decimal places.
A different style must finish at 800 mm. Assume a stable, relevant trial shows 3% shrinkage. A first estimate is:
Required pre-process dimension = 800 ÷ (1 − 0.03) = 824.7 mm.
Adding 3% to 800 gives 824 mm. That is close but uses a different base. Before using either value as a pattern rule, confirm the construction and variation.
Check length and width separately. Do not apply a waist result to inseam length. Also confirm that later pressing has not temporarily stretched a measurement into tolerance.
Separate colour judgement from function judgement
Assess shade under the light sources agreed for the product. Include the main shell, visible stitching, rib, pocketing and zipper tape.
YKK's colour matching guidance explains why lighting matters for colour comparison. This applies to zipper components and garment fabric. A match under one source can look different under another.
Use a defined viewing setup and consistent sample orientation. Folded thickness, gloss and texture can affect visual comparisons. Instrument readings can support the decision. They cannot replace every appearance check on a structured garment.
Record how the shell differs from the standard. Then record how each component contrasts with the shell. The shell may meet its target while the sewing thread looks too light.
Then complete the relevant performance checks. Check the intended care route, seam integrity and closure function. Check dimensions and any durability needs specific to the product.
Do not hide a functional failure inside a general comment saying colour approved. The approval record should show which checks passed and which remain open.
Keep input chemistry and finished-product evidence distinct
Chemical selection and finished-garment testing answer related but different questions.
ZDHC describes its MRSL as a system focused on chemical inputs. It covers substances restricted from intentional use in manufacturing. A finished-product restricted substance list addresses the article supplied to the market.
Use the programme and buyer requirements that apply to the order. Record the approved chemical products and supporting evidence. Keep safety information where staff can access it. Make application instructions available to those who need them.
An input may be approved. That does not prove the final garment meets every chemical or performance requirement. Contamination, incorrect use and interactions with other materials can still matter.
Likewise, a finished-product test does not establish that every manufacturing practice was acceptable. Keep both sets of evidence connected. One cannot replace the other.
For the dye recipe itself, use the dyehouse's qualified technical route. ApparelDiary's reactive dyeing control guide addresses those process decisions in more depth.
Investigate faults with a controlled comparison
When a trial fails, identify the smallest useful comparison. Avoid changing several unrelated components at once.
Observed problem | First comparison to make | Evidence to retain |
|---|---|---|
Pale line in an otherwise matching seam. | Compare approved thread with the suspect bobbin or cone. | Keep thread identity and stitched samples. |
Stain beside metal hardware. | Compare the same assembly with and without that trim. | Record contact location and trim finish. |
Pocket outline after dyeing. | Compare pocketing lot and construction with the control. | Keep dimensions before and after processing. |
Local pale patch. | Compare the marked area with clean fabric from the same lot. | Keep handling history and wetting observations. |
Fused area bubbles. | Compare the actual fused construction with the approved control. | Keep bond results, face appearance and process record. |
Waist loses recovery. | Compare the treated waistband with an untreated matched sample. | Keep agreed force and recovery results. |
These comparisons narrow the question. They are not automatic diagnoses.
For example, a team replaces a zipper and changes the drying route together. The stain disappears, but its cause remains uncertain. A controlled follow-up can establish which change is necessary.
Keep the buyer informed when the correction changes the design effect. A cleaner seam or stronger contrast may be technically sound. It may still fall outside the approved appearance.
Plan any correction route before using it
A second dyeing or stripping treatment adds exposure. It may affect components that survived the first route.
Approval for one cycle does not cover repeated processing by default. Extra heat, moisture, chemistry or movement could change material properties. Ask which properties need another check.
If a correction route is commercially necessary, qualify it on representative garments. Record the correction route's limits. State when garments must be rejected instead of treated again.
Keep corrected goods marked until the relevant checks are complete. Evidence may differ for first-pass and reprocessed garments. Keep those groups identifiable within the bulk lot.
This also helps planning. A correction may need more finishing time or extra measurements. It may also need replacement trims. Consider those effects before processing the whole lot again.
Read pilot yield without concealing different faults
Use a pilot disposition table alongside the technical results. Count garments that pass all agreed requirements. Separately count those that need a defined repair and those that cannot be released.
Consider a hypothetical 40-garment pilot. Suppose 34 pass directly. Four need an approved post-dye button replacement. Two fail because of shell damage. First-pass yield is 34 ÷ 40 × 100 = 85%.
If all four repaired garments later pass, the final accepted quantity is 38. Final accepted yield is 95%. These figures describe different stages. Reporting only 95% would conceal the extra operation.
Keep fault counts separate from garment counts. One damaged garment might also have a pale seam. Those are two faults on one garment. Do not count them as two rejected garments.
The small pilot cannot establish a precise long-term defect rate. It can show which problems remain open. It can also reveal unplanned repairs in the proposed route.
Also check the distribution. If all damaged pieces use one rib lot, investigate that lot. Do not apply the same allowance to every garment. Defects may appear only on the largest size. Then review load movement and construction at that size.
Decide whether the route is ready, needs a focused repeat, or should be changed. A good average yield does not override a serious product failure. Base release on the agreed limits. Check the evidence for each one.
Release bulk with a clear boundary
A useful release identifies the style, material lots and components. It lists approved colours and the equipment route. It links each to its supporting evidence. It also states what changes require review.
Link it to the established garment trim approval process. Keep the same component names in the dyeing trial and wider approval record.
Check the first bulk output against the retained approval sample. Confirm that labels, sizes and colour lots remain traceable through sorting and finishing.
A release covers one material combination. It does not promise the same result for every future order. Revisit it when fabric preparation or the thread product changes. Changes to trim finish or process route also need review.
Frequently asked questions
Does cotton thread always match a cotton garment?
No. Matching fibre names do not prove matching preparation or dye response. Test the specified thread in the real seam and colour route.
Can I approve dyeing from a fabric lab dip?
A lab dip supports shade development. It does not assess trims or seam movement. Garment shape and closure performance also need separate checks.
Should all accessories be attached after dyeing?
The answer depends on the product and assembly route. Delaying a sensitive item can reduce exposure. Still check access, attachment quality and final appearance.
Is one successful colour enough?
It provides evidence for that route. Other shades may use different conditions or show component contrast more clearly. Define coverage from the actual risks and process differences.
What should trigger another trial?
A material substitution or preparation change can affect the result. So can a new component finish or changed process. Review the change against the original approval boundary.
Make compatibility visible before bulk dyeing
The strongest garment dyeing precaution is a traceable trial of the complete product. Identify every component. Define the desired appearance. Measure both size and function after the intended route.
Use controlled comparisons when a result fails. Then release only the materials and routes that the evidence supports. This joins shade development with garment engineering. Bulk production then follows the same evidence.
References
Coats: Sewing post-dyed garments.
YKK: Metal zipper colour changes and garment staining.
YKK: Matching zipper colour to a garment.
CottonWorks: Dyeing preparation.


Discussion0
Loading the discussion…