
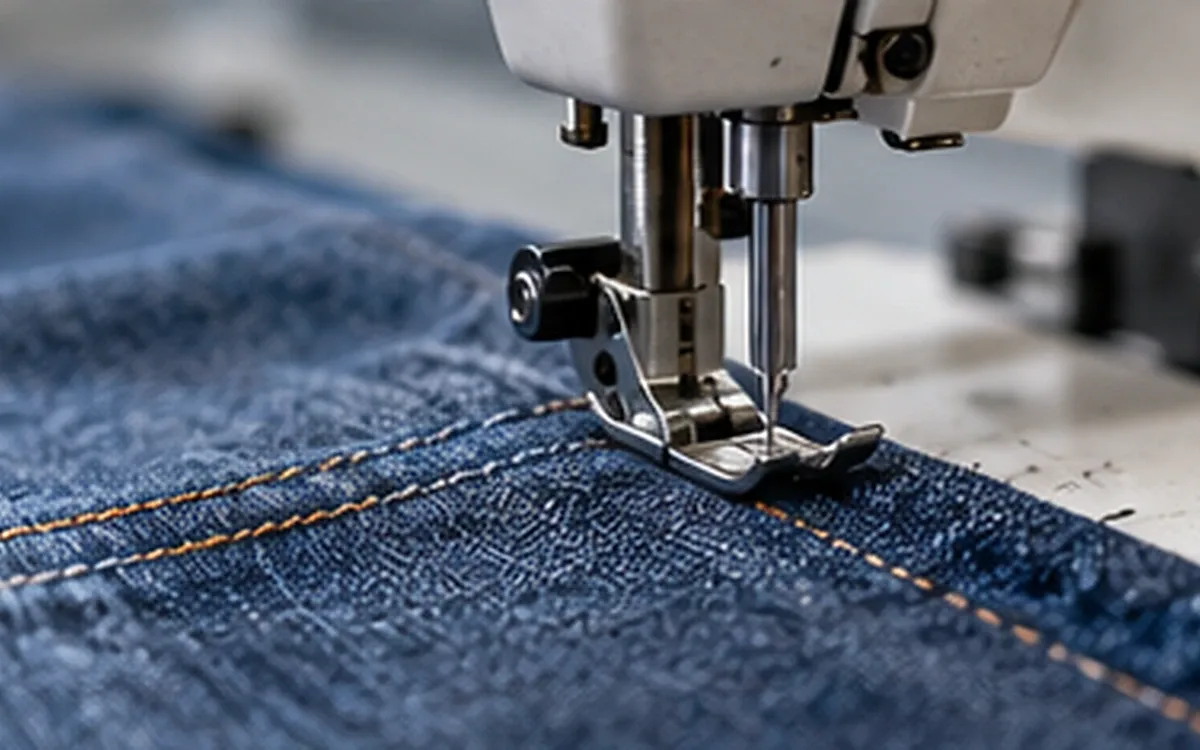
A seam that leaves the machine flat may develop waves after care. Another may pucker before it reaches the pressing table. These two observations help locate the problem, but neither names its cause. Thread tension, fabric feeding, yarn displacement and changes in component size can act together.
To find the right remedy for seam puckering, start with the actual seam. Preserve a sample, identify its material and record when the waves first appear. Then choose a comparison that can distinguish the possible causes.
This guide develops that approach through original examples. All sample readings and calculations are fictional teaching cases. They are not factory results, machine settings or universal acceptance limits. The purpose is to make a diagnosis that leads to a repeatable correction.
Capture the change before trying to remove it
Seam puckering is unwanted wrinkling or waviness along a sewn line. It differs from planned gathering or ease that forms part of the approved design. A photograph should show the whole seam as well as the close detail. Include its direction, the garment face and the location of the waves.
Record the first stage at which the defect was observed. Useful stages include cutting, sewing, resting, pressing and the complete care treatment. “After sewing” is too broad if some pieces were pressed and others were left untouched.
Keep the same sample identity through those stages. Do not compare a smooth piece from one bundle with a wavy piece from another as a before-and-after pair. Their fabric lot, handling and seam geometry may differ.
Use a viewing condition that the team can repeat. Lay the sample without pulling it flat. Record any support, lighting or sample preparation that affects the judgement. Pressing a failed piece can hide useful evidence. Save its original state first, even if the improvement later disappears.
When pressing belongs to the approved process, assess that complete route as well. Keep images from before pressing, after pressing and after the agreed rest or care. A flat appearance immediately under the iron answers a narrow question. It does not show whether the effect remains when the garment reaches the customer.
For a proposed pressing repair, record the equipment and approved treatment used. Compare the repaired piece with an intact control through the remaining required stages. Check whether the original waves return and whether another visible change appears. The comparison shows whether the finish lasts or only changes the immediate view. It does not assume that every pressing remedy is unsuitable.
Fabric finishes can delay tension puckering, as American & Efird explains. It may become visible later or after laundering. This is why “first seen after washing” does not, by itself, prove that the thread shrank in the wash.
The following observations are starting points for investigation:
Observation | First comparison to make | Question still open |
|---|---|---|
Paired marks drift apart during sewing | Check original cut lengths and ply movement | Is the mismatch from cutting, feeding or intended ease? |
Waves reduce when a stitch bridge is released | Compare the intact and released areas | How much does thread restraint contribute? |
Distortion remains after thread release | Inspect the fabric structure and other constraints | Is yarn displacement involved, or does another cause remain? |
Waves appear after care | Compare the full treatment history and components | Did care create a difference or reveal an earlier one? |
Check the seam lines that must meet
First check whether the two parts should have equal joining lengths. Do this before adjusting the machine. Compare the approved seam lines between matching reference points. Cut edges alone can be misleading when allowances or curves differ.
A sleeve, shaped panel or curved hem may contain a planned difference in length. The construction method must explain how that difference is handled. Removing it by trimming a part can change fit or shape. Do not hide an accidental mismatch by stretching one ply until the cut edges meet.
AMANN's pattern guidance covers curved edges and the effect of topstitching. If the problem keeps returning at a shaped feature, check the construction there.
Trace each part to the correct pattern revision, size and notch position. Check the actual cut piece against that record. A correct digital pattern does not prove that the bundle contains the correct cut parts.
The comparison should also include any tape, lining or interlining caught in the seam. A short tape can restrain an otherwise matched pair of fabric panels. A folder may add drag at the same point where a shaped part becomes harder to handle. Those are different questions, although both may leave a similar wave.
Follow the plies through the feed
Uneven ply movement can cause feed puckering. One layer may move farther or stretch more than another. Stitches then hold the uneven relationship in place. AMANN's feed guidance explains the lower feed and foot pressure. It also describes how the upper layer follows.
One layer may show more distortion than the other. Treat that as a clue, since several causes can overlap. An operator may pull a layer to correct a mismatch. That action can change the evidence halfway through the seam.
Use paired marks to locate the drift
Consider two matched test strips with a 300 mm joining length. Their approved seam lines have no intended ease. Mark both strips at the start and at 75 mm intervals before sewing. Confirm that the marks match when the unsewn pieces lie in the agreed state.
Now sew under the recorded baseline setup. Keep both layers identified and retain the sewing direction. Record the gap between each pair of marks along the seam. Here, a positive gap means the lower-ply mark lies ahead of its pair in the sewing direction.
Original mark position | Observed gap between marks | Increase from previous checkpoint |
|---|---|---|
Start | 0 mm | — |
75 mm | 1 mm | 1 mm |
150 mm | 3 mm | 2 mm |
225 mm | 8 mm | 5 mm |
300 mm | 12 mm | 4 mm |
The final gap is 12 ÷ 300 × 100 = 4% of the original joining length. The largest increase occurs between the 150 mm and 225 mm marks. That directs attention to the conditions within that part of the operation.
This 4% is a registration measure for the example. It is not a measured strain in either ply, a feed-dog setting or a universal defect limit. Sliding, stretch, local gathering and the measurement method can all affect the gap. Inspect the sample and process before choosing a mechanical explanation.
Observe the material before, beneath and after the foot. Look for changing hand pull, a hanging panel, drag in a guide or a thickness crossing. Check whether the support keeps the work in the same state across the full seam.
Have competent staff check the feed arrangement under the machine maker's instructions. Foot pressure must still control the material, and the chosen feed must suit the assembly. A more advanced feed system does not fix a wrong pattern. Poor setup or a handling change can also remain unresolved.
Retain the baseline and repeat the marked check after an agreed correction. Compare the pattern of drift, not only the final ends. Two trials can end at the same gap while building that gap in different places.
Keep material-side and handling changes separate
A complaint may occur only when a particular fabric face touches the foot. Label the face, ply position and sewing direction before trying another arrangement. Otherwise, “turn the piece over” can conceal several changes at once. The directly driven layer may change. So may the sewing direction and the way the operator supports the panel.
Choose a comparison that answers one of those questions. For example, change the external support under a long panel. Keep both layers in their original positions. Use new matched pieces and the same marked checkpoints. If drift falls mainly in the formerly unsupported part, investigate the handling at that point.
It still does not prove that every wave came from handling. Repeat the observation and examine the seam after the required rest and care. Only then try another supported explanation. If reversing the plies is the next test, label it as a different comparison. Do not merge its readings with those from the support trial as though both used the same conditions.
Separate thread restraint from fabric movement
Overtight sewing thread can recover after stitch formation and compress the seam. A balanced-looking stitch does not guarantee that the total thread restraint is suitable. Both thread paths may be too tight even when the lock lies in an acceptable position.
AMANN's tension guide separates thread balance from the amount of thread in the stitch. It also notes that tension readings depend on the machine's type and condition. A dial position copied from another machine is weak evidence of an equivalent seam.
Record the thread product, size, lot and path. Identify the machine and needle system. Note the needle condition, stitch type and stitch length. Where a tension measurement is part of the approved setup, record its method and units. A static pull reading and a rapidly changing sewing force are different measurements.
A study by Mori, Niwa and Kawabata examined tension and puckering. It considered fabric mechanics as well as the thread. Its abstract reports that the relationship also depended on fabric bending stiffness. This suggests checking the response of the actual material. One tension value need not give the same appearance on every fabric.
Adjustments need to preserve stitch control. A flat seam is not enough if the lighter tension also creates loops, opening or other faults. Check the relevant seam performance as well as appearance after each candidate change.
To identify a cause, avoid changing thread tension, foot pressure and stitch length together. A combined trial may find a usable setup. It cannot show which change produced the improvement. State which kind of conclusion the trial is meant to support.
The retained evidence should include the original seam before release or repair. A later smooth sample proves something about that later setup. To draw conclusions about the earlier seam, the comparison must preserve the relevant conditions.
Consider yarn displacement in the fabric
A dense woven structure may have little room for the needle and sewing thread. Local yarn movement can create distortion around the stitch line. This is often called displacement puckering or structural jamming.
AMANN's displacement guide lists fabric density and finish among the factors. Needle and thread size matter, as does stitch density. Consider them together. A smaller needle must still suit the thread and resist bending in the actual assembly.
Compare the faulty seam with an unsewn piece from the same material state. Look for waves tied to single needle holes, several rows or one grain direction. Preserve any visible yarn movement when examining the sample.
A trial could compare a finer compatible thread and needle. Another could test a revised stitch density. Check strength, damage, coverage and running behaviour before approving them. The practical target is a suitable complete seam, not the smallest number on a needle packet.
Direction also deserves a test where the construction permits it. Midha and Kumar studied seam angle in lightweight woven fabrics. They compared cotton and polyester at different stitch lengths. The reported angle giving the lowest puckering differed among the fabrics tested. That result does not supply a universal angle for cutting every garment.
Changing grain direction can affect the planned shape, stretch and appearance. It therefore needs design approval and a new construction check. A convenient diagonal sample cannot qualify a production seam that follows another direction.
Multiple rows deserve the same care. Approve the finished group of rows, including their order and spacing. A single-row sample may miss the combined effect of the actual topstitching operation.
Release a sample in stages and keep a control
A thread-release check shows how the waves change when restraint is reduced. Some distortion may remain in the fabric. Coats' bulletin describes cutting or removing stitch threads and comparing released plies. These checks alter the sample, so record the intact condition first.
Use a designated test piece away from the machine. Retain an untouched comparison. Use matched areas where possible. Choose them before seeing the result, so a convenient small section does not drive the conclusion.
Identify the length to be examined and photograph both faces. Record the material, stitch and stage of treatment. Save the existing appearance judgement before changing the seam.
Release the relevant stitch bridges with care. Do not pull out the loops or damage the cloth. Observe whether the waves reduce, remain or change. Fewer waves support a role for thread restraint. Other causes may still exist.
If further checks need thread removal or separate plies, record that step. Compare their relaxed relationship under the same conditions. Preserve any cut or damaged area in the record.
Keep those steps distinct: cutting a bridge and removing all thread are different changes. Removing the thread changes both restraint and the material occupying the stitch path. A result after full removal cannot be treated as though only tension had changed.
A released sample cannot serve as an untouched strength or after-care specimen. Prepare separate pieces for those questions. Label the altered specimen clearly so that it cannot return to the approval set as an intact seam.
Compare components through the actual care route
A seam joins materials that may respond differently to washing, drying or other treatments. Compare the shell fabric, tape, lining, interlining and thread relevant to that construction. Fibre names alone cannot show that the finished components will change by the same amount.
Define the whole treatment. ISO 6330:2021 specifies domestic washing and drying procedures for textile testing. Its public scope says that a full test includes both stages. Changes in test settings can affect the results. Record the selected route, cycle count and sample identities.
Production garment washing, domestic care and pressing are distinct process histories. Keep them separate where the product needs more than one. A supplier's result under one route should not be silently applied to another.
An original component-length comparison
Suppose a fabric specimen and a separate tape specimen each have a 200 mm gauge before treatment. In the agreed final state, the fabric gauge is 196 mm and the tape gauge is 190 mm.
Fabric reduction = (200 − 196) ÷ 200 × 100 = 2%
Tape reduction = (200 − 190) ÷ 200 × 100 = 5%
The results differ by 3 percentage points, while their final free lengths differ by 6 mm. The figures flag a possible compatibility problem. They do not predict a 6 mm pucker height or the exact length of the sewn assembly.
Once joined, the components restrain each other. Their stiffness, geometry, seam construction and treatment history affect the result. Test the assembly as well as the separate materials. The same caution applies when free thread data are used to explain a finished seam.
ISO 5077:2007 concerns dimensional change after specified washing and drying procedures. ISO 7770:2009 addresses the smoothness appearance of existing seams after cleansing. These are separate questions. Neither public scope supplies a universal allowable difference between any two garment components.
A formal result needs the full applicable method and the agreed product requirement. Keep an appearance grade, a length change and a strength value as separate fields. One cannot be substituted for another simply because each concerns the same seam.
State the denominator when reporting seam contraction
A marked distance can track change across stages. Keep the same marks and measurement state throughout. Define whether the measurement follows the relaxed marked gauge or another prescribed geometry. Stretching a wave flat during one reading changes the comparison.
Consider a separate teaching case with these gauge lengths:
Stage | Gauge length | Reduction from the original 400 mm |
|---|---|---|
Before sewing | 400 mm | 0 mm |
After sewing and the agreed rest | 392 mm | 8 mm |
After the full care route | 380 mm | 20 mm |
The first reduction is 8 ÷ 400 × 100 = 2.00%. The later stage removes another 12 mm, which is 12 ÷ 392 × 100 = 3.06% of the post-sewing gauge. The total reduction from the original marks is 20 ÷ 400 × 100 = 5.00%.
Adding 2.00% and 3.06% gives 5.06%, which uses mismatched denominators. Add the losses in millimetres first when reporting the total against the original 400 mm. State that basis beside the percentage.
The gauge length also affects what a small reading difference means. A 1 mm difference equals 1% of a 100 mm gauge, but 0.25% of a 400 mm gauge. These figures describe scale; they do not establish the accuracy of a ruler or test method. Keep the specified gauge and method when comparing results.
Record the original readings before rounding the percentages. If a result lies near an agreed limit, check the sample placement and marks. Review the permitted measurement procedure too. A second reading of the same seam is useful for checking the reading process. It is not a second independently sewn specimen. Keep that distinction clear when reporting how many samples support a conclusion.
These values describe contraction of the marked gauge. They do not assign a share to feed, thread recovery or material change. The viewing geometry can also affect the result. They also do not measure the visible severity of puckering. The cause still needs the comparisons described above.
ApparelDiary's shrinkage and pattern allowance guide covers the broader measurement questions. A pattern allowance and a pucker correction serve different purposes. Keep their approval records distinct.
Confirm the correction on a complete seam
Choose the next trial from the evidence. If marks drift at a folder, test the handling and guide condition there. Suppose thread release reduces waves, while the marks still align. Investigate the thread path and restraint. If the problem is specific to a dense finished lot, retain that material in the comparison.
Hold the other relevant conditions steady for a focused trial. Record any unavoidable change. Include several specimens and a repeat run suited to the question. One attractive piece cannot establish stable production behaviour. Decide the sample plan before choosing the best result.
Use the actual features that made the seam difficult. Include starts, crossings, curves and later topstitching where they belong to the garment. Check the result after the required treatment as well as immediately after sewing.
A successful correction must meet the agreed appearance requirement. The other required properties must also remain sound. Check for new damage, open stitches, poor extension or weak seams. Replacing one visible problem with a less obvious one is an incomplete result.
Record the approved material, construction and setup. Add the trial evidence, method, limits and responsible approval. ApparelDiary's quality assurance guide explains how these controls support release.
Finally, confirm that the next operator or shift can reproduce the approved condition. A correction that depends on an unexplained hand movement is difficult to maintain. The evidence should name the change and explain why it was chosen. It should also identify the complete seam that passed the checks.
References
Mori, Niwa and Kawabata: Effect of Thread Tension on Seam Puckering, 1997.
Midha and Kumar: Effect of Seam Angle on Seam Puckering in Lightweight Woven Fabrics, 2015.
ISO 6330:2021: Domestic Washing and Drying Procedures for Textile Testing.
ISO 7770:2009: Smoothness Appearance of Seams After Cleansing.
Discussion0
Loading the discussion…