
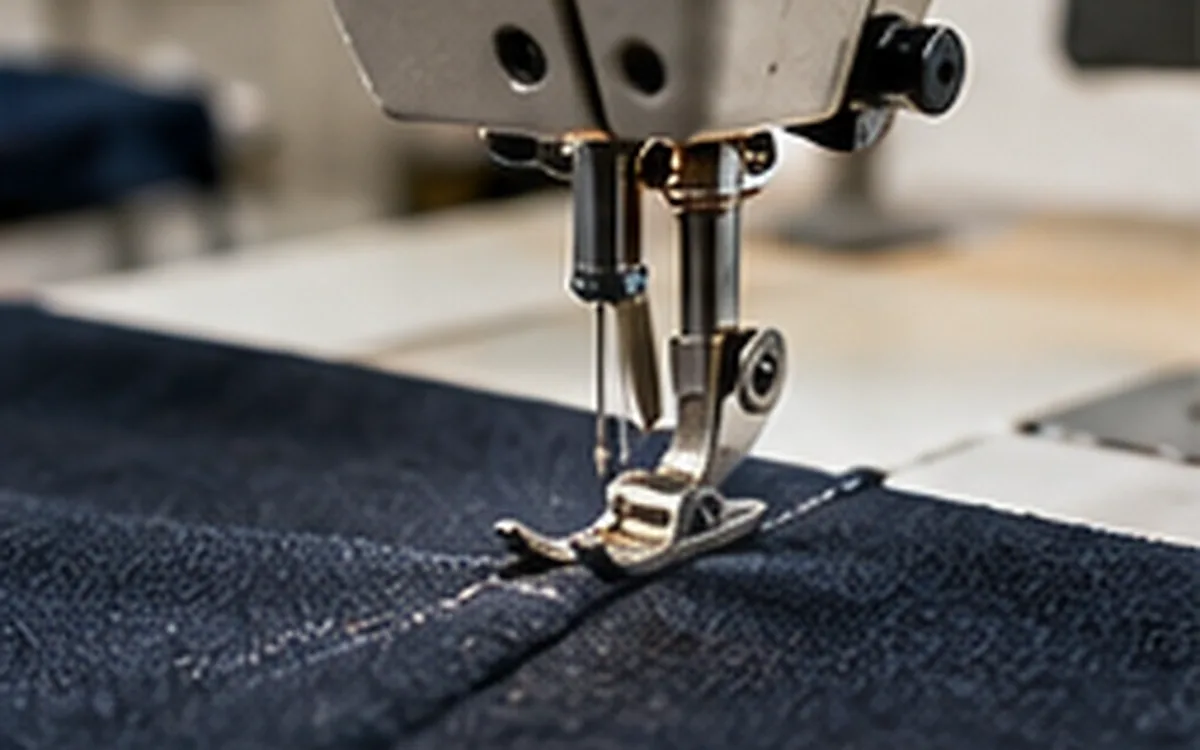
A straight row on the face of a garment tells only part of the sewing story. A 401 chainstitch has two thread paths. The needle and looper threads meet below the cloth in a repeated sequence. The needle can leave a hole even when that sequence fails. A neat-looking face therefore does not prove that every link underneath has formed.
Knowing the sequence helps an operator describe a problem. It also helps a technician choose the right check. It also gives sample-room staff a way to explain a stitch without calling every loop the same thing. This guide follows the two threads through one cycle. Original measuring and inspection examples then show what the finished row can reveal.
The examples are teaching cases. They are not machine settings, factory observations or buyer acceptance limits.
Give each thread a clear identity
Type 401 uses one needle thread and one looper thread. The needle carries its thread through the material. The two threads interloop below the cloth. Type 101 is different: its single needle thread interloops with itself. These roles are set out in American & Efird's stitch terminology glossary.
For the explanation below, call the needle thread N and the looper thread L. N and L are labels for their jobs, not thread grades. They do not specify fibre, size, colour or strength.
Keep the same labels when looking at the top, the underside and the machine's threading diagram. A change of viewing angle does not change which thread passes through the needle. Calling both underside segments “the bottom thread” loses that distinction. Part of the needle thread is also below the fabric.
This guide follows one row of 401. A machine with several needles may use a different thread arrangement. Count the actual paths and check its stitch code. A chain-like underside does not prove that a multi-row stitch uses this same arrangement.
Follow the cycle through two thread exchanges
The sequence repeats while material advances through the machine. It is useful to describe four phases, while remembering that real motions overlap. There is no universal left-to-right direction or clock-face setting for every machine head.
Carry N through the material and form its loop
The needle takes N through the cloth. After reaching its lowest position, it begins to rise. A loop of N develops beside the needle, in the region presented to the looper. Coats explains these early stages in its basic stitch formation guide.
The useful question at this point is specific: has N formed a loop where the looper can enter it? Seeing the needle rise does not answer that question. The loop's position and shape matter as well as the needle's movement.
Bring L through the loop of N
The looper enters the available N loop while carrying L. This is the first exchange to follow. The looper's passage through that loop brings the separate thread systems together.
In a teaching sketch, draw N and L in different colours and label the fabric face. Keep the looper distinct from L: one is a machine part and the other is thread. Saying “the looper makes a loop” can hide which object is moving and which thread is being held.
Present the looper-thread triangle to the needle
The next descent takes the needle through the looper system's thread triangle. That is the second entry. JUKI's MH-481/MH-484 manual lists these two missed entries as separate faults.
That distinction improves a fault report. Did the looper miss the needle loop? Did the needle miss the looper-thread triangle? Those are two distinct observations. Check the motion before naming timing as the cause.
Release and set the interlooped threads
As the cycle continues, the held loop is released from the forming part. Thread control draws the interlooping into its finished position. Coats calls these broad stages cast-off and stitch setting. The feed provides the spacing for the repeated row.
The result depends on both forming the links and placing them well. A loose but linked stitch and a missed link are different findings. Tightening a loose row may change its appearance. That change alone does not prove that the missing exchange now takes place.
Use a finished sample to practise thread tracing
Start with a sound sample that a trained person has sewn on the intended equipment. Inspect it away from the moving machine. Mark the face, reverse, sewing direction and sample identity before discussing individual loops.
Contrasting thread colours can help a training exercise. The chosen threads must still suit the setup. A demonstration may use different products from production. If so, it cannot prove how the production threads will behave. Keep the demonstration and approval samples clearly identified.
Trace N from a visible face segment through one penetration to the reverse. Then find where L meets that part of the needle thread. Continue along several repeats rather than choosing the clearest single link. This makes it easier to notice when a label has accidentally switched from one thread to the other.
Use magnification if needed, but record what can actually be seen. A buried part of the path may remain uncertain without opening the sample. If the sample is taken apart, label it as dismantled and retain an untouched comparison piece. Pulling out thread changes the evidence.
The finished sample shows the resulting thread arrangement. It cannot show when the looper arrived or the clearance beside the needle. Nor can it show tension during formation. Those are machine observations. Keep the result you can see separate from the motion you infer.
Read the needle as part of the thread path
The needle does more than pierce cloth. Its eye carries N, while its long groove protects the thread along its route. The scarf gives clearance near the loop-forming part. Coats explains these functions in All About Needles. The needle system must suit the machine; nominal size alone does not identify it.
For a formation check, compare the installed needle with the approved system, size, point and orientation. A packet marked with the expected size is insufficient if the system is wrong. Leave insertion details and clearances to the exact machine instructions.
Suppose a sample record says only “size 90 needle.” A second person cannot tell from that entry which system was used or which point was selected. Add the maker's full designation. Another person can then identify and check the part, rather than guessing from its size.
This matters when comparing two trials. Suppose both the needle system and thread change. An improved row will not show which change helped. Record the actual parts before making a claim about why formation improved.
Treat threading as a controlled route
A thread path includes guides and control points as well as the needle or looper eye. Check the route against the manual for the exact head and fitted options. The JUKI manual shows separate needle and looper routes. Some guide arrangements depend on the model variant. It also requires power to be turned off before threading and guards to be in place for operation.
A useful route record names the machine model and identifies the manual page. The maker may provide more than one route. Record the approved option used and why it applies. Avoid replacing that information with “threaded normally.”
Consider two samples labelled A and B. Their fabric and thread codes match, but sample B was made after a rethread. If the route was not checked or recorded, the team cannot assume that thread control stayed the same. First establish what was changed; then decide what comparison remains valid.
A diagram does not justify a general rule to skip a guide or add a wrap. It also does not set a handwheel direction for all machines. Such details depend on the machine. The goal of this check is to confirm a known route, not to invent a new one from the appearance of the seam.
Why a loop may be hard to catch
The loop must be available at the right place and time. Material support, thread behaviour and needle movement can all affect that loop. American & Efird explains these effects in its thread breakage and skipped stitches bulletin. If the fabric rises with the needle, often called flagging, the expected loop can be disturbed. A raised seam crossing can also change support and needle deflection.
This gives a reason to mark fault locations on a sample. A miss next to a thick crossing is a clue worth preserving. It is not proof that the feed, needle or timing alone caused it.
Thread behaviour adds another part of the problem. Thread twist can shift during needle passage and change the loop. Groz-Beckert describes this in its Loop Position Control explanation. A thread's stated strength therefore cannot describe its whole sewing behaviour.
When testing a thread change, record the material, approved needle and other trial conditions. Give the thread's product code and name its role. Was it the needle thread or looper thread? “Changed thread” leaves that question open.
Distinguish a hole, a stitch interval and a secure link
Counting helps only when the thing being counted is defined. Needle holes show penetration positions. Intervals show the spacing between successive positions. The linked thread structure needs its own inspection.
Imagine an undistorted sample with 33 consecutive penetration holes. The measured distance from the centre of the first hole to the centre of the last is 80 mm. There are 32 intervals between those 33 holes.
Average pitch = measured distance ÷ number of intervals
80 mm ÷ 32 = 2.5 mm per interval.
The equivalent nominal density is 25.4 ÷ 2.5 = 10.16 intervals per inch. Here 25.4 mm equals one inch. Report the measured span and count with the result, so another person can reproduce the calculation.
Dividing 80 by 33 would give about 2.42 mm. That is the wrong denominator for this endpoint-to-endpoint measurement. It mixes the number of marked positions with the number of gaps between them.
Now suppose the reverse inspection reveals a missing interloop at one position. The hole count remains 33. The measured pitch also remains 2.5 mm, assuming the material has not moved. Neither result proves complete stitch formation.
This distinction is valuable when a report says “stitch density correct, seam acceptable.” The first part may be a valid measurement; the second needs further evidence. Density, link formation and end-use performance answer different questions.
If the fabric is stretched while measuring, record that condition. For example, the same 32 intervals spread over 88 mm would average 2.75 mm, a 10% increase in measured pitch. That does not show that the feed originally produced longer stitches. It may simply reflect the changed sample length.
Relate machine speed to the short formation cycle
Formation happens quickly, which limits what a casual visual check can establish. In an illustrative case at a steady 2,400 stitches per minute, the rate is 2,400 ÷ 60 = 40 cycles per second. One complete cycle occupies 1 ÷ 40 = 0.025 seconds, or 25 milliseconds.
At 3,600 stitches per minute, the rate is 60 cycles per second. Each cycle takes about 16.7 milliseconds. These are arithmetic examples, not recommended running speeds or model ratings.
The calculation explains why “I watched it sew and saw nothing wrong” is weak evidence about a brief loop exchange. It does not mean that every point in the cycle takes equal time. Nor does a regular machine sound establish that each thread path is correct.
There are two exchanges to follow within the formation sequence. Counting both does not double the stated stitch rate. Forty cycles per second are not eighty completed stitches per second. Keep the machine's cycle count separate from the number of events chosen for a teaching explanation. A four-phase description also does not mean four stitches have formed.
When checking motion, use qualified technical support and the maker's approved observation method. Keep people and tools away from moving parts. A slowed recording can help explain the motion. Yet its frame rate or viewing angle may miss the event of interest. It should not be treated as a clearance measurement.
Work through a formation-focused sample case
Suppose a sample room wants to understand recurring misses near a seam crossing. It makes twelve labelled trial pieces under one recorded setup. Each row is 400 mm long and includes the same planned crossing position. These are invented observations for this example.
The reviewer marks each missed-link event. A separate entry states whether each piece has any missed link. The results are:
Location group | Missed-link events | Pieces in the group |
|---|---|---|
Near the crossing only | 6 | 4 |
Away from the crossing only | 2 | 2 |
No observed missed link | 0 | 6 |
Total | 8 | 12 pieces inspected |
Each piece belongs to one group in this teaching case. No affected piece has events in both location groups. If that occurred, add a separate group or use individual piece records to avoid double counting.
The twelve rows contain 12 × 0.4 = 4.8 metres of inspected seam. Eight events over that length give about 1.67 observed events per metre. Six of the twelve pieces have an event, so the affected-piece share is 50%.
These figures are different descriptions of this small trial. Eight events are not eight affected garments. Neither value establishes the expected defect rate for a production order.
Define the area called “near the crossing”
Assume the team defined a 20 mm inspection window before examining the rows. Each window is centred on its crossing. The remaining 380 mm of each 400 mm row belongs to the other location group. A boundary rule assigns an event exactly on the window edge to one group only.
Across twelve pieces, the crossing windows total 12 × 20 = 240 mm, or 0.24 metres. The six events in those windows therefore give 6 ÷ 0.24 = 25 observed events per metre of window length.
The rest of the rows total 12 × 380 = 4,560 mm, or 4.56 metres. Their two events give 2 ÷ 4.56 ≈ 0.44 events per metre. The two lengths add back to 4.8 metres, and the event counts add back to eight.
These are location summaries for the invented trial, not forecasts. A raw comparison of six events against two needs care. The two groups cover very different lengths of seam. Those counts alone do not justify calling the crossing region “three times worse.”
Keep the window width with the results. A later reviewer might define “near” as a wider area. Before comparing results, reassign the counts and measured lengths to that new area. Photographs or retained pieces help locate each event. Still, write down the window width.
Decide what the evidence supports
The concentration near the crossing supports a closer review of that part of the operation. It does not identify which thread exchange failed. The reviewer should retain the pieces and mark the N and L paths where they can be traced.
A useful report might read: “Six observed misses occurred near the crossing on four pieces. Two more occurred elsewhere on two pieces. Thread identity at the missed exchange has not yet been confirmed.” This states both the finding and the unresolved question.
By contrast, “looper timing wrong” adds a cause that the sample count does not prove. A technician may later confirm a timing issue. Leave the cause open in the initial record until that check is complete.
Keep the next comparison interpretable
Suppose the team finds an incorrect thread route and restores the documented route. It then makes another twelve pieces. The recorded materials, crossing layout and inspection method stay the same. No missed links are observed in that second set.
That is useful evidence in favour of the correction under the trial conditions. It is still a limited result: twelve pieces and 4.8 metres were inspected. Suppose the team also replaced the needle and changed the thread. It could not then assign the improvement to the route alone.
Retain the first and second sets separately. State the actual correction, the remaining conditions and what was inspected. Explain the formation change clearly and keep the percentage tied to the inspected set. The small trial leaves wider performance uncertain.
Separate formation, setting and final seam approval
Coats separates skipped stitches from imbalanced or variable rows in Solutions to Sewing Problems. Its cause lists include loop entry, thread control, needle behaviour and material support. The categories help a reviewer avoid treating every untidy row as the same failure.
A sample check needs three separate observations. Are the intended links present? Is their appearance consistent? Does the completed assembly meet its required tests? A link can be present without the row looking acceptable. An attractive row can still need strength, movement or care testing.
Do not invent a universal pull force or extension limit for a 401 stitch. Use the approved product requirement and method for the actual assembly. The stitch designation describes its structure; it does not supply a complete garment acceptance rule.
Controlling a process and checking its output are related tasks. ApparelDiary explains the difference in its garment quality assurance and quality control guide. The formation record supports both tasks without replacing the product specification.
Check starts, stops and ends as part of the row
Do not assess only the best-looking central section. Inspect the start, the section after any interruption and the finished end using the intended construction. Coats identifies runback as a concern with 401. A sound middle section cannot establish end security by itself.
For a training set, identify uninterrupted samples separately from samples containing a restart. Record how each end was finished. Suppose one sample uses an approved overlap while another has loose cut tails. Their ends represent different finished conditions, so the comparison needs that qualification.
Keep a repaired specimen clearly marked. A repair may solve the garment problem, but it changes the evidence about the original row. Retaining an unrepaired example helps the technician understand what happened before the correction.
Leave a record that another person can use
A formation record should name the machine and approved thread routes. Add N and L product codes, the needle designation, material stack and sample numbers. Add the measured pitch with its span and interval count. Where a miss occurs, mark its position and state which thread exchange is known or still uncertain.
Attach the observation to the correct style revision. ApparelDiary's apparel PLM guide explains how shared product records keep approved details connected. A sample labelled only “chainstitch test” is hard to trace. Its label will not identify a later fabric, thread or seam change.
The most useful explanation of 401 formation keeps returning to N and L. Which thread made the loop? Which part entered it? Was the next thread triangle entered correctly? What did the finished sample actually show? Clear answers help the next person choose a relevant check. “Adjust until it looks better” gives that person much less to work with.
Discussion0
Loading the discussion…