
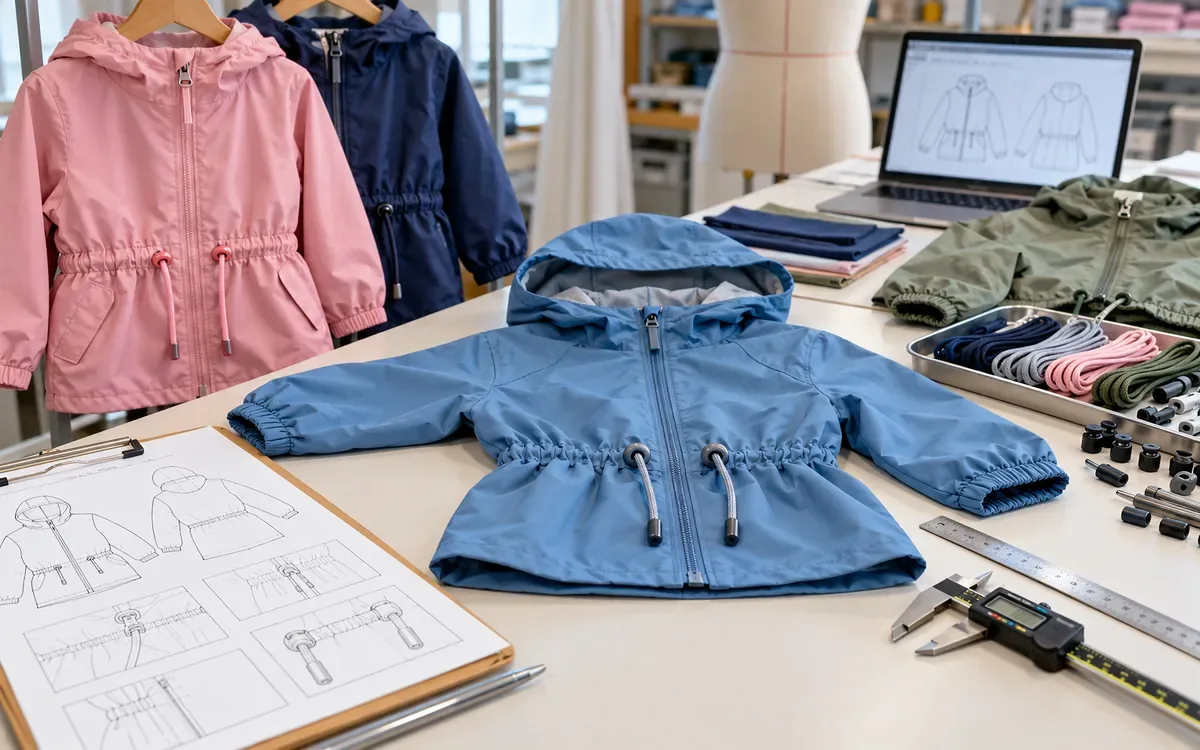
Start with the cord, the child, and the place it can catch
A jacket arrives at sample review with a neat cord at the waist. The sketch shows two short ends. Pull the garment to its full width and move the cord, though, and the team may see a different shape. Free ends, loops, exit points, and the anchor all deserve attention before the feature is approved.
Children's clothing drawstring safety begins with that close look at the garment. Does the cord serve a real fit need? Which sizes will use it, where does it sit, and in which markets will it be sold? Those answers come before a length limit. The same number can mean different things on different products.
This guide focuses on outerwear development and factory control. It explains key U.S. rules, the wider scope of European cord guidance, and a practical way to turn a design into clear production checks. The worked examples are hypothetical. They show how to manage dimensions; they do not replace the applicable standard or a product assessment.
Why the garment's details matter
The U.S. Consumer Product Safety Commission describes incidents in which clothing cords caught on playground equipment or moving vehicles. A knot or end fitting can act as a catch point. A long free end can reach an object beyond the garment itself. Those are useful design questions even before a team starts measuring. See the CPSC drawstring guidance.
Make a front and back drawing of each style. Mark every cord, ribbon, tie, loop, and end fitting. Include details hidden under a flap. Show how the item looks when loose, closed, and adjusted. A drawing that only shows the garment in its most flattering state can hide the longest exposed cord.
Next, ask what each feature does. A waist cord may adjust fit. A neck bow may have no purpose beyond appearance. A zip pull may help a child grip a closure. These functions differ, so copying one rule across all three features can lead to the wrong decision.
At the review meeting, give each cord a decision: retain for a stated purpose, revise, or remove. Assign the change to the pattern, trim list, and artwork at the same time. An adult version may explain where the feature came from, but it does not establish a child's fit need. Resolve an unnecessary detail before a trim order makes it costly to change.
Build a market and size map first
Use a simple approval sheet with one row per intended market. Enter the product description, size range, size chart, sales route, relevant rule, and standard edition. Name the person who confirmed each entry. Leave a date beside it so the team can tell whether a reused sheet needs review.
The U.S. rule in 16 CFR 1120.3 identifies certain children's upper outerwear with nonconforming drawstrings as a substantial product hazard. It incorporates ASTM F1816-97. The current ASTM store publication is F1816-18(2024). Those are different edition references. A specification should show the legal reference and any newer buyer requirement as separate entries.
Do not replace the edition named in a rule with the latest edition simply because its date is newer. Equally, do not assume an old legal reference is the only requirement in a purchase contract. Ask the buyer to resolve any unclear difference before a factory starts work.
The CPSC FAQ explains that upper outerwear includes jackets and sweatshirts generally worn over other clothes. Lightweight versions can fall within that scope. Pants, shorts, and skirts are outside this particular upper-outerwear definition. That scope boundary does not establish that every cord on a different product is safe.
For development, keep a separate row for each top and bottom in a set. A matching fabric and shared style number do not make their cord rules identical. Also check the final sales description. A product developed as sports kit may later be sold as everyday clothing.
What the main U.S. limits mean in practice
For upper outerwear in sizes 2T through 12, or the equivalent, hood and neck drawstrings present the hazard identified by CPSC. For waist and bottom drawstrings in sizes 2T through 16, or the equivalent, CPSC specifies a maximum exposed length of 3 inches outside the channel when the garment is at its fullest width. Free ends must have no toggles, knots, or other attachments. A continuous waist or bottom cord must be bar tacked to prevent it pulling through. These points are set out in the CPSC business guidance.
Treat that set of conditions as a group. A short cord with a prohibited end fitting does not become acceptable because its length is small. A cord that meets the length limit on one side can still fail the design intent if it slides through and becomes long on the other side.
The rule also addresses size names and ranges. It treats girls' and boys' Large as equivalent to size 12 and Extra-Large as equivalent to size 16, with further provisions on size evidence. If a range includes a covered size, the range is subject to the relevant requirement. The actual regulatory size provisions matter more than a convenient marketing label.
Product detail to review | Development question | Useful record |
Hood opening | Is there a cord in a covered size? | Front and side drawing |
Waist channel | What is the longest exposed end at full width? | Measured sample sheet |
Continuous cord | What prevents movement through the channel? | Anchor location and construction |
Size labelled 12/14 | Does the range include a covered size? | Market and size assessment |
Shared adult and child artwork | Could an adult cord be copied into a child style? | Separate approved component list |
The table is a development aid. Its rows do not cover every requirement that may apply to a children's garment.
European guidance covers more than outerwear drawstrings
BSI lists BS EN 14682:2014 as the current release in its public record. It concerns cords and drawstrings on children's clothing. Use the relevant full standard for its definitions, age groups, body zones, exclusions, and detailed measurements. A short public summary cannot reproduce that whole assessment.
A useful official example comes from the UK Office for Product Safety and Standards. Its PRISM case study describes a summer set for children under three. The top had a decorative cord tied across the front of the neck. The case demonstrates why calling a feature decorative does not remove the need to assess it. It also discusses restrictions in the head, neck, and upper chest area under EN 14682:2014.
BSI also publishes guidance on using EN 14682:2014. Its public description explains that the report helps users interpret the standard for garment styles. Use that guidance alongside the standard when a drawing is hard to classify.
For a brand selling in several markets, maintain separate requirement columns. Put the exact unit and measuring state beside every dimension. Do not merge a 75 mm value from one context with the U.S. 3-inch limit. They are numerically different and can apply to different features.
A single product can be designed to meet several sets of requirements. First, however, the team must understand each set. The most restrictive number in a spreadsheet is not enough if the definitions or measuring states differ.
Remove the need for adjustment where possible
Before choosing a substitute closure, revisit the fit. Does the hood need a cord to stay in place, or does its shape need work? Does the waist need continuous adjustment, or would a well-chosen elastic section serve the wearer? Could a shorter garment avoid a trailing hem?
Try changes in a sample. Review the opening, movement, access, and comfort. A cord removed from a hood should not leave the hood too loose to use. Nor should a tight fixed opening make dressing difficult. The aim is a useful garment whose fit does not depend on the hazardous detail.
CPSC names snaps, buttons, hook-and-loop closures, and elastic as alternatives for upper outerwear neck closures in its FAQ. Each substitute still needs its own assessment. For example, a button's presence says nothing by itself about its attachment or suitability.
For a proposed elastic panel, record the relaxed and extended dimensions. Check how the finished sample returns after stretching. For a tab, review both its closed and open positions. For a fixed opening, test dressing and removal with appropriate supervision after the design has passed its safety review.
Avoid replacing one long loose detail with another under a different name. A ribbon, belt, or decorative tie should have a clear purpose and its own assessment. The file should explain the geometry that changed, not merely the component name.
A worked example: design margin at a waist channel
The following example concerns a hypothetical continuous waist cord on U.S. children's upper outerwear within the covered size range. Assume the design is otherwise eligible, the free ends have no prohibited fittings, and the required anchor is present. This calculation only studies exposed length.
Start by converting the limit without rounding it upward:
Maximum exposed length = 3 in × 25.4 mm/in = 76.2 mm
Now suppose the full-width channel path is 800 mm. The cord is 920 mm long. Its middle is anchored at the middle of the channel. Ignore thickness and curvature effects for this simple model. The two exposed ends are equal.
Exposed length per end = (cord length − channel path length) ÷ 2
Exposed length per end = (920 mm − 800 mm) ÷ 2 = 60 mm
The nominal margin is 16.2 mm on each side. That is not the same as a proven production margin. Cutting error, anchor position, and changes in channel length can all use part of it.
Consider a deliberately conservative development case. The cord is cut 8 mm longer than nominal. The channel becomes 24 mm shorter during an agreed care trial. The anchor position adds another 3 mm to the longer exposed end. These are assumed values for this example, not standard tolerances or a prescribed wash test.
Contribution to the longer end | Calculation | Added length |
Nominal exposed end | (920 − 800) ÷ 2 | 60 mm |
Extra cord length | 8 ÷ 2 | 4 mm |
Shorter channel path | 24 ÷ 2 | 12 mm |
Anchor position effect | Assumed effect on longer side | 3 mm |
Total longer end | 60 + 4 + 12 + 3 | 79 mm |
Excess above the limit = 79 mm − 76.2 mm = 2.8 mm
This case fails the length comparison. Averaging the two ends would hide the problem. So would rounding 76.2 mm to 80 mm.
The model points to three measurements for the development trial: cord length, channel path, and anchor position. It does not predict real shrinkage or anchor movement. Record those values on finished samples under the required conditions, then revisit the proposed cut length.
If the longer end uses almost all the available margin, the team has a design decision to make. A shorter cord may still provide the intended adjustment. A different fit detail may remove the need for it. The chosen target should allow the process variation shown by the trial. A nominal sample at the limit leaves no room for that variation.
Turn the decision into a usable pattern and specification
A comment such as “cord to be safe” gives the sewing line no clear instruction. Show the exit points, channel route, anchor position, cord type, and end finish. State which sizes use the feature. Mark any style or market where the feature must be absent.
Use stable pattern references for the anchor. A distance from a seam intersection is often easier to verify than a vague instruction to sew “near the centre.” Check that the chosen point still makes sense after grading. The anchor must stay aligned with the intended cord and channel geometry.
ApparelDiary's guide to pattern markings, grainlines, and notches explains how production marks communicate placement. Apply that discipline to the anchor and channel. Keep the placement mark distinct from unrelated assembly marks.
The component list should identify the approved cord. Include its material, form, width or diameter, colour, cut length, and permitted end finish. If another supplier proposes a replacement, compare the finished feature. A similar colour does not prove the same stretch, bulk, or response to care.
Specify the approved construction without inventing a universal stitch count.
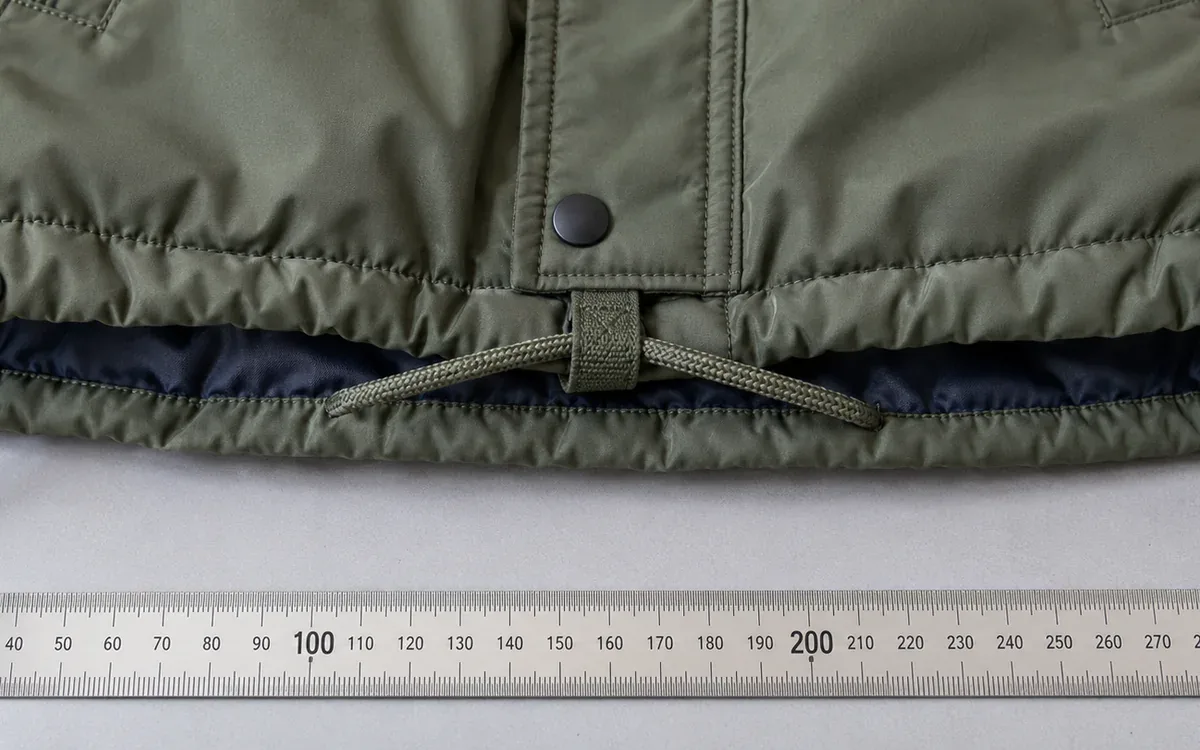
The needed construction depends on the materials and design. Confirm it through the applicable assessment and the agreed verification method. ApparelDiary's seam-strength failure guide provides useful background on separating material failure from stitch failure.
Place an image of the accepted sample beside the written detail. Also keep one clear rejected example if it helps operators see the issue. Explain the reason for rejection so the lesson survives a change of staff.
Measure finished garments in a consistent state
Make the inspection instruction specific enough that two trained people can obtain comparable results. It should identify the sample, size, conditioning state, measuring position, instrument, and recording method. Use the applicable standard's procedure where it gives one.
For the U.S. waist and bottom limit discussed here, the garment must be expanded to its fullest width. A casual measurement of a gathered garment is a different state. Give the operator a clear view of the channel exit and the end being measured. Avoid hiding the start point under a fold.
Record left and right results separately. Photograph an unusual construction with the measuring points visible. Keep the raw measurements; a pass mark alone is less useful if a later sample is disputed.
A proposed development sequence is:
Confirm the style, size, market, and approved specification.
Inspect the feature for missing anchors and unapproved end fittings.
Arrange the garment in the required measuring state.
Measure each relevant end or loop using the applicable method.
Record the result, instrument, date, and inspector.
Repeat the checks after any agreed development treatment or change.
Hold unresolved results for technical review before release.
This is a workflow, not a substitute standard method. Do not turn it into a child entanglement trial. Geometry and construction checks belong on a bench. Any wear trial should begin only after the product has passed the relevant safety assessment.
Control the details that change during production
The biggest sample is not always the most demanding size. A shorter channel can expose more cord if the factory uses one cord length across the range. An anchor may also shift when patterns are graded. Check the logic for every size before selecting production samples.
Colourways can matter when they use different fabrics, finishes, or trim sources. Treat a shared design as a family of products with known differences. Record which differences were assessed and why a sample represents other units.
At the cutting-to-sewing handoff, check one bundle against the current trim list. Pre-cut cords need a visible size and style identity. Cords cut on the line need a clear length instruction at that station. When the design changes, remove the old instruction from use and separate any remaining old components. Otherwise an approved sample can coexist with the wrong parts on the line.
An anchor sewn through the channel fabric but missing the cord may look tidy from outside. Define how the team confirms the intended construction. If the approved method includes a functional check, give the operator its exact procedure and acceptance rule. Do not invent a force value at the workstation.
Suppose an inspector finds a long exposed end in one size. Hold the work linked to that size and component batch while the scope is checked. Compare the cord cut length, channel path, and anchor with the approved sample. Extend the hold if the same parts or method were used elsewhere.
Approve a repair only after the cause is understood. Cutting the end may change its finish and still leave a missing anchor. The repaired garment needs the same relevant checks as the approved design. Record which units were reworked and who accepted the result before they return to the packing flow.
Learn from a real recall without copying its remedy
In May 2026, CPSC announced a recall of Allura Imports youth sweatshirts with a Bobcat logo. The products had neck drawstrings and included sizes 8/10 and 12/14. The official recall notice is a current example of why a familiar sweatshirt shape still needs a child-specific review.
For a development team, the useful question is where such a detail could enter its own process. Was the starting artwork based on an adult style? Did the size range receive a separate review? Could a factory restore a cord because the eyelets remained in the pattern?
Build those questions into the sample approval meeting. Review the actual garment as well as the tech pack. Check sales images against the approved product so that later orders do not reintroduce an old feature.
A recall remedy belongs to the named product and notice. It is not a general instruction for reworking every similar garment. A different design may need a different correction, assessment, or action.
What a release file should explain
The release file should let a colleague reconstruct the decision without calling the original sample technician. Connect the market and size assessment to the current drawings and component list. Identify the reviewed sample and keep its actual measurements. For each change, show the question raised, the evidence reviewed, and the person who closed it.
Keep the cord review within the wider product process. CPSC explains that this 15(j) rule does not itself trigger an independent testing or certification requirement under section 14(a). Other applicable children's product rules can require testing and certification. The CPSC FAQ makes that distinction. A cord measurement sheet is not proof of compliance with every product requirement.
Public standard pages also have limits. The ASTM product page describes the standard's scope, including its fully retractable drawstring exclusion. It does not give a team permission to assume that a cord which can be pushed inside a channel meets that definition. Resolve such a design against the full requirements and official guidance.
Questions that often arise in sample approval
Can a decorative bow be ignored?
No. Assess where it sits, how it is fixed, and what free ends or loops remain. The UK case study discussed above concerns a decorative neck cord. Decoration is a function, not evidence of safety.
Can the adult hoodie pattern be scaled down?
Use it as a visual starting point only after checking the children's requirements. Remove or redesign unsuitable features before grading and sampling. A proportional reduction does not answer the cord-location question.
Is passing one sample enough?
One sample establishes what was measured on that sample. The production plan must address size changes, component variation, and assembly control. Choose checks based on the actual risks and applicable requirements rather than assuming that all units will match.
Should the factory round inches to a convenient metric value?
Keep the exact conversion in the requirement. Three inches equals 76.2 mm. Set a sensible design target below a maximum, with a margin supported by real process results.
A useful garment starts with a deliberate choice
A cord should remain in a children's outerwear design because the team has assessed its purpose and finished form. Removing it is a normal design choice. Retaining it requires a clear link between the relevant requirements, the pattern, the component, and the checks on production garments.
Keep market rules and exact units visible. Show inspectors the required measuring state and record both ends where relevant. When those details travel with the style, the next sample review or supplier change starts from an understood decision.
Safety rules belong in the specification and in tests, so see the garment specification sheet, care label validation and zipper performance tests.

Discussion0
Loading the discussion…