
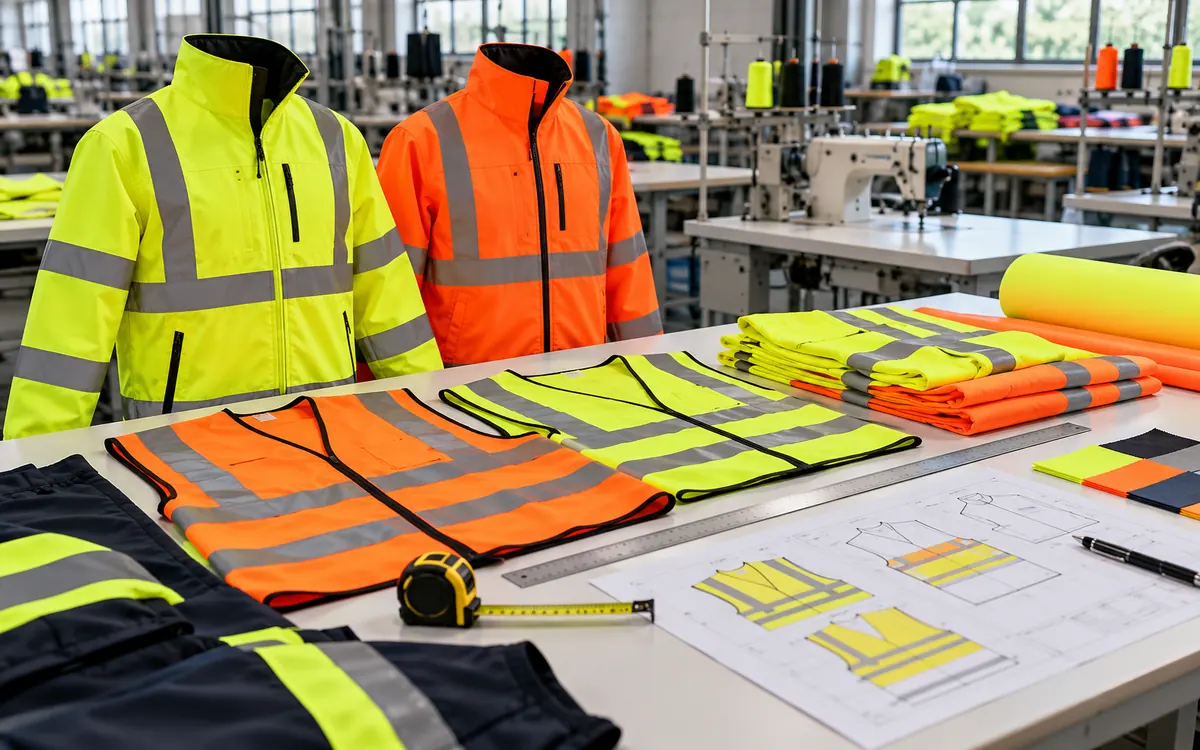
A high visibility class describes specified garment performance. To use that class well, a buyer needs the standard, edition, and intended work conditions. A label alone cannot settle whether the garment suits a particular site. Lighting, moving vehicles, fit, and other equipment all affect that choice.
For apparel teams, preserving the approved design is just as demanding as selecting it. Consider a customer who orders the same vest with a larger logo. The fabric and tape may be unchanged, yet less background material remains visible. Smaller sizes can make that loss more critical. This guide explains how to read the classes, check material areas, and carry an approved design through branding, issue, and care.
Start with the hazard and the required scheme
A high visibility garment is intended to help others detect a person's presence. It is one part of a wider system for managing vehicle and workplace risks. HSE's current PPE guide starts with risk assessment and other controls. It then considers the need for PPE. A bright vest does not replace traffic separation or safe routes. Lighting and safe work procedures still matter. HSE PPE overview.
Before choosing a class, ask the site owner or safety lead which scheme applies. Check the edition too. Record any contract, road authority, rail, or employer requirements. Do not use a generic job title as the entire assessment. Two people may share the job title of warehouse worker. Yet they may face different traffic and lighting. Their need to be seen may differ too.
The terms ISO, EN ISO, and ANSI/ISEA refer to different documents or adoptions. A Class 2 label under one system should not be treated as an automatic substitute for Class 2 under another. Compare the actual specification and accepted conformity evidence. This article uses ISO 20471 area classes as its main design example. It explains the separate ANSI/ISEA system later.
Check the edition before using a design table
At the source review for this article, ISO listed ISO 20471:2013 as published, with Amendment 1:2016. Its scope includes colour, retroreflection, minimum areas, and placement of visible materials. The ISO website also listed a replacement draft, ISO/DIS 20471, under development. A draft is not the same as a published replacement. ISO 20471:2013, Amendment 1:2016, and replacement draft status.
This distinction matters when a supplier says a style follows “the latest standard.” Ask for the full reference, edition, amendment, and applicable adoption. Keep them in the purchase specification and technical file. Check the status again for each new order or redesign. Take extra care while the standard is being revised.
Public summaries help explain the subject. They do not contain every rule needed to assess a garment. Use the complete standard that applies. Choose a competent assessment route to approve the design. Do not turn an online table into a self-issued certificate.
What the visible materials do
Fluorescent background material and retroreflective material serve different purposes. The background supports daytime conspicuity. Retroreflective material returns light toward its source. It helps a person stand out when lit by vehicle headlights. Both the material properties and their arrangement matter. ISO's scope addresses daytime viewing and viewing under headlights in darkness. ISO scope.
The word “reflective” on a trim description is not enough. The product needs evidence for the relevant material performance and intended care. Decorative silver fabric may look like qualified trim in a showroom. Yet it may return light quite differently. A bright fashion colour does not prove that a fabric meets the required colour limits.
Ask suppliers for the exact material codes used in the approved construction. Connect those codes to test reports, care conditions, and the bill of materials. A factory may change the tape width, backing, glue, or background fabric. Review the effect before accepting the change.
ISO 20471 Classes 1, 2, and 3
The following minimum areas are summarized in 3M's technical explanation of ISO 20471. They apply to visible materials. The standard's rules for measurement, design, and performance also apply. The class is not determined by area alone. 3M Scotchlite standards guidance.
ISO 20471 class | Background material | Retroreflective material |
Class 1 | 0.14 m² | 0.10 m² |
Class 2 | 0.50 m² | 0.13 m² |
Class 3 | 0.80 m² | 0.20 m² |
Class 1 also has a route for combined-performance material. Its minimum area is 0.20 m². That is a specific alternative, not permission to combine unrelated numbers freely. The design must meet the relevant route's full requirements. The area assessment must address the smallest size offered in the approved range. 3M technical summary.
Class 3 requires more visible material than Classes 1 and 2. It should not be described as making a worker three times safer than Class 1. These are performance categories, not injury reduction percentages. Selection must follow the actual risk and applicable requirements.
A product can have plenty of one material and too little of another. A large fluorescent area cannot compensate for insufficient qualifying retroreflective area. Correct material placement, garment form, and the other requirements must also be met. Keep separate checks for each part of the assessment.
An area calculation that catches a branding problem
Consider a hypothetical small-size garment being developed toward ISO Class 2. The design assessor has checked the background area. Before two proposed additions, 0.580 m² can count toward the requirement. This starting figure leaves out covered areas and other areas that cannot count. It already excludes the reflective layout. It is not the gross area of all cut panels.
A logo covers 180 mm by 150 mm. A contrasting panel covers 120 mm by 150 mm. Assume each addition covers an area that would otherwise count as background. The two additions do not overlap.
Logo area = 0.180 m × 0.150 m = 0.027 m²
Contrast panel area = 0.120 m × 0.150 m = 0.018 m²
Remaining background area = 0.580 − 0.027 − 0.018 = 0.535 m²
The background area is 0.035 m² above the Class 2 area threshold in this simplified check.
Area margin relative to threshold = 0.035 ÷ 0.500 × 100 = 7%
Now a customer requests another back graphic. It covers 0.042 m² of eligible background. The remaining area becomes 0.493 m², which is below 0.500 m².
Revised area = 0.535 − 0.042 = 0.493 m²
The earlier area check can no longer support approval for the intended class. Moving, reducing, or removing artwork may be possible, but the revised layout needs review. The 7% earlier margin was a design reserve, not a permitted compliance tolerance.
This example does not establish conformity. It checks only one area requirement using assumed eligible dimensions. The assessor must still check the measurement rules and layout. Materials and garment design need checks too. All other relevant rules still apply.
Check tape length and width in consistent units
A second hypothetical design uses qualifying retroreflective strips. Their total measured visible length is 3.20 m. Their width is 50 mm. Convert the width to metres before calculating the area.
Width = 50 mm ÷ 1000 = 0.050 m
Nominal strip area = 3.20 m × 0.050 m = 0.160 m²
The assessor then checks the actual construction. Suppose 0.15 m of that length does not qualify. The remaining area is:
Eligible strip area = (3.20 − 0.15) × 0.050 = 0.1525 m²
That exceeds the Class 2 retroreflective area minimum of 0.13 m² in this arithmetic example. It does not prove that the strips are in the right places or that each detail is allowed. A total area can pass while the design arrangement fails.
Do not double-count overlapping strip ends. Do not use the roll width when the visible finished width is smaller. Keep measured and nominal values separate. Retain a drawing that shows how each length was counted. Some dimensions may be close to a limit. Resolve the measurement and the factory's ability to meet it before release.
Design the smallest size as a real product
A size run needs more than a scaled copy of the approved sample. A pocket may keep its practical size while the body panel becomes smaller. Armholes, closures, and artwork also compete for the remaining space. Check the layout on the smallest version before promising the class across the range.
Start that review while the pattern can still change. Mark each zone that contributes to visible area, then examine the finished garment after grading. Keep the area used for assessment separate from cutting consumption. Fabric bought for a style includes seams and covered parts; it does not all remain visible on the wearer.
If one size fails the intended requirements, make the commercial decision explicit. The team might alter the shape, revise the offered range, or develop an approved outfit. Another suitable product may be needed. A size that does not qualify cannot keep the higher-class label simply because the larger sizes pass.
Review fit with the underlayers people will use. A roomy sample worn over a shirt may behave differently over a winter jacket. Check closure, reach, bending, and access to work equipment. Record the sizes and versions tried. If wearers leave the garment open or alter it, investigate the fit problem before releasing the range.
Evaluate the garment with the rest of the equipment
Review the complete work outfit. A tool belt, harness, radio pouch, rain shell, or backpack can cover visible material. The high visibility garment may also interfere with another item of PPE. HSE's PPE guidance addresses how equipment works together. Its clothing guidance also covers suitability, checks, and correct cleaning. HSE PPE guidance, L25.
Make a practical outfit matrix for the site or product range. Include warm weather, cold weather, wet weather, and any special tasks. For each outfit, state which garment provides the required visibility. Explain how to wear it. A summer vest may be hidden under a dark waterproof coat. Do not assume it still serves its intended role.
Observe normal movements in a controlled fitting area. Look for closures that open, hems that ride up, and accessories that cover key zones. This review checks use and how the parts work together. It does not replace optical testing. Do not test detectability by placing people in live traffic.
Ask users what they remove or change during a shift. A design that encourages workarounds needs attention. Find a suitable garment or work arrangement that solves the cause. Do not assume each complaint means someone has ignored instructions.
Ensembles need documented approval
A supplier may offer a jacket and trousers as one assessed or certified outfit. The relevant scheme governs that claim. That does not mean their class numbers can be added. Class 2 plus Class 1 is not a mathematical rule that automatically creates Class 3.
Ask the supplier for the exact approved outfit. Get the style codes, sizes, and wearing instructions. Check whether the evidence applies to that pair as worn. A
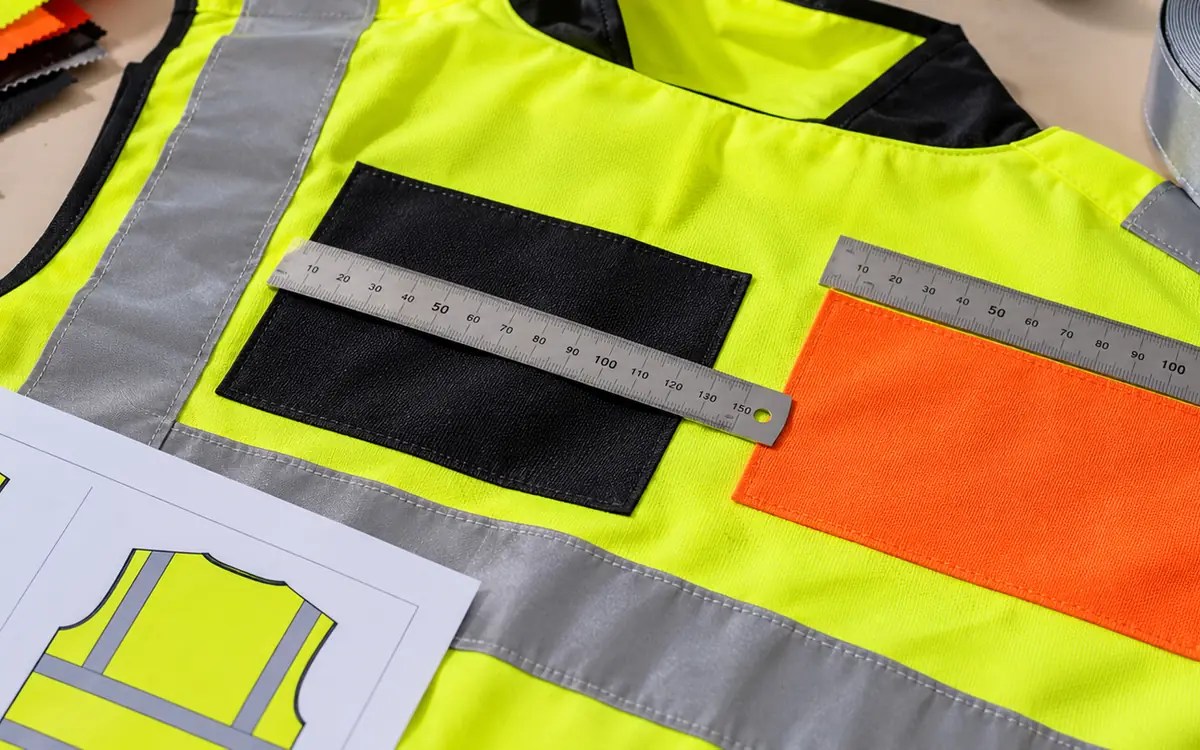
replacement trouser from another range may look similar. Its material, area, layout, or fit may differ.
Keep ensemble information at the point of issue. A worker may receive only one part. The buyer should know the class that applies to that part alone. Use clear stock descriptions. A routine stock change should not break the approved pair.
Keep a photo or drawing and both style codes in the order record. Add the sizes, assessment reference, and instructions for wearing the pair. These details help preserve the claim through ordering, washing, and replacement.
Understand the ANSI/ISEA system separately
ISEA uses Type O, Type R, and Type P for different work settings. Its system also has performance classes and supplemental Class E items. These labels belong to that system. They should not be translated to ISO classes by matching a number. ISEA high visibility products.
ISEA's current standards page identifies ANSI/ISEA 107-2026. It describes new sizing rules for smaller Type R garments. Other changes cover some trim layouts, records, and tests. Check the current full document and the edition the buyer requires. A table from a 2020 brochure may be out of date. ISEA current standard page.
For a product sold into more than one market, create a requirements matrix. Put each applicable scheme in its own column. List the material and garment design evidence. Include marking, care, and conformity records. A dual claim needs support for both columns. Passing one does not fill the other.
Avoid presenting a type as a garment quality ranking. The intended environment and class structure matter together. A customer may ask only for “ANSI Class 2.” Ask the buyer to complete the specification first. Then choose the style and approve its artwork.
Control logos, pockets, and later alterations
Branding is often added after the original garment is approved. Give the decorator a controlled artwork zone and maximum approved dimensions. State whether the size range has different restrictions. Confirm the process with the garment maker. A decoration can affect more than visible area.
The instruction should identify the exact artwork, position, colour, and process. “Small chest logo” is not precise enough. Measure the production artwork, including its background block, rather than only the letters. Keep a retained decorated sample or a controlled record of the approved version.
Pockets and repairs deserve the same attention. A dark replacement pocket can obscure background material. A patch can cover tape. A shortened leg can alter the reflective layout. Follow the maker's approved instructions for repairs and changes. Do not guess which changes are allowed.
Consider a hypothetical uniform order with three customer logos. Approving one logo does not approve all three. One may be narrow lettering, another a solid square, and the third a large back panel. Review these versions before production. Attach the correct evidence to each offered style.
Use testing evidence that matches the finished construction
Ask for evidence at two levels: the materials and the garment. A tape supplier's report supports the named tape under the stated conditions. It does not approve a new jacket design. A garment report should identify the style and construction actually offered.
Where trim is heat applied, control the approved application process. Where it is sewn, control the attachment details. Follow the component maker's instructions and the garment's assessed construction. Two trims may share the same reflective face. Their backings or application methods may still differ.
Build a traceable bill of materials. Include background fabric, trim, important contrast panels, closures, and approved decoration. Record the supplier and material code as well as a common name. A component may become unavailable. Review any proposed replacement before the factory uses it.
Check incoming documents for identity, scope, date, and edition. Confirm that any conformity declaration or assessment applies to the exact model. A document for a different style can suggest useful questions. It does not prove that the new style complies.
Care, inspection, and replacement are separate decisions
Follow the garment maker's care instructions. Record the allowed cleaning route and any stated limits. HSE's guidance stresses keeping the clothing clean. It also calls for checks for wear, damage, and loose seams. HSE L25, high visibility clothing section. ApparelDiary's care label validation guide explains the wider workflow. It links care artwork to product evidence.
The stated cleaning limit is not a promise of useful life. A garment may become unfit for use before that count. Damage or heavy soiling may shorten its life. Equally, a visual check cannot prove the full optical performance of a garment. Use the maker's instructions and the employer's assessment. Set clear rules for removing and replacing worn items.
Keep inspection prompts concrete. Look for missing trim and areas that peel or crack. Check for tears, failed closures, covered surfaces, and labels that cannot be read. Provide a simple way to report a problem and obtain a replacement. A worker should not have to keep wearing a damaged garment because the issue process is unclear.
Agree on the steps used by a managed laundry service. These include item tracking, cleaning, checks, repair, and return. Preserve the link between the item and its approved style. If replacement trim or patches are allowed, use the specified parts and process. Keep a record of the work.
Resolve a document mismatch before issuing garments
Suppose a hypothetical buyer orders style HV42 in six sizes. The purchase order asks for the specified Class 2 garment. The delivery includes a report for HV42 and a photo of a sleeveless vest. But the cartons contain a revised short-sleeve top called HV42B. The supplier says the new item uses the same fluorescent fabric and is an improved version.
First, the buyer should check the scope of the assessment and declaration. Do they cover HV42B? A similar code and the same fabric do not answer that question. Request the approved drawing, size range, and bill of materials. Get the document that identifies the revised style. Check the sewn label against those records. Keep the affected stock from routine issue while the identity question is unresolved.
Next, compare the delivered construction with the approved sample. Has the front closure changed? Are the sleeves part of the assessed design? Does customer artwork match the approved size and position? A good document pack is only useful if it describes the garment in the carton.
The outcome may be simple. The supplier provides the correct evidence for the revised style. The buyer then confirms that the delivery matches it. The supplier may instead need to replace the goods. Or it may need to complete the appropriate assessment. Record the resolution so the same naming problem does not recur on the next order.
Close the mismatch in a way receiving staff can use next time. Update the approved style code and revision on the specification, sample record, and inspection sheet. Add a clear photograph of features that distinguish HV42B from HV42. Record who accepted the evidence and when the stock was released.
This is more useful than filing another unlabelled report. At the next delivery, staff can compare the carton, sewn label, and actual garment with one controlled reference. Any new difference then has a clear route back to the buyer or technical team.
A practical release checklist for buyers and designers
Question | Evidence to retain | Failure to resolve |
What scheme and edition apply? | Complete purchase requirement | Ambiguous class or outdated reference |
What class is claimed for each size? | Style and size assessment | Assuming the largest sample represents all sizes |
Are materials traceable? | Approved codes and reports | Similar-looking substitution |
Does the layout qualify? | Controlled garment drawing and assessment | Area total used as the only check |
Is decoration included? | Approved artwork and dimensions | Logo added after review |
Are combinations defined? | Exact approved ensemble details | Class numbers added without evidence |
Does the outfit work in use? | Fit and compatibility review | Required areas hidden by other equipment |
Can the garment be maintained? | Care, inspection, and replacement instructions | Cleaning or repair decided by guesswork |
Use this as a record of decisions, not a replacement for the applicable assessment. Each unresolved item should have an owner and a clear action. Close the issue before the affected product claim or order is released.
Questions about high visibility clothing classes
Does a brighter colour mean a higher class?
No. The scheme includes material properties, visible area, placement, and other requirements. Colour appearance alone does not assign the class. Check the garment's supported claim and the specified standard.
Can a logo be added if it avoids reflective tape?
Avoiding tape does not settle the question. The logo may obscure required background material or affect the construction. Review the exact decoration against the approved design and the manufacturer's instructions.
Is Class 3 always the right purchase?
Selection depends on the risk, work, fit, other equipment, and applicable requirements. A higher class does not excuse poor suitability or a hidden garment. The responsible assessment should define what is needed for the task.
Can a normal vest become certified by adding reflective strips?
Adding strips alone does not establish conformity. The materials and their placement need evidence. So do the garment design, tests, markings, and required records.
Keep the claim connected to the garment people wear
The class claim should still describe the garment at the point of use. Keep its scheme and edition tied to the exact style, size, and approved wearing arrangement. Check later changes with the same care used for the first sample. A controlled logo, correct replacement part, and clear issue record help preserve that decision through daily use. The garment then supports the site's wider work to help people be seen.
Visibility classes rely on specification and testing, so see light fastness testing, the garment specification sheet and care label validation.
References
HSE: Using personal protective equipment to control risks at work.
ISO 20471:2013, high visibility clothing.
ISO/DIS 20471, replacement draft status.
3M Scotchlite: Standards and ISO 20471 material area summary.
HSE L25: Personal protective equipment at work, including high visibility clothing.
Discussion0
Loading the discussion…