
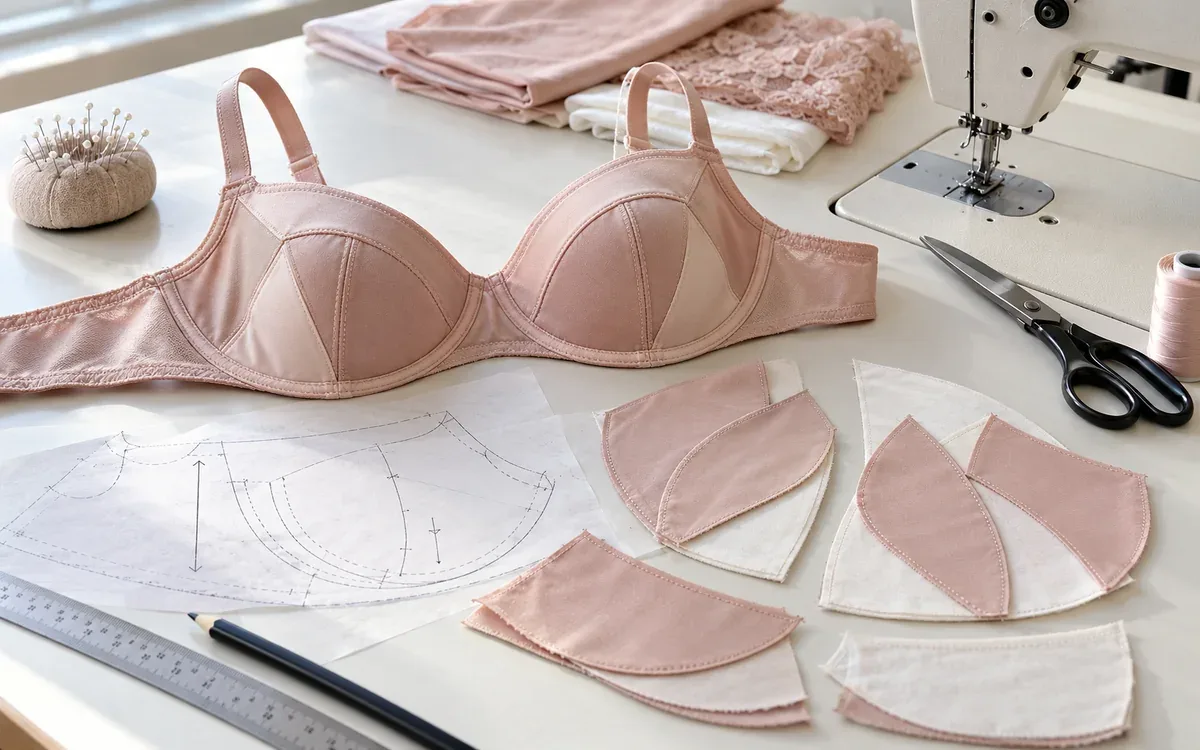
A bra cup can look right on paper and change once it is sewn. A small shift in a curve, a rotated panel or an extra millimetre in the seam can alter the result.
Cut-and-sew cup development brings those choices together. The pattern supplies the shapes. The materials respond to load. The seam joins the pieces and influences how they hold their form.
This guide focuses on developing one base cup. It does not provide a size-grading rule or a universal draft for every body. The numerical examples are hypothetical checks that a developer can adapt to a defined project.
Begin with a known base and a clear purpose
Start from an approved base pattern or a documented draft. State what the next version should change: the visible seam, a local fit issue, the neckline or the way a material behaves.
Avoid a brief that says only “make the cup better.” That leaves the team free to change several things without knowing which one helped.
Shin's research on underwired bra patternmaking compared a new approach with a traditional method through cutting, sewing and fitting. It is a reminder that a draft should be judged through the resulting garment. A paper method alone does not prove fit. Source: Shin, 2007.
For the first comparison, keep the base size, frame, materials and fitting conditions fixed. If the project concerns a new material, record that as the planned change.
Name the pattern revision before cutting. The sample room should be able to connect each sewn cup to one exact set of pieces.
Understand what a panel seam can do
A seam can join two panels while helping form a three-dimensional surface. Its position and curve are part of the design.
Norma Loehr's explanation of bra anatomy links cut-and-sew shaping to seam placement, seam curves and fabric movement. These factors work together. Counting panels alone does not describe the finished cup. Source: Loehr in Seamwork.
A new seam can offer another place to adjust local shape. It also adds a joining operation and a line that may show through clothing.
Do not treat “three-piece” or “four-piece” as a fixed support rating. The result still depends on the material, fit, construction and rest of the bra.
Separate the panel boundary from a decorative line. A topstitched design line on one continuous panel does not necessarily behave like a seam that joins shaped pieces.
Also separate a seam change from a volume change. A designer may move a line while trying to preserve the base shape, or alter a curve to change it.
Read the cup as a set of landmarks
Before altering the outline, label the main landmarks on the base cup. These may include the intended apex, centre-front edge, underarm edge, neckline and lower cup boundary.
Use the pattern's own definitions. A notch near the apex may serve as an assembly mark without being the exact point of greatest projection.
Record the connection points to the frame and strap. Moving them can affect more than the cup's appearance.
A simple panel map helps:
Part of the map | What to identify |
Inner and outer cup | Which side faces the centre front or underarm |
Upper and lower regions | The intended position in the assembled cup |
Main seam | Start, end and matching landmarks |
Cup boundary | Stitching line where the cup joins the frame |
Neckline | Finished edge and any added allowance |
Strap connection | Exact attachment point and construction |
Material direction | Meaning of each arrow |
Mirror pair | Left and right pieces, viewed as specified |
A clear map prevents an expensive misunderstanding: two people may use “inner cup” for different pieces unless the drawing makes it explicit.
Keep it with the pattern, rather than relying on the sample maker to infer the layout.
Work on stitching lines before cutting lines
The stitching line describes where a conventional sewn join will form. The cutting line includes the allowance needed to make that join.
When comparing two curved seams, use their stitching lines. Their cut edges may have different lengths because the allowance follows different curves.
Cloth Habit's cutting guide advises checking the actual stitching lines after pattern changes. Its method also separates the pattern outline from the details needed for a stable cup. Source: Cloth Habit, cutting guide.
Write the allowance on each relevant edge. Do not assume that a joining seam, elastic edge and trimmed foam edge all use one width.
A pattern change should follow a clear sequence: edit the intended seam, check its partner, then rebuild the cutting edge. Moving only the cut edge can leave the intended sewing path unclear.
ApparelDiary's guide to pattern markings, grainlines and notches provides the wider marking context. On small cup panels, those marks need to remain readable after cutting.
Walk seams in sections, not just end to end
“Walking” a seam means comparing the paths that will be joined. Use the seam lines and work between matching landmarks.
A total-length check can miss a local mismatch. Consider this invented two-section join:
Section | Panel A | Panel B | Difference |
Start to central notch | 88 mm | 92 mm | 4 mm |
Central notch to end | 96 mm | 96 mm | 0 mm |
Total | 184 mm | 188 mm | 4 mm |
Total mismatch = 188 mm - 184 mm = 4 mm
If the base design calls for equal seam lengths, investigate that difference before cutting. Check whether the edit changed one curve, shifted the notch or used the wrong line.
Do not hide it by stretching one panel during sewing unless that easing is part of the approved method.
A seam may intentionally include ease. In that case, define the amount, location and handling method. “It will sew in” is not enough for another maker to repeat the result.
After fixing the pattern, repeat the section check. A smooth-looking curve is not proof that the lengths now agree.
Equal totals can still put the shape in the wrong place
Now consider a second hypothetical join. Both panels have a total seam length of 180 millimetres.
Panel A has 80 millimetres before the central notch and 100 after it. Panel B has 90 before the notch and 90 after it.
Panel A total = 80 + 100 = 180 mm
Panel B total = 90 + 90 = 180 mm
The totals match, but the marked sections differ by 10 millimetres in opposite directions.
If the notch is a required matching point, the operator cannot join all the sections evenly without an adjustment. Something about the notch, curve or intended ease needs to be resolved.
Do not move the notch to make the report look neat without checking what it represents. It may locate a shape feature or a join with another panel.
This is why a cup pattern needs both dimensions and meaning. A number can confirm a path length while saying nothing about where the key feature sits.
Distinguish style-line changes from shape changes
A seam can run across the cup, more vertically or at an angle. The direction label describes its route, not a guaranteed effect on every wearer.
Beverly Johnson demonstrates a style-line change on her Classic Bra base. The aim is to shift the seam while retaining the cup's intended volume. Her example works from seam lines and then restores the allowances. Source: Johnson, Horizontal Hocus Pocus.
That is a useful distinction for a development brief. “Move the visible seam” and “add room at this region” are separate requests.
Cloth Habit's vertical-seam tutorial also shows how splitting and reshaping panels can change a cup. It stresses checking the new seam lengths after the alteration. Source: Cloth Habit, vertical seam variation.
Use those examples to understand the design problem. Do not assume one tutorial's curve or allowance is a factory standard.
For a style-only change, compare the old and new sewn cups on the same reference. If the shape changes, decide whether that was intended before proceeding.
Do not turn flat area into a cup-volume formula
A flat panel area is useful for material use. It does not uniquely define the enclosed cup shape.
Two sets of panels can have similar total area but different seam curves, boundaries and projection. Their assembled shapes need not match.
A 2021 lower-cup study compared five ways of arranging replica pieces and assessed bras on 18 women. The researchers reported differences in shaping and fit. Those results relate to the studied designs and group. They do not provide a universal drafting equation. Source: Lee, Hong and Lee.
If a project needs a volume measure, define how it will be obtained and what boundary closes the volume. Do not label a simple paper-area calculation as breast volume.
For routine pattern development, a controlled sewn sample and clear fit observations may be more useful than a false precision figure.
Use geometry to make the draft consistent. Use the garment to test whether that geometry works with the chosen materials and wearer.
Clarify every direction arrow
In a woven fabric, grain direction refers to the yarn layout. In a knit, the loop structure provides its own directions. A bra pattern may instead mark the direction of greatest stretch or movement.
Those arrows must not be confused.
Cloth Habit asks makers to check the fabric's actual stretch direction, including mechanical give in relatively stable materials. Loehr likewise distinguishes fabric movement from simply following a conventional grainline. Sources: Cloth Habit and Seamwork.
Write the arrow's meaning in the pattern key. If a factory uses different symbols for grain and stretch, preserve that difference in every export.
Test the actual material lot. A fabric name such as “tricot” does not tell the cutter the required orientation for this pattern.
Keep the left and right panels consistent with the intended mirrored layout. A rotation made to save a small scrap can change how one side responds.
If the chosen print requires a different direction, treat that as a design change to test.
Compare directional stretch with a defined sample
A small comparison can expose a direction mistake before a whole bra is made. It needs consistent loading and handling to be useful.
Suppose two hypothetical strips start at a marked gauge length of 100 millimetres. Under the same defined load and hold time, the first reaches 118 millimetres and the second reaches 105.
Extension (%) = ((loaded length - initial length) / initial length) × 100
Direction A extension = ((118 - 100) / 100) × 100 = 18%
Direction B extension = ((105 - 100) / 100) × 100 = 5%
These values describe the chosen strips and test conditions. They are not universal fabric properties independent of load, width or time.
Also check what happens after the load is removed. Extension and recovery are different questions.
Do not use the 18% result as an automatic 18% pattern reduction. The cup works in more than one direction and joins other parts.
The result is useful because it shows why the orientation matters. The next step is a prototype made with the intended direction and assembly.
Treat the lining as part of the cup
A lining can change the way a cup stretches, holds its shape and feels at the seams. It is not just a hidden finish.
Record its material, direction, panel layout and method of joining. If the outer cup and lining have different seam routes, show how they relate.
A stable lining beneath a stretch outer can create a different system from either fabric alone. Check the combined assembly rather than judging the outer fabric in isolation.
Also consider layer length. If the lining is too short along a path, it may limit the
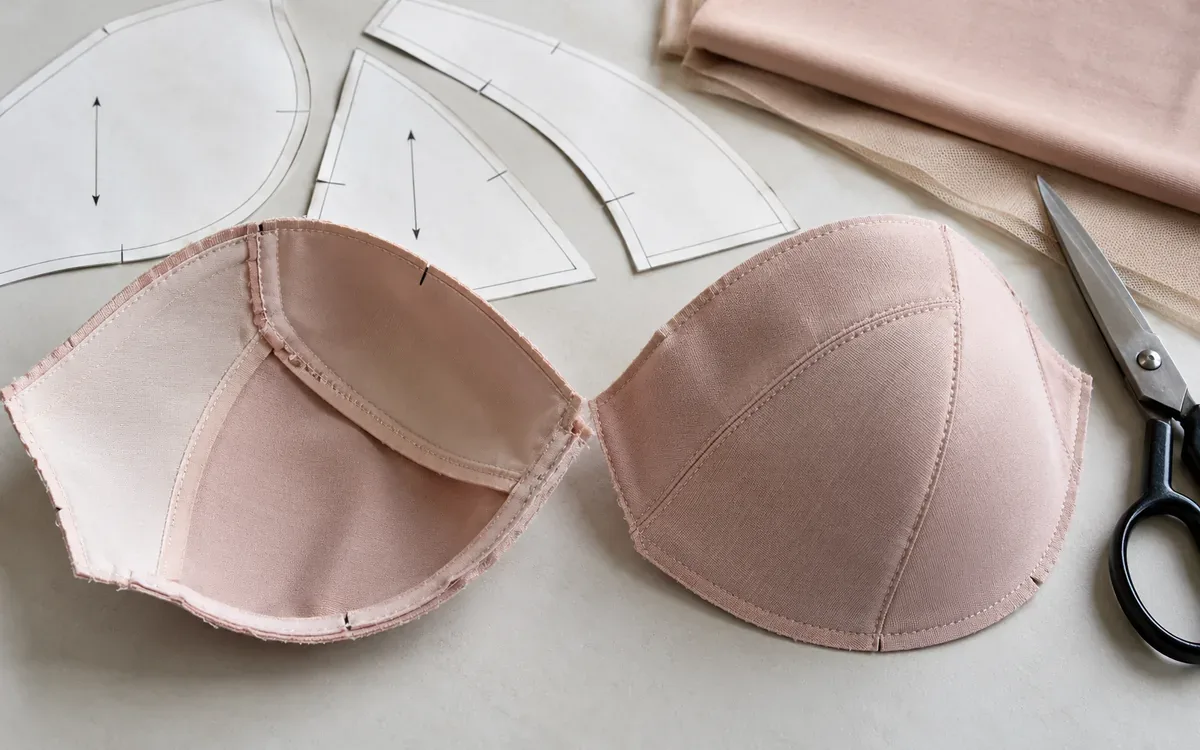
shape before the outer cup is filled. Excess length may create folds.
Use a controlled sample to separate these effects. Keep the outer pattern and material fixed while changing the lining under review.
Do not assume that rotating a lining will solve every fit problem. It may change movement in one direction while creating a new issue elsewhere.
Label the lining revision as clearly as the visible cup. A hidden material substitution still changes the product.
Keep sewn foam rules separate from fabric seams
Cut-and-sew foam is different from a cup formed as one piece in a mould. Its panels are joined to create the shape.
Make Bra's full-band method joins foam edges without overlap, then adds a fabric cover. Its instructions use a different joining approach for the cover and warn against collapsing the foam while positioning it. Source: Make Bra, full-band instructions.
That example shows why one allowance rule cannot cover every layer.
For a butt join, adding a conventional overlap allowance can change the intended shape. For a fabric seam, removing the joining allowance can leave too little material to sew.
Check the actual construction drawing before changing either outline. A foam pattern, cover pattern and lining pattern may be related without being identical.
The covering stage also needs a defined method. A maker who pulls hard to remove a wrinkle may distort the underlying cup.
Compare paired cups before attaching them to the frame. It is easier to trace a cover-placement issue while the assembly is still visible.
Quantify a sewing-line error
A pattern can be correct while the seam is sewn in the wrong place.
Imagine two panels designed with a 6-millimetre seam allowance at a conventional join. The operator instead sews 7 millimetres from each cut edge.
The stitching moves 1 millimetre farther into each panel. In a simple local cross-section:
Extra take-up = 1 mm + 1 mm = 2 mm
If a measured path crosses two such joins, the simple accumulated loss would be:
Extra take-up across two joins = 2 × 2 mm = 4 mm
This is a local illustration with fixed panel dimensions. It is not a claim that the whole curved cup loses four millimetres of depth or a fixed percentage of volume.
The point is practical: check the sewn line before redrafting the pattern.
Marking a trial seam can help distinguish a pattern problem from a sewing problem. Inspect stitch position, feed and panel alignment together.
An operator should not have to guess the intended allowance from a familiar presser foot. Put the requirement in the sample instructions.
Build the trial so it answers one question
A useful prototype has a purpose and a control.
For a seam-shape trial, keep the fabric, lining, direction, frame and finishing method the same. Change the seam shape under review and label it.
For a material-direction trial, keep the pattern fixed. Do not also shorten the neckline or change the lining.
A practical sequence is:
Copy the approved base into a new revision.
State the intended change and expected effect.
Check seam paths, landmarks and allowances.
Cut the specified materials in the marked directions.
Sew and inspect the cup before full assembly.
Assemble under the same conditions as the control.
Record fit and appearance, then decide the next change.
This is a development workflow, not a claim that seven steps certify fit.
Keep the control sample in the review. Human memory is poor at comparing subtle shapes across several days.
Where a change affects the frame connection, record that dependency. Holding everything fixed is only useful when the proposed change makes that possible.
Observe the whole cup during fitting
Look at the cup in its intended garment, with the agreed band and strap settings. A loose cup held by hand does not show the same conditions.
Record where the fabric lies smoothly, where it folds and where it feels tight. Use a location map rather than a single “fit failed” note.
Distinguish an observation from its possible cause. A wrinkle near the lower cup may suggest several checks. It does not prove that the pattern has excess volume.
Ask whether the sample was cut and sewn as specified. Check the frame, cup position and material direction before making a large pattern change.
The wearer should be able to describe comfort and movement in plain terms. Record the action that brings on a problem, such as lifting an arm or reaching forward.
For an asymmetric fit, do not automatically force both sides into the same adjustment. Record what each side needs and the product's intended fitting approach.
Use a fault review that preserves evidence
Observed issue | Check before changing the draft |
A pointed seam region | Sewn curve, seam accuracy, material and intended silhouette |
Wrinkles at a join | Matching sections, feed, allowance handling and layer lengths |
Neckline stands away | Edge finish, upper region shape, fit and strap setting |
Lower cup folds | Cup placement, boundary fit, material direction and local shape |
Left and right differ | Mirror layout, panel identity, sewing path and assembly |
Lining pulls the outer inward | Lining path lengths, orientation and attachment |
Cover looks smooth but foam distorts | Cover positioning, stretch and layer compatibility |
Use this table to narrow the next check. It does not diagnose a body or prescribe one alteration for every bra.
Photograph the sample under consistent conditions if the wearer agrees. Mark the pattern location that corresponds to the issue.
Keep the unaltered sample or record it before opening seams. Once several areas are changed at once, the original evidence becomes hard to recover.
Resolve a sample-room disagreement with a controlled remake
Consider a hypothetical three-panel cup. The wearer feels a tight line across one join. The patternmaker proposes adding length to the upper panel.
Before editing the draft, the sample maker compares the garment with its instructions. The approved allowance is 6 millimetres, but the trial seam is about 7 millimetres from the cut edge. The lining arrow also points in a different direction from the control.
These are two known departures from the specification. Adding panel length now would mix a new design with corrections to the sample. It might produce a better fit, but the team would struggle to explain why.
The next step is a faithful remake. Mark the intended sewing line for this trial and cut the lining in the approved direction. Keep the outer material, frame and fit settings the same. Label the remake so that it cannot be confused with the first sample.
If the tight line remains, the patternmaker can plan a local curve or length change against a valid control. If it disappears, the evidence points toward the combined making departures, although this remake does not identify which departure mattered most.
That last limit is useful. When the team needs to separate the causes, it can plan further samples that change one feature at a time. It should not claim that lining direction alone caused the fault from a remake that also corrected the seam.
The release record should address the source of the mistakes. Was the arrow undefined? Did an old instruction sheet reach the sample room? Correct that document as well as the sewn cup. A successful remake is of little use if the next operator receives the same unclear instructions.
Release a complete base-cup record
Once the base cup is approved, retain more than the paper outline. Keep the material codes, layer layout, arrows, seam rules and approved sewn sample together.
The garment specification sheet should link those records to the same revision.
Include the points used to assess the cup and any limits on material substitution. A new lace, lining or foam may need a new trial even when its colour is unchanged.
State which side each piece represents and how the left-right pair is created. Add the order of joins when the construction depends on it.
This release concerns the base size. Extending the design across a range needs separate grading and fit checks. Do not treat one successful sample as evidence for every band and cup combination.
Common questions
Do more panels always mean better support?
No. More joins can offer more places to shape the cup, but the outcome depends on the whole design. Test the actual bra.
Should the two cut edges be the same length?
Check the stitching lines first. Cut-edge lengths can differ because of curved allowances. Follow any intentional ease stated by the pattern.
Can I rotate a panel to save fabric?
Only if the approved layout allows it. A rotation may change stretch, appearance or layer behaviour. Verify the intended direction before cutting.
Can I change a diagonal seam into a vertical one?
It is possible in suitable patterns, but it is a design change. Recheck the curves, landmarks, seam lengths and sewn shape. Do not assume the original fit survives every redraw.
Why does a correctly measured cup still fit poorly?
The chosen measurements may not describe the whole shape. Materials, seam accuracy, layers, frame connection and wearer shape all need review.
Make small changes that you can explain
A reliable cut-and-sew cup starts with clear seam lines and known materials. Match the sections that join, preserve the meaning of landmarks and check how each layer is cut.
Then use controlled sewn trials to judge the result. The best development record explains what changed, what the sample showed and why the next version was chosen. That record makes a good base cup easier to reproduce.
Cup shaping uses general pattern knowledge, so see garment pattern types, reading a garment pattern and garment seam types.
References
Shin, 2007: Patternmaking for the Underwired Bra—New Directions. Institutional abstract.
Lee, Hong and Lee, 2021: Lower Cup Pattern Development from Three-Dimensional Shape Analysis. Institutional abstract.

Discussion0
Loading the discussion…