
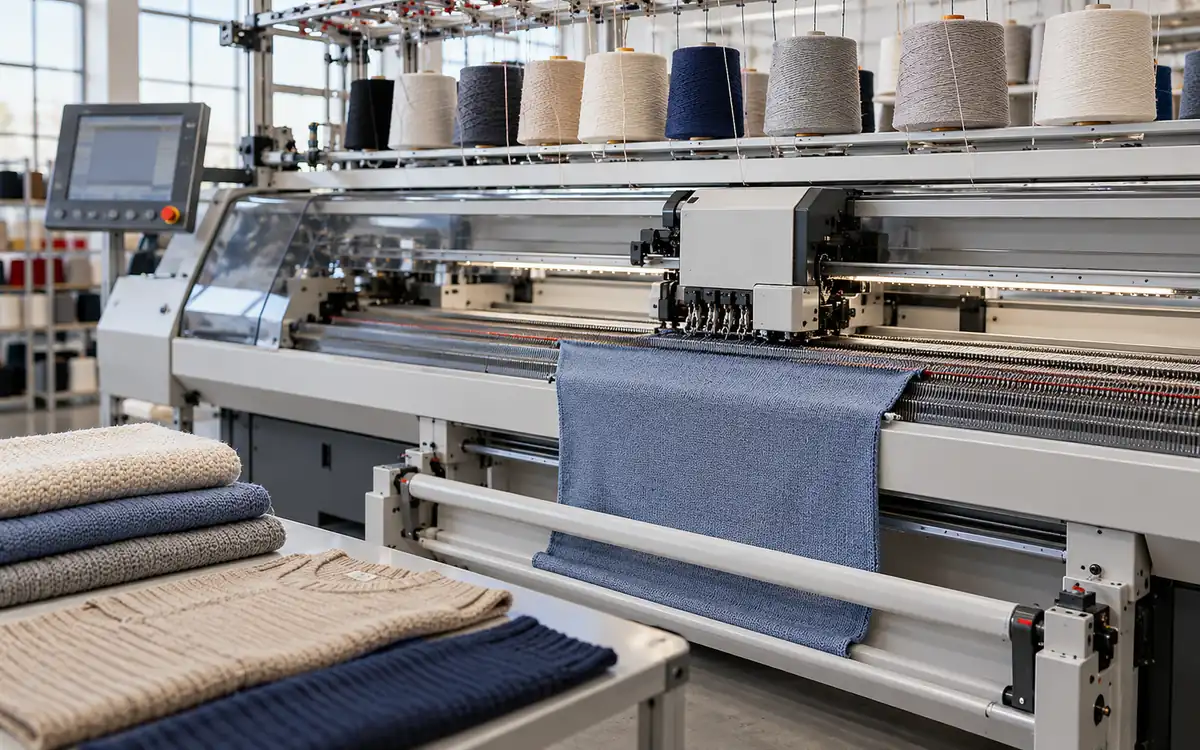
A computerized flat knitting machine turns yarn into panels, trims, or shaped items. A carriage moves across one or more needle beds to drive this work. Its value comes from controlled needle selection, yarn placement, loop transfer, and fabric take-down. Buying a fast carriage alone does not secure good output.
A production team needs a repeatable shape and a stable cycle time. Can the machine deliver both with the chosen yarn? That question needs a trial at the machine and a check after finishing. A tidy panel straight from the needle bed is only an early result.
This guide explains the physical machine and its controls. It then builds a trial plan, a gauge calculation, and an output estimate. All numerical examples are hypothetical. They show how to assess a process; they are not settings for a named machine.
Follow the yarn through the machine
Start with the yarn package. Follow its path through the guides and tension control. Then check the feeding device and yarn carrier. Then follow the fabric from the needles through the take-down system. This simple walk reveals the points at which the machine must control motion.
A flat-bed machine has needles arranged along a straight bed. The needle slots stay in place while carriage-mounted cams pass across them. Those cams guide needle movement. This differs from common circular machines, where the needle cylinder rotates past the cam systems. CottonWorks explains the basic arrangement.
The computer selects actions, but mechanical parts carry them out. A correct programme can still make poor fabric if a carrier is misplaced or a worn needle cannot hold its loop. Conversely, sound hardware cannot fix a programme that calls for an unsuitable transfer.
Use a machine map during training. Give each carrier, feed path, needle bed, and take-down zone a clear name. Record the naming convention used by the maker. A fault note saying “rear bed, needle 214, carrier 6” gives a technician much more to work with than “hole near the top.”
Needle beds and needles
Two beds arranged as a V are common. More complex machines may use extra beds or transfer elements. Groz-Beckert describes systems with up to four needle carriers. Its needle range includes latch and compound types. It also supplies selection parts, transfer parts, and take-down comb parts. Its flat-knitting brochure shows why the needle must be treated as part of a matched system.
A latch needle uses a hinged latch to close its hook. A compound needle has a separate closing element. These are different mechanisms, so a fault check must suit the installed needle type. Do not apply a latch-brush adjustment to a machine that uses a different closing system.
For a spare-part order, record the full part code and approved variant. A needle that looks similar may have a different butt, hook, or transfer feature. Keep a known correct sample in its labelled package. This is a stronger control than relying on a drawer marked only with the machine gauge.
Carriage, cams, and knitting systems
The carriage carries the cam systems across the beds. Each system can perform the actions allowed by its design and programme. More systems may do more useful work per traverse. Their benefit depends on the structure and yarn route.
A course is a row of loops. During a simple knitting section, two working systems might produce two courses in one traverse. During transfers or carrier positioning, a traverse may produce no new knitted course. Read the actual sequence before turning system count into an output claim.
For a basic latch-needle knit cycle, the needle rises so the old loop clears the latch. It receives yarn as it descends. The old loop then passes over the closed hook, leaving the new loop held on the needle. The amount of yarn drawn into that loop affects fabric dimensions and appearance. CottonWorks illustrates these stages.
An observer should ask what is moving. What useful work occurs during that movement? The answers help separate knitting time from transfer time, turns, stops, and handling.
Four controls that must work together
1. Needle selection and loop transfer
Selection determines which needles take part in a given action. Transfer moves a held loop to another needle or transfer element. These actions support shaping and pattern changes, but they also create demanding points in a programme.
Check the first transfer in a trial at the maker's permitted inspection speed. Watch the receiving position, loop clearance, and take-down behaviour. Compare the fabric with the approved stitch plan. Does the error repeat at the same programme row? That calls for a different check from random damage across the panel.
Racking shifts a needle bed sideways relative to another bed. Stoll's training manual defines this motion and distinguishes it from the home position. The manual's early chapters also explain bed gauge and nominal width.
Racking distance must suit the machine and programme. It is not an adjustment to try by feel. Check a revised transfer sequence before it runs. It must meet the machine's motion limits and pass its collision checks.
2. Yarn carrier position
The carrier presents yarn to the knitting zone. Its route, height, parking position, and relationship with other carriers matter. A brochure may list many carriers. Check how many the pattern can use without extra movement.
Stoll's ADF range uses carriers that can move horizontally and vertically. The manufacturer calls this Autarkic Direct Feeding. The ADF 530 ki has a listed working width of 50 inches. It has three knitting and transfer systems. Carrier options are 24 or 32. These are named product specifications, not features of every computerized flat machine. See the ADF family specifications.
During a trial, label the yarn paths and compare their order with the machine file. A correct colour in the wrong carrier may produce the right shade but the wrong plating or edge. Keep the trial yarn route with the approved programme record.
3. Yarn feed and tension
Yarn tension and stitch length are related, but they are not the same measurement. One concerns force in the yarn path; the other concerns yarn length in a loop. A higher tension reading does not by itself prove the intended stitch length.
Shima Seiki describes active yarn feed and retrieval in its i-DSCS+DTC system. The system uses electronic tension control. The page also describes independent carriers. They can avoid some carriage movements used only to position yarn. These are specific control approaches, not a universal promise of faster production. Read the manufacturer's feature descriptions.
Record the feed setting, yarn path, package condition, and measured result together. If only one carrier shows a defect, compare its path with a stable path. Do this before changing the whole programme. A controlled comparison is easier to interpret than several simultaneous adjustments.
4. Fabric take-down
Take-down draws fabric away from the knitting zone. It must remain suitable as the panel widens, narrows, or changes structure.
Stoll's user guide separates tension during knitting from pretension at carriage reversal. It states that suitable settings depend on working width, yarn, and pattern. It also links excessive values and contact pressure to early roller wear. The take-down guide is useful because it shows that one fixed setting is not a complete control plan.
Compare take-down behaviour at the narrowest and widest parts of a sample. Check the start, the body, and the shaped edge. If a fault appears only after a major width change, include the take-down sequence in the investigation.
Keep cleaning methods specific to the installed roller or belt material. An approved chemical for one model may be unsuitable for another.
Gauge is not finished fabric density
Machine gauge often causes confusion because teams use “gauge” for several different measures.
For the standard English bed gauge, E is the number of needle positions per inch on one bed. Stoll's training guide gives the pitch relationship below. Read special multi-gauge codes using the maker's definition. Do not treat a code such as E7.2 as a simple decimal in this formula. See Stoll's gauge definitions.
Needle pitch p (mm) = 25.4 mm / bed gauge E
For a hypothetical standard E12 bed:
p = 25.4 / 12 = 2.1167 mm
Now consider 300 consecutive needle centres. There are 299 intervals between the first and last centre.
Centre-to-centre span = (300 - 1) × (25.4 / 12) = 632.88 mm
This is a geometric span on the bed. It is not a prediction of the relaxed panel width. The yarn, loop length, structure, and finishing all affect the fabric. So does the use of one or both beds.
To estimate the needle requirement for a finished panel, use a finished trial swatch. Suppose the target width is 52 cm and the trial gives 5.8 wales per cm in the relevant direction and structure.
Estimated wale count = 52 cm × 5.8 wales/cm = 301.6 wales
Round to a workable whole number, such as 302, then check the pattern repeat and edge construction. Do not add or remove a wale without considering those constraints.
If the target height is 62 cm and the finished density is 8.4 courses per cm:
Estimated course count = 62 cm × 8.4 courses/cm = 520.8 courses
A starting estimate is 521 courses. The final programme must still allow for shaping, borders, and sections with different densities.
These two calculations answer different questions. Bed pitch checks machine geometry. Finished stitch density helps build the product. Keep them separate during sampling. Machine gauge does not state the number of finished wales per inch.
Build a repeatable machine trial
A useful trial has a defined question. “Can this machine knit our product?” is too broad for a single sample. “Can this yarn pass the shoulder transfer without damage and hold the finished width?” is much easier to test.
Prepare the trial record
Record the machine identity, installed gauge, needle type, software version, and programme revision. Add yarn lot, count, number of ends, package type, and any treatment. Record the finishing route that will be used to judge the sample.
ApparelDiary's guide to selecting yarn for knitting through a trial plan helps define the yarn side of this work. The machine trial should carry those same lot details forward.
Define acceptance points before knitting. Include the difficult feature, not just an easy square of plain fabric. A shaped shoulder, deep neck, or mixed-yarn area may reveal limits that a basic swatch cannot show.
Run from simple to demanding
First prove that the yarn feeds and forms a stable basic structure. Then add the feature under study. Keep changes traceable.
A practical sequence is:
Check the approved machine setup and the yarn route.
Run a short basic section using the intended yarn.
Inspect loop formation and the first planned transition.
Knit the complete trial panel at the agreed trial conditions.
Mark panel identity, carrier use, and any stop locations.
Finish and measure the panel under the defined procedure.
Repeat the accepted setup to check whether the result holds.
The first good panel is evidence of possibility. Repeat panels provide evidence of consistency. Keep the best sample and the rejected samples. The rejects often show where the process stops working well.
Change one cause at a time
Suppose a shoulder transfer develops holes. Start by finding whether the holes repeat at the same row and needle group. Check the programme revision and the relevant hardware condition. Then test one permitted change.
Avoid changing yarn tension, transfer speed, take-down, and loop length all at once. Even a good result then gives little guidance for the next order. A short change log makes the improvement reusable.
Trial item | Record before the change 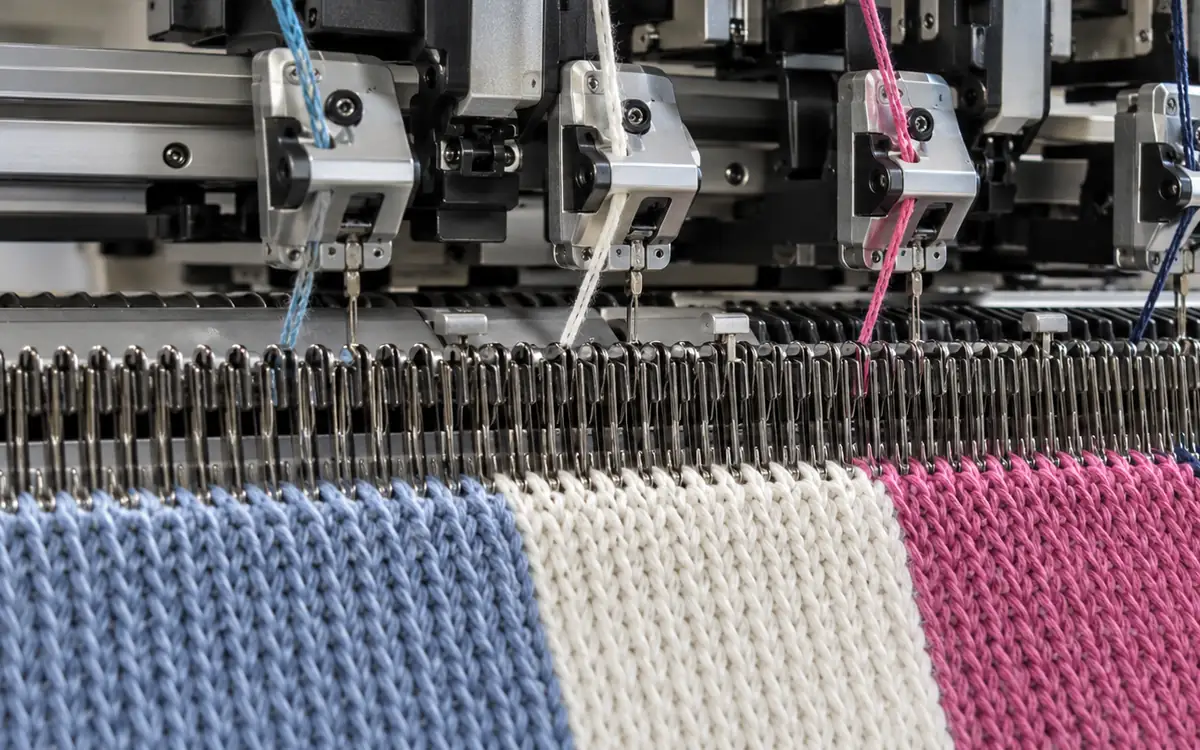 | Record after the change |
Shoulder transfer | Hole locations and programme row | Same locations checked on each repeat |
Carrier path | Carrier number and yarn routing | Exact route or setting changed |
Take-down | Values for the affected section | Revised section and measured effect |
Finished width | Measurement method and conditioning | Width after the same finishing route |
Machine stops | Cause and duration | Cause removed, unchanged, or newly introduced |
This table is a proposed trial record. It is not a standard test method.
Estimate output from the actual knitting sequence
Maximum carriage speed is a poor stand-alone basis for capacity. The carriage must reverse, and the pattern may need transfers or positioning moves. Shima Seiki explains the carriage turns at each end. Their space and time affect useful motion. Its R2 carriage explanation supports measuring the complete cycle.
Consider a hypothetical panel with 600 knitted courses. Assume two systems each form one course on every knitting traverse in that section. No extra course is counted during the separate transfer operations.
Knitting traverses = 600 courses / 2 courses per traverse = 300 traverses
Suppose a knitting traverse takes 2.4 seconds. This observed time includes the relevant return allowance.
Knitting time = 300 × 2.4 s = 720 s
Measured transfer and positioning work adds 90 seconds. Starting and releasing the panel adds 60 seconds.
Complete panel time = 720 + 90 + 60 = 870 s = 14.5 min
With 435 minutes available for this repeat cycle:
Gross panels = 435 min / 14.5 min per panel = 30 panels
If 27 of those 30 panels pass the stated acceptance checks:
First-pass yield = 27 / 30 × 100 = 90%
Accepted panels = 30 × 0.90 = 27 panels
Check which losses the measured time and available minutes already include. Do not apply another efficiency factor for those same losses. That would count the same loss twice.
Also keep “panel” separate from “garment.” A sweater may need several panels plus linking and finishing. A machine output of 27 accepted fronts is not 27 finished sweaters.
Compare improvements on accepted output
Imagine a faster setup reduces cycle time to 13.8 minutes but produces more repair work. The time saving alone is not enough to approve it.
Use an equal observation window. Record completed pieces, accepted pieces, repair minutes, and yarn waste. Compare the result after the same finishing route. A faster machine setting that shifts work to linking or inspection may increase total cost.
For short orders, include changeover and sample approval time in the planning window. For a long repeat order, report those times separately. The planner can then see which portion changes with order size.
Diagnose faults by where and when they occur
A fault location is a clue, not a verdict. Use the following checks to narrow the next action.
Observed pattern | Useful first question | Controlled check |
Mark repeats in one wale | Does it stay at the same needle position? | Inspect that position and its approved parts |
Fault starts at a colour change | Does it follow one carrier or yarn path? | Compare routing and carrier assignment |
Hole follows a transfer row | Does the programme reproduce it? | Review that transfer and its clearances |
Size shifts between panels | Did yarn lot or finishing change? | Compare matched samples and records |
Distortion begins after narrowing | Does take-down change at that point? | Review the width transition sequence |
Stops cluster near one bed end | Is the same movement involved? | Record the event before altering speed |
These are investigation prompts. They do not justify reaching into a moving machine or overriding a guard.
Separate machine faults from downstream changes. If the raw panels match but the finished panels differ, investigate finishing before rewriting the knitting file. If both raw and finished panels drift, widen the check. Include yarn feed, yarn lot, and machine condition.
Photograph the sample with its identity and a scale. Mark the affected row on a copy of the programme record. Preserve the original settings before making a revision. This makes a later rollback possible.
Match the machine to the product family
A flat knitting machine should be assessed against a basket of real products. Include a simple repeat, a demanding shaped item, and a material that is difficult to feed. Weight the basket according to the intended business.
Compare the following points:
Usable bed width and gauge options.
Knitting and transfer capabilities for the target shapes.
Carrier motion and usable carrier count.
Take-down behaviour across changing widths.
Yarn-feed options for the intended materials.
Sample approval time, operator access, and local service.
Accepted output after finishing.
Special hardware may serve a real need. Shima Seiki lists a motorized unwinding option for metallic and monofilament yarns. These materials can be hard to feed smoothly. Its industrial range also includes four-bed machines. The industrial machine overview shows why the yarn and product should lead the specification.
Research equipment can illustrate wider uses without becoming a buying benchmark. TU Dresden lists flat knitting systems for technical structures. Some have inlay features or special take-down arrangements. The page describes equipment installed at the institute. A production-line purchase needs a current quotation. See the institute's flat-knitting facilities.
Maintenance and safe intervention
Plan maintenance around the installed machine's instructions and actual running conditions. Name the part, task, and approved material in the schedule. Assign a person and record completion. “Clean machine” is too vague.
Give extra attention to repeated defects and recurring alarms. A needle replaced every day at the same position may point to another cause. Record the location and examine the related parts. Replacing the needle may not solve the cause.
Use the maker's safe mode to observe the machine. Follow the required isolation procedure before an intervention. Do not defeat interlocks to watch a transfer. Check that training covers carrier motion as well as carriage motion.
ISO 11111-6:2005 covers fabric-manufacturing machinery, including knitting, together with Part 1. The published edition has amendments from 2009 and 2016. ISO lists a revision in development. A draft does not replace the published documents. The official scope and status page identifies the relevant family. Detailed conformity work requires the applicable full documents and a machine-specific assessment.
Common questions
Does more knitting width always mean more output?
No. Wider capacity helps only when the programme, carrier arrangement, and product layout can use it. Compare accepted pieces per complete cycle and include the time needed to change styles.
Can one gauge knit every yarn count?
No single simple count rule establishes suitability. Yarn construction, the number of ends, hook space, structure, and the intended loop length all matter. Prove the intended yarn on the installed configuration.
Does shaped knitting remove all later work?
It can reduce cutting for the shaped component. The actual route may still include joining, trimming, washing, finishing, and inspection. Define the production boundary before claiming a time or material saving.
What should be saved after a successful trial?
Save the approved programme and machine configuration. Add yarn identity, settings, the finished sample, measurements, and the observed cycle record. Include the conditions under which the result was accepted.
Make the approved sample reproducible
A good flat-knitting process joins three records: the machine setup, the knitting sequence, and the finished product result. None can stand in for the others.
Start with a clear yarn path and sound knitting elements. Use measured trial density for product dimensions. Measure the complete cycle for capacity. Then keep the approved settings tied to a repeatable finished sample. The next operator then has a process to reproduce. The planner has an output figure with a clear meaning.
Flat knitting links yarn choice to garment shaping, so see selecting yarn for knitting, sweater garment assembly, yarn package winding and yarn twist.
Discussion0
Loading the discussion…