
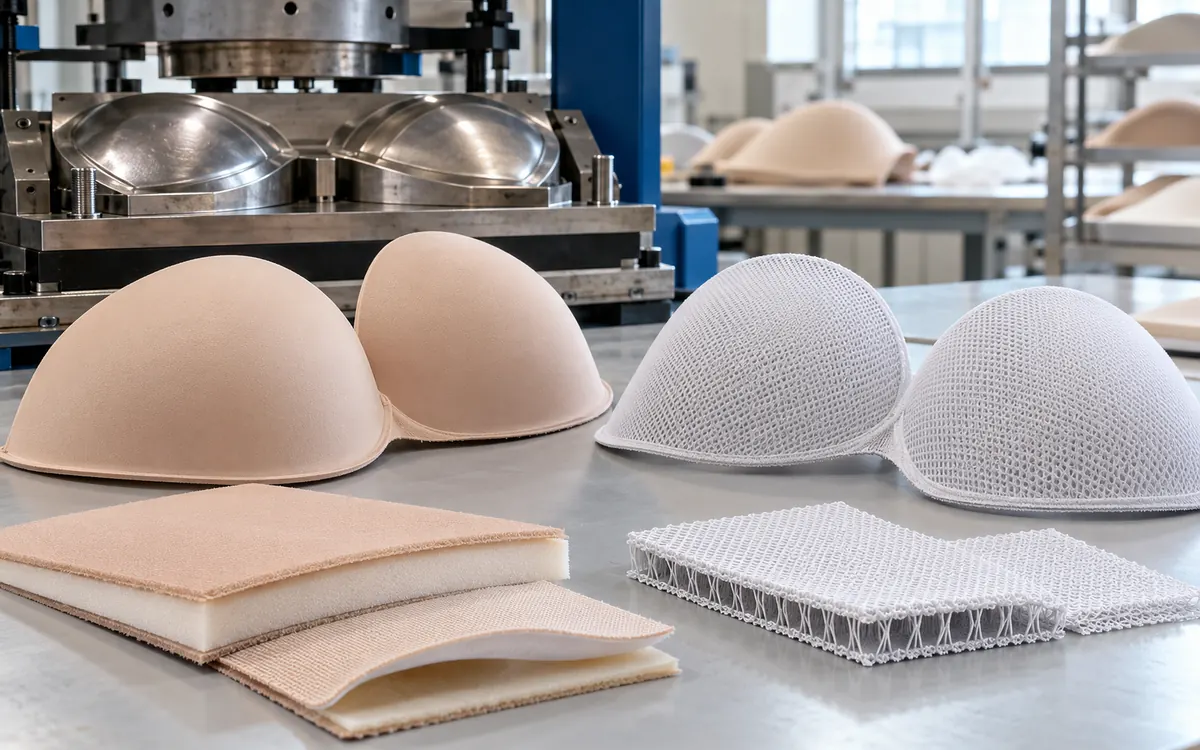
A smooth cup tells you little about what sits beneath its surface. It may contain a foam layer, a knitted spacer structure or a blend of materials. Those choices affect how the cup forms, how it feels and how the factory controls it.
The useful question is not simply which material is better. It is which cup system meets the intended shape, fit, care and cost brief.
This guide compares moulded foam and spacer bra cups from a product developer's point of view. Research findings are identified as such. The trial plans and numerical examples are original, hypothetical cases, not factory benchmarks.
Separate the material from the shaping process
“Moulded” describes a way of forming a shape. It does not identify the material.
A foam cup may start as a polyurethane sheet or a sheet already joined to fabric. Heat and a shaped tool help form the cup. A spacer cup may also be moulded from a flat textile. Other spacer cups can gain their shape during knitting.
Research on fabric-foam cup moulding describes both bare foam and laminated sheets. The chosen material affects the resulting height and shape. It is therefore misleading to treat every moulded cup as the same construction. Source: Yick and colleagues, 2010.
Ask for a cross-section or a clear list of layers. Record the fibre or polymer, thickness, face fabric and joining method. A sales name alone cannot replace that information.
Also ask whether the quoted item is a finished cup, a cup blank or sheet material. A low sheet price and a high finished-cup price cover different stages of work.
What gives a spacer fabric its depth?
Spacer fabric has two textile faces with connecting yarns between them. Those yarns hold the faces apart and give the material depth.
Muehlmeier describes this structure in its own spacer cup range. Its description identifies outer textile surfaces and a connecting layer of monofilament yarns. Treat the page as a manufacturer's description of its product family. Its comfort claims still need to match the cup selected for your bra. Source: Muehlmeier product categories.
The visible faces are only part of the specification. Ask about the connecting yarns and the knit structure as well.
“Spacer foam” is sometimes used as a trade description. Clarify whether the supplier means a knitted spacer fabric, a foam with open cells or a mixed product. The words should not leave the buying team unsure about the actual structure.
A sample may feel light when squeezed by hand. That is a useful first impression, but it does not measure recovery, airflow or support in a finished bra.
Compare systems against a defined brief
Build the comparison around the intended product. An everyday smooth cup, a lightly padded bralette and a sports bra may need different balances.
Decision | Foam-based cup | Spacer-based cup | What to verify |
Material identity | Foam grade and any fabric layers | Faces, connecting yarns and knit structure | Full construction record |
Shape route | Often formed from a sheet | Moulded sheet or a shaped knit route | Actual supplier process |
Thickness | May vary across the cup | Depends on structure and forming | Map at agreed points |
Surface | Face fabric, foam or added cover | Knitted face or added cover | Final assembled appearance |
Feel | Depends on foam and layers | Depends on yarns and structure | Compression and wearer response |
Shape stability | Material and forming history matter | Material and forming history matter | Controlled checks after rest and care |
Cost | Includes material, forming and rejects | Includes material, forming and rejects | Cost per usable matched pair |
The table is a planning tool, not a ranking. Do not fill its cells with assumed claims such as “all foam is hot” or “all spacer is soft.”
Set the main requirements before looking at samples. Otherwise, the most appealing hand feel can take over a decision that also depends on shape and fit.
Foam grade matters more than the word foam
Two foam sheets with the same nominal thickness may form in different ways. A study of five polyurethane foams linked suitable temperature and dwell time to the materials' thermal and mechanical properties. It used thermal analysis and three-dimensional shape measurement to examine that relationship. Source: Yick and colleagues, 2010 foam study.
The practical lesson is to qualify the actual grade. A recipe approved for one foam should not pass to a replacement solely because the colour and thickness look similar.
Record the supplier's grade, lot and stated properties. Keep a retained sample from the approved trial. If the supplier changes the foam, compare the new material with that record.
Separate density, hardness and thickness in the discussion. They describe different properties. A thicker sheet is not automatically a denser sheet.
The same care applies to “soft” and “firm.” Agree on how the team will assess each term. A hand-feel sample can help explain the desired result, while a defined test makes later comparisons more consistent.
A spacer sheet is not automatically mouldable
A spacer textile has to accept the required shape and retain useful properties after forming.
Yip and Ng studied five spacer fabrics for a defined cup shape. Not every fabric could be moulded to the intended form. Their findings linked the result to factors such as the connecting yarn material, yarn density and stretch recovery. Source: Yip and Ng, 2009.
That finding does not supply one setting for every modern spacer cup. It does explain why a developer should test a proposed sheet before approving it for a deep contour.
Start with a sample that has the correct face, thickness and connecting structure. A nearby grade may not behave the same way.
Inspect the formed area and the edge. A cup can reach the desired depth while gaining an unwanted surface change or losing the feel that led to its selection.
Keep an unformed control from the same lot. It helps the team separate incoming material features from changes caused during forming.
Lamination changes the material system
When fabric is joined to foam, the factory is no longer forming only the foam. The whole assembly must take the shape.
The 2010 fabric-foam study found that laminate choice affected cup height. It also warned that height alone was not enough to judge a forming condition. Tool design and the final geometry mattered. Source: fabric-foam moulding study.
Record the face fabric, its direction and the bond route. Keep those details fixed during a comparison unless one is the factor being tested.
A smooth cup before assembly may wrinkle after a cover is added. Examine the fit between the cover and cup rather than assuming the core material is defective.
Likewise, a separating layer needs a bond investigation. Cup depth alone cannot diagnose it.
For the approved sample, keep a layer diagram and material codes in the garment specification sheet. Include the approved revisions for both the cup and any added cover.
Treat heat, time and tool gap as linked choices
Foam moulding uses heat and mechanical constraint. The material's response depends on more than the timer setting.
Wu and colleagues examined heat transfer and thickness change in two flexible polyurethane foams. Their work linked the outcome to material properties, temperature, dwell time and the gap between heated surfaces. The experiment used flat slabs to study thickness behaviour. Source: Wu and colleagues, 2018.
A flat-slab study helps explain the process. It is not a universal production recipe for every curved cup, laminate or machine.
The paper also shows why tool gap and finished thickness should not be treated as the same value. The formed material can change during the process and cooling.
Use the supplier's validated operating limits and the machine maker's procedures. Product teams should not copy a temperature from a paper and send it straight to production.
A useful trial records the settings and the measured result. A recipe without a result map is hard to compare when the material changes.
Run a controlled forming trial
Start by naming the failure or improvement the trial should address. Examples include shallow depth, local thinning or a poor surface at the neckline.
Select factors that the trained process team can vary within approved limits. Hold other factors steady. Record the actual material lot, tool identity, machine and operator.
Choose enough repeats to see whether a result is consistent. One attractive cup is a sample, not evidence that the process is stable.
An original trial record might include:
Material and layer codes, lot numbers and orientation.
Tool number, size and left or right side.
Set and checked process conditions.
Time between forming and inspection.
Shape and thickness measurements.
Surface defects and tactile observations.
Later care or recovery results.
Do not hide a setting change inside a note such as “adjusted as needed.” Record what changed and which cups were made before and after it.
Keep samples from unsuccessful trials as well as the selected one. A labelled sequence can explain why the team rejected a tempting shortcut.
Measure shape without forcing the cup to fit
Agree on the support fixture and how the cup rests on it. If an inspector pushes the cup hard against a form, the test may hide a shape mismatch.
Define the base reference, cup depth and any width or contour points. Draw the locations on the inspection sheet.
Do not assume that two cups with the same peak depth have the same shape. They may differ near the wire line, neckline or side.
For a symmetrical design, compare matched left and right cups under the same setup. For an intentionally asymmetric design, compare each side with its own approved target.
A three-dimensional scan can provide more detail, but it still needs a clear alignment method. A colourful difference map is not useful if samples were aligned in different ways.
For a simple fixture check, record how the cup sits, where gaps appear and whether it rocks. Keep the method repeatable enough that another trained inspector can obtain a comparable result.
Use a thickness map, not one convenient reading
A cup may have different thicknesses at its peak and edge. That can be deliberate or a process concern.
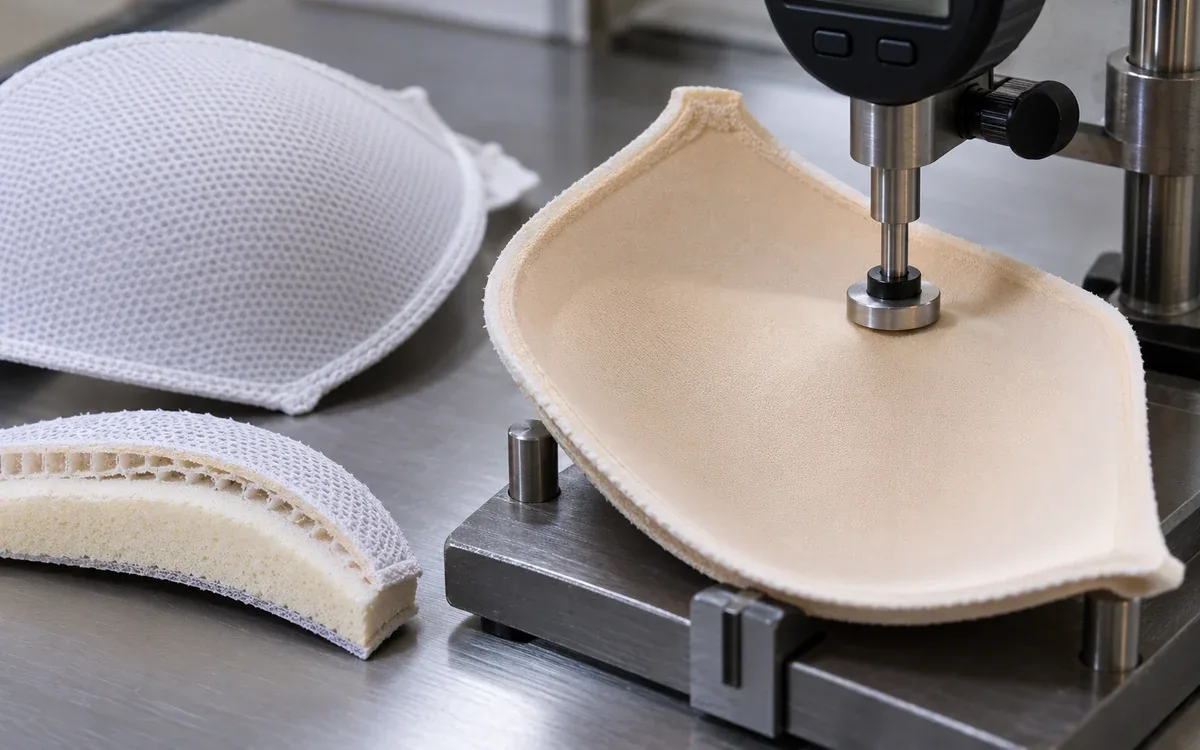
Mark several relevant locations. Use a method suited to the material and curved shape. State the contact force or pressure where the instrument applies one.
A soft material can compress under the measuring foot. If two inspectors use different methods, their numbers may describe the measuring setup as much as the cup.
The 2018 foam study used optical thickness checks and a defined cooling period. Its approach underlines the need to state how and when thickness was measured. Do not treat its laboratory setup as a ready-made acceptance test for every cup. Source: Wu and colleagues.
Keep thickness and shape records together. A cup that meets its outline may still have an unwanted thin region.
Avoid cutting all retained samples for a destructive check. Reserve intact samples for assembly and fit work.
Work through a thickness example
Suppose a hypothetical foam blank is 10.0 millimetres thick. After forming and the agreed rest period, one mapped point measures 3.8 millimetres.
The reduction from the starting thickness is:
Thickness reduction = ((10.0 - 3.8) / 10.0) × 100 = 62%
This is a reduction between two measured states. It does not isolate thermal shrinkage from mechanical forming. Do not call it a pure heat-shrinkage property of the foam.
Now suppose the local tool gap was 4.0 millimetres.
Difference below tool gap = ((4.0 - 3.8) / 4.0) × 100 = 5%
The two percentages answer different questions. One uses the original sheet as
its reference. The other uses the tool gap.
Neither percentage proves that the cup is acceptable. Compare the 3.8-millimetre result with the approved requirement at that point. Then check the remaining locations, shape and surface.
Do not multiply every tool dimension by one correction factor based on this single result. A curved cup can behave differently at different points.
Compare comfort properties with the same method
Air movement through a material, water-vapour transfer and a wearer's sense of warmth are related questions, but they are different outcomes.
Yu and colleagues developed five fully fashioned spacer cup designs in a 2022 study. The tested designs had lower air resistance than the foam reference. Their reported support and wearer responses also depended on the design. Source: Yu and colleagues, 2022.
That is evidence for the tested samples. It does not establish that every spacer cup will feel cooler than every foam cup.
Compare the full material stack that will be worn. An added cover or lining is part of the product. Do not test one bare core and compare it with another fully covered cup.
Ask the lab to name the method, specimen state and unit. ASTM's textile catalogue lists D737-18(2023) for air permeability. The method's name is not a universal comfort pass limit. Source: ASTM textile standards catalogue.
ApparelDiary's air-permeability testing guide explains the need for a defined test setup. For cup selection, add fit and wearer feedback to the material evidence.
Assess recovery and care on the actual cup
A single squeeze cannot show how a cup behaves after repeated compression or care.
Define the question first. Is the team concerned about packing marks, wear recovery, washing or drying? Those conditions should not be mixed into one vague “durability” test.
For a packing trial, record the load, duration, arrangement and recovery time. Then inspect shape and surface under the agreed method.
For a care trial, follow the intended care route and record the full cycle conditions. Check after the stated rest period, not at an arbitrary moment while one sample is still damp.
Compare new and conditioned cups at the same mapped points. Add the assembled bra when seams, binding or covers could affect the outcome.
Do not set a universal number of wash cycles simply because it appears in another product's report. Choose a justified plan for this product and claim.
Keep a control sample out of the trial. It helps the team judge whether a subtle change is real or a result of memory and lighting.
Count usable pairs, not just good individual cups
A bra normally needs a compatible left and right cup. High yield in one side cannot fully offset a shortage in the other.
Imagine a hypothetical run of 1,000 left cups and 1,000 right cups. Inspection accepts 940 left cups and 920 right cups. Assume every accepted cup within a side is interchangeable for this example.
Accepted cups = 940 + 920 = 1,860 cups
Individual-cup acceptance = 1,860 / 2,000 × 100 = 93%
The maximum usable pair count is the smaller side count:
Usable pairs = minimum of 940 and 920 = 920 pairs
Pair yield = 920 / 1,000 × 100 = 92%
Twenty accepted left cups remain unmatched. They may be useful later, but they do not complete this order's pairs.
Actual matching can be more restrictive. Shade, size, material lot or appearance rules may reduce the count further. State those rules before using a pair-yield figure.
This example shows why the buying unit matters. A quoted price per cup is not the same as cost per ready-to-use pair.
Compare cost after rejects and tooling
Now give the hypothetical run a total cost of 4,600 currency units. Assume this includes its material and conversion costs but excludes separately stated tooling and freight.
Cost per usable pair = 4,600 / 920 = 5.00 currency units
Dividing by the planned 1,000 pairs would give 4.60. That number hides the loss in this run.
Suppose another route costs 4,900 but produces 980 usable pairs.
Alternative cost per usable pair = 4,900 / 980 = 5.00 currency units
The two routes have the same cost per usable pair under these assumptions. The second still delivers more pairs and may have different lead-time or material risks.
If a dedicated tool costs 2,400 and the approved plan expects 6,000 usable pairs:
Planned tool allocation = 2,400 / 6,000 = 0.40 per pair
If only 3,000 usable pairs are made, that allocation becomes 0.80. Keep expected volume visible in the cost review.
These are decision examples, not market prices. Include the costs relevant to the actual quote and avoid counting a tool twice.
Troubleshoot before changing the material family
Observation | Checks that can narrow the cause |
Cup is shallower than the target | Material identity, tool, forming record and rest time |
Surface has wrinkles | Layer direction, cover compatibility and forming history |
Local thin spot | Thickness method, mapped location and local tool relationship |
Layers separate | Bond specification, material match and care history |
Left and right differ | Tool identities, lot records, inspection setup and side mix-ups |
Cup loses shape after packing | Packing load, duration, arrangement and recovery time |
Bra fits poorly despite acceptable cups | Assembly dimensions, cup placement, frame and wearer fit |
These are investigation paths, not confirmed diagnoses. Use the sample history to choose which check comes first.
Change one cause at a time when practical. If material, tool and cover all change together, a better result may be hard to explain or repeat.
A material switch can solve a problem, but it also creates a new qualification task. Keep the original failure evidence so the team can test whether the new system addresses it.
Consider shaped knitting without overstating its benefits
The 2022 fully fashioned spacer study showed a route from yarn to cup shape in one knitting process. The researchers assessed several designs and compared prototypes with a foam-cup bra. Source: fully fashioned cup study.
For development, this opens a different question from choosing a moulding temperature: can the knit design deliver the required shape and feel?
It does not remove the need for size development, assembly checks or fit trials. It also does not prove lower environmental impact for every commercial product.
If reduced waste is part of a proposal, define what is counted. Include rejected cups, start-up material and later assembly losses where relevant. Do not compare one route's trim waste with another route's total waste.
Ask for evidence that matches the proposed factory process and volume. A successful research prototype and a stable production order are different stages of development.
Resolve a mixed trial result
Consider two invented spacer prototypes that meet the agreed depth target. Sample A has the preferred feel. Sample B holds its neckline shape better after a packing trial.
The buyer favours A because its depth is correct. The developer places both cups on the agreed fixture and points to the edge gap. The depth reading describes the peak; it does not measure that gap. The inspection record needs both observations.
Before changing the cup, the team checks the packing log. Was A packed in the intended arrangement, under the agreed load and for the stated time? Was it allowed the same recovery period as B? If those conditions differ, the comparison is incomplete.
Suppose the records confirm a fair trial. The team keeps A's result even though its hand feel is attractive. It marks the edge location and retains an unpacked control. This gives the next trial a specific target.
The proposed revision changes the local structure around that edge. Its new code follows the cup into forming, inspection and assembly. The rest of the design stays fixed where possible. Without that control, a new cover fabric could hide or create the effect being investigated.
The repeat compares the edge, peak depth and feel under the same conditions. It also checks the assembled bra, since a cup that looks sound alone may behave differently once attached.
A successful revision would answer the edge problem while retaining the valued feel. If it does not, the buyer has a clear trade-off to review. The useful outcome is a documented product decision, not an average score that hides the weak region.
Common questions
Is spacer always thinner than foam?
No universal comparison follows from the material names. Check the actual cup thickness at defined points, using the same method.
Does a thicker cup give more support?
Thickness alone cannot answer that. The cup material, geometry, frame, fit and whole bra construction need to be considered together.
Can one mould serve every material?
Do not assume it can. Trial the proposed material and check the finished shape. A tool that works with one system may need review for another.
Should the softest hand-feel sample win?
Only if it also meets the other requirements. Shape stability, fitting, care and cost may change the decision.
Can a supplier certificate replace prototype testing?
It can support the material record within its stated scope. It does not automatically cover the new cup shape, added layers or complete bra.
Make the decision at cup and garment level
Choose the material system from evidence about the actual product. Confirm its structure, forming route and condition after rest. Map shape and thickness rather than relying on a single attractive sample.
Then assemble the bra and check fit, care and wearer response. Compare cost per usable matched pair. A well-chosen foam or spacer cup is one whose measured behaviour meets the brief and can be reproduced in production.
Cup materials relate to bonding and lining choices, so see choosing garment linings, fusing process validation and HF welding qualification.
References
Yick and colleagues, 2010: Seamless Bra Cup Moulding of Fabric-Foam Laminated Materials. Institutional abstract.
Muehlmeier: Spacer and Other Bra Cup Product Categories. Manufacturer's product description.
Yick and colleagues, 2010: Thermal-Mechanical Properties of Polyurethane Foam and Moulded Cup Shape. Institutional abstract.
Yip and Ng, 2009: Moulding Properties of Three-Dimensional Spacer Fabrics. Institutional abstract.
Yu and colleagues, 2022: Fully Fashioned Knitted Spacer Fabric Bra Cups. Institutional abstract.
ASTM International: Textile Standards Catalogue. Method title and edition information.


Discussion0
Loading the discussion…